Upgrading to 3.0 and above
The Helpshift v3.0 is a major update and has important UI/UX changes. If you have questions or feedback, please Contact Us
Upgrading from 3.x to 3.x+1
Skip 3.0 upgrade steps and navigate below to the new version heading.
What is new in 3.0?
- Optimized faster loading and syncing of messages.
- Better UI/UX resembling a Helpshift’s agent experience.
- Non-disruptive messages provide feedback on user actions.
- Fewer DMLs and SOQLs.
- Fewer API calls.
- Better logging to enable troubleshooting.
FAQs before the upgrade
- Will the upgrade affect our current flow? What if the new messenger doesn’t work? What if I find issues in the new admin panel/messenger?
- Your existing flows will not be impacted.
- There is no loss or change in data during the package upgrade.
- The old experience will be available too. If the new messenger or any admin functionality doesn’t work as per your expectations, or you do not like the new experience, you can switch back to the old experience. Please provide feedback to Helpshift Support on reasons to switch back.
- What are the recommended pre-upgrade steps?
- Sandbox testing - Install the 3.0 package on your sandbox.
- Test with your usual workflows and use cases before installing/upgrading on the production org.
- Ensure the sandbox is not linked to the Helpshift production domain. If that happens, the link with the Salesforce production environment will break and all the new cases will start flowing into the Salesforce sandbox.
- Get in touch with Helpshift Support to create a test domain for linking with the sandbox.
- Contact Helpshift Support to try the Beta version of an upcoming package on the sandbox.
- Do not directly install on production using the link even if it works fine on the sandbox.
- Use an incognito window to install using the link.
- Do not add both, the old and the new, messenger components on the same page in production.
- It will slow down the case record page on production.
- We recommend testing on the sandbox first with both messengers added. That will help you to 1. compare the newer experience with the old messenger. 2. get used to the new experience.
- Sandbox testing - Install the 3.0 package on your sandbox.
Upgrading the package
- Login to your Salesforce org which has the earlier package (eg. 2.19/2.11) installed.
- Open a new browser tab and paste the package URL. (Package URL would be available on app exchange post-release.)
- Once the page is loaded, a screen similar to the below would be seen
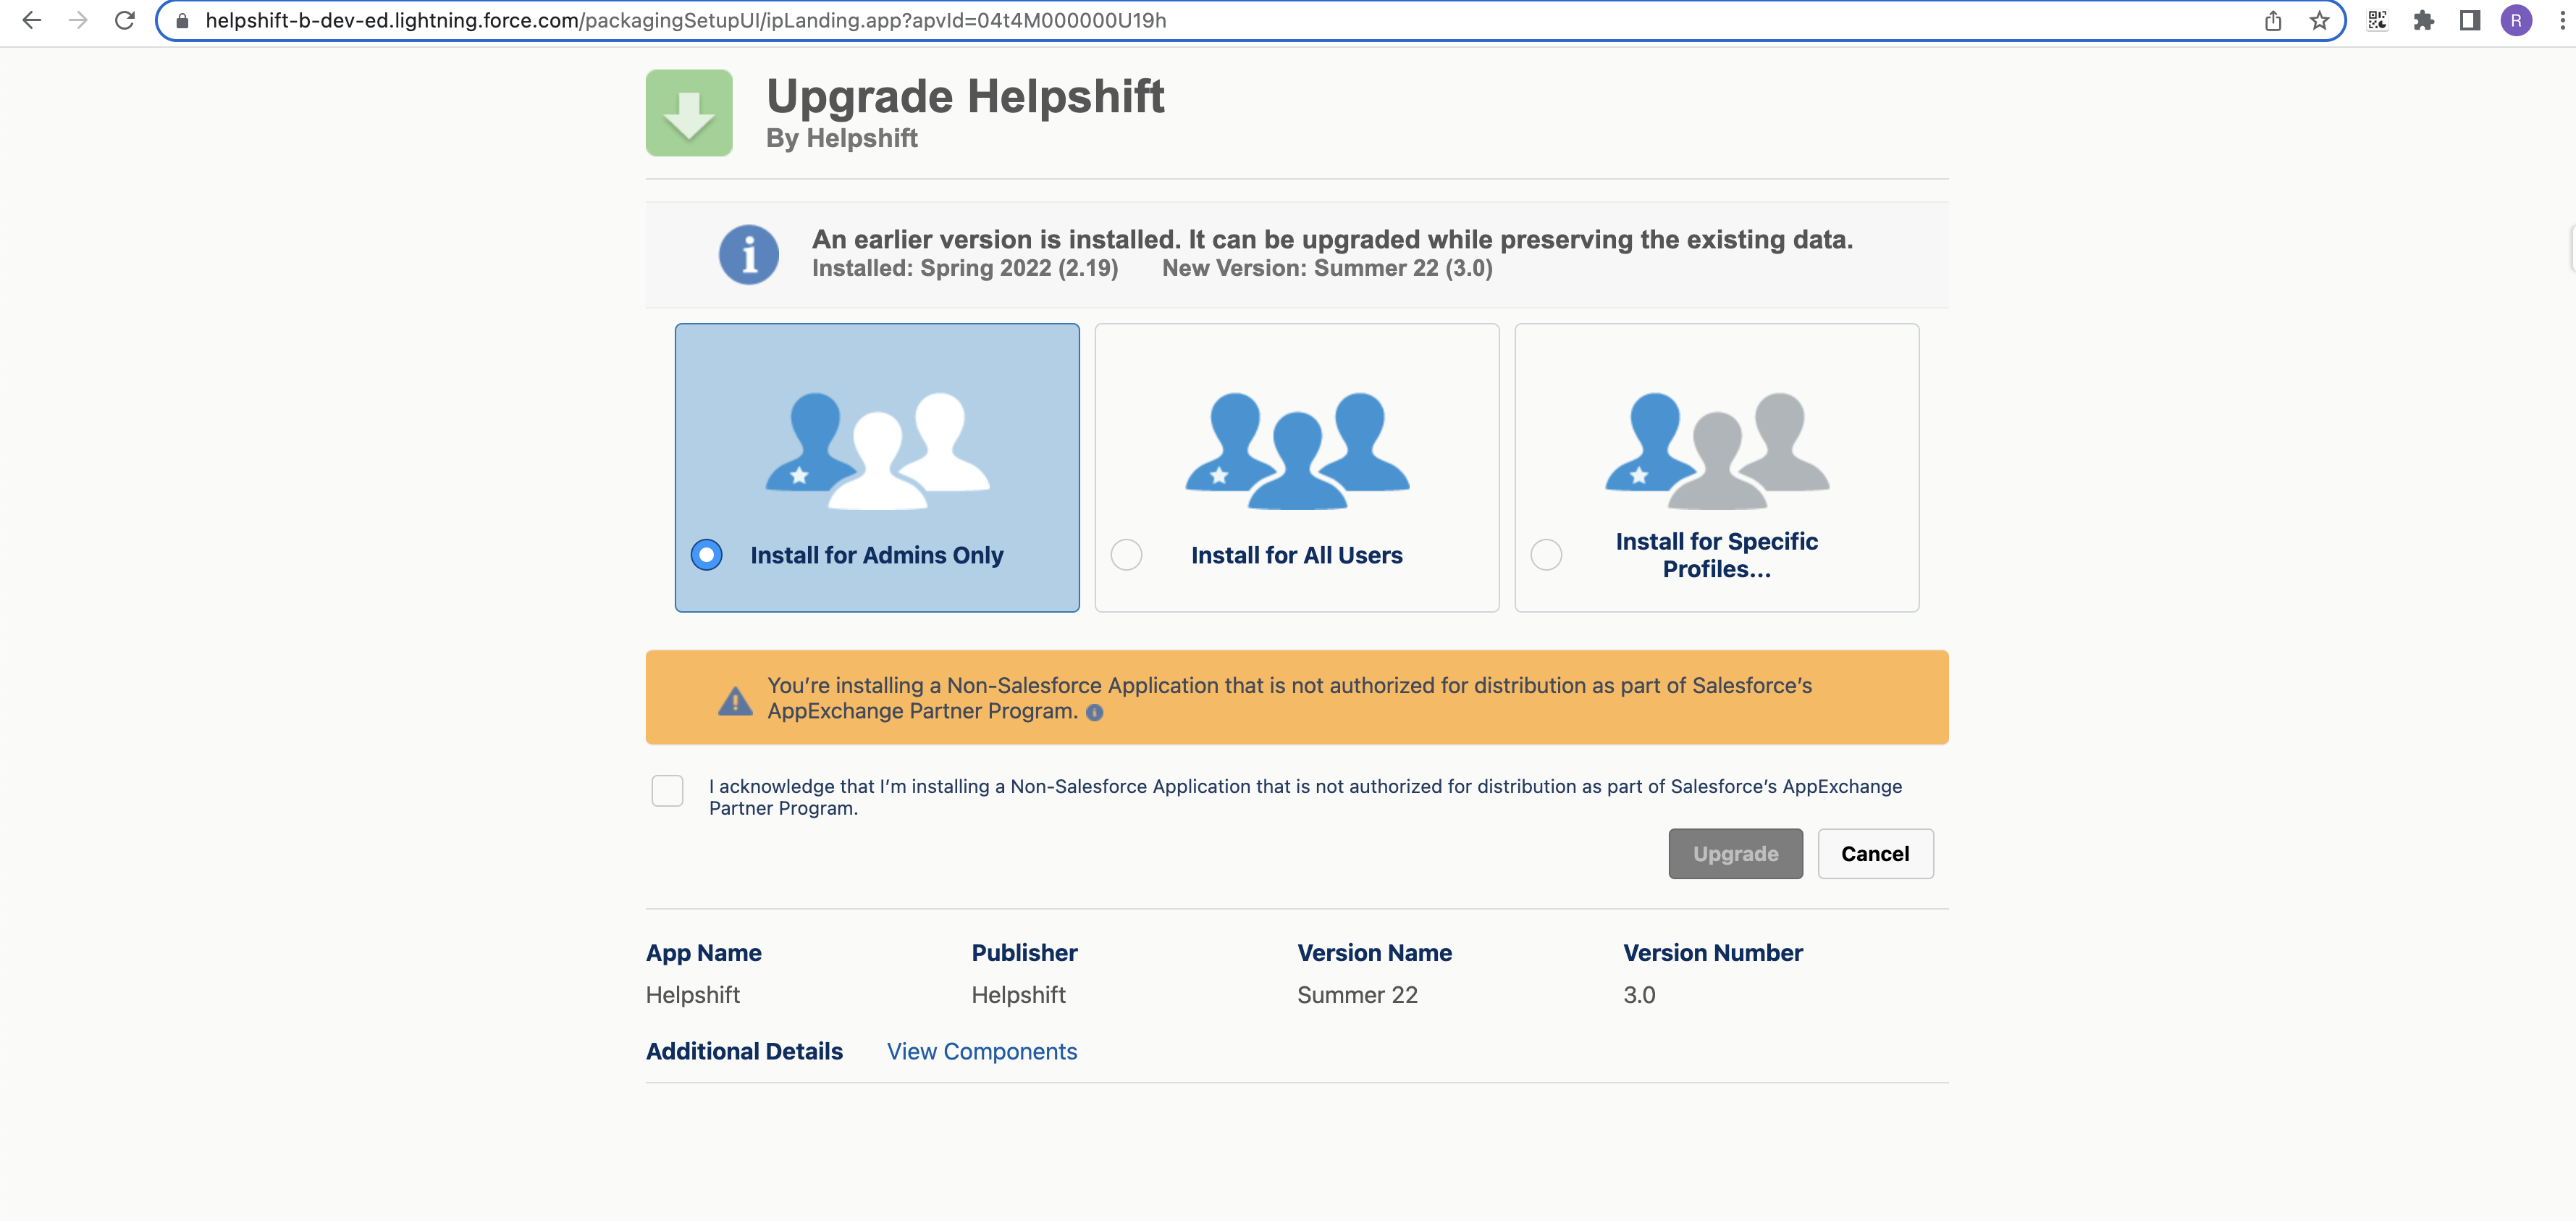
- The upgrade page would show the current version and the new version. In the above image, the current version is 2.19.
- Choose “Install for Admins only“ and the package will be installed in approximately 5-10 minutes.
After upgrading the package
- Things to check after upgrade *** IMP
- Verify whether the following picklist values are present in Helpshift_Message_Type__c field. This field can be found on the Helpshift Case Comment object from the object manager. [Add the new ones]
{" "}bot_control_message
text
faq
action_card
csat_rating
csat_comment
resolution_rsp
confirmation_rejected
confirmation_accepted
intents_with_option_input
empty_msg_with_intent_auto_assignment
rsp_intents_with_option_input
si_skip
empty_msg_with_intent_auto_assignment
si_intent
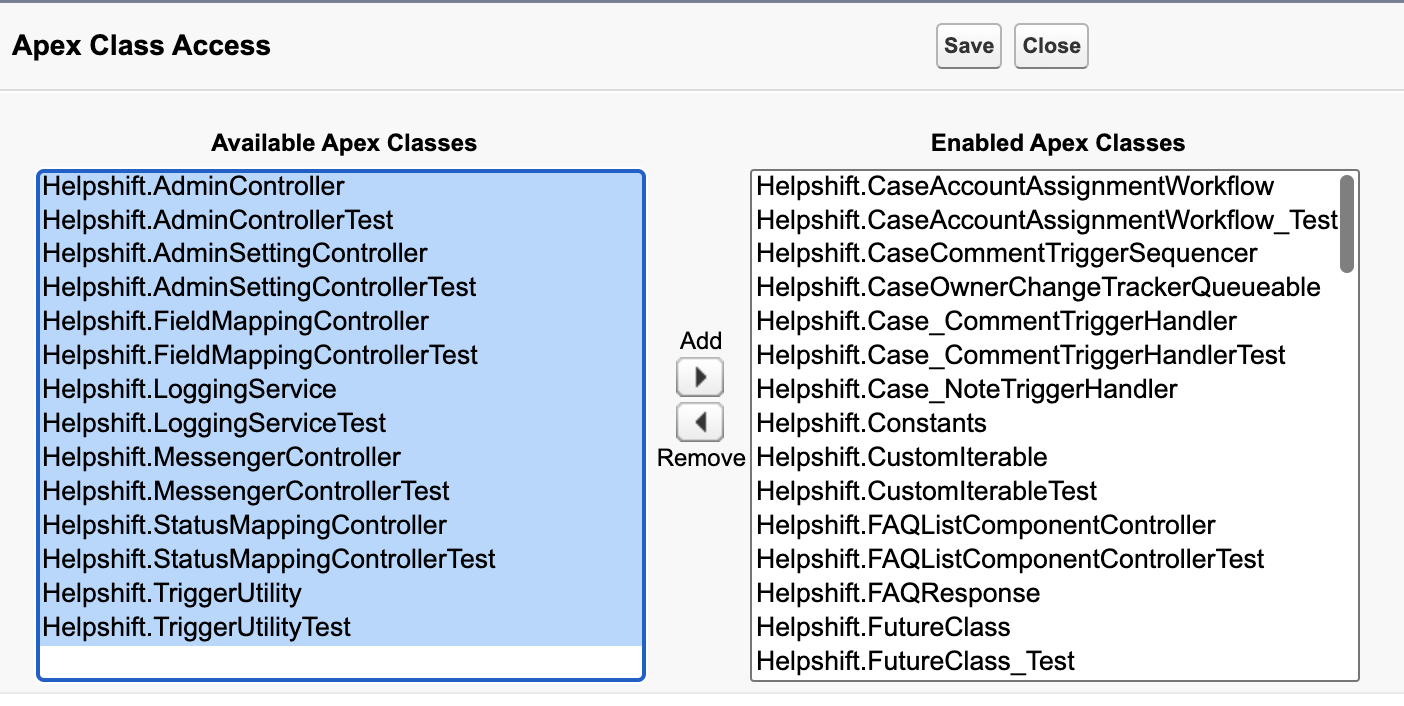
si_with_text 2. Check if Helpshift_Standard_Object permission set has the new Apex classes permissions. If not, add them directly as shown below.
- Helpshift Admin (LWC) tab is automatically included in the Helpshift app
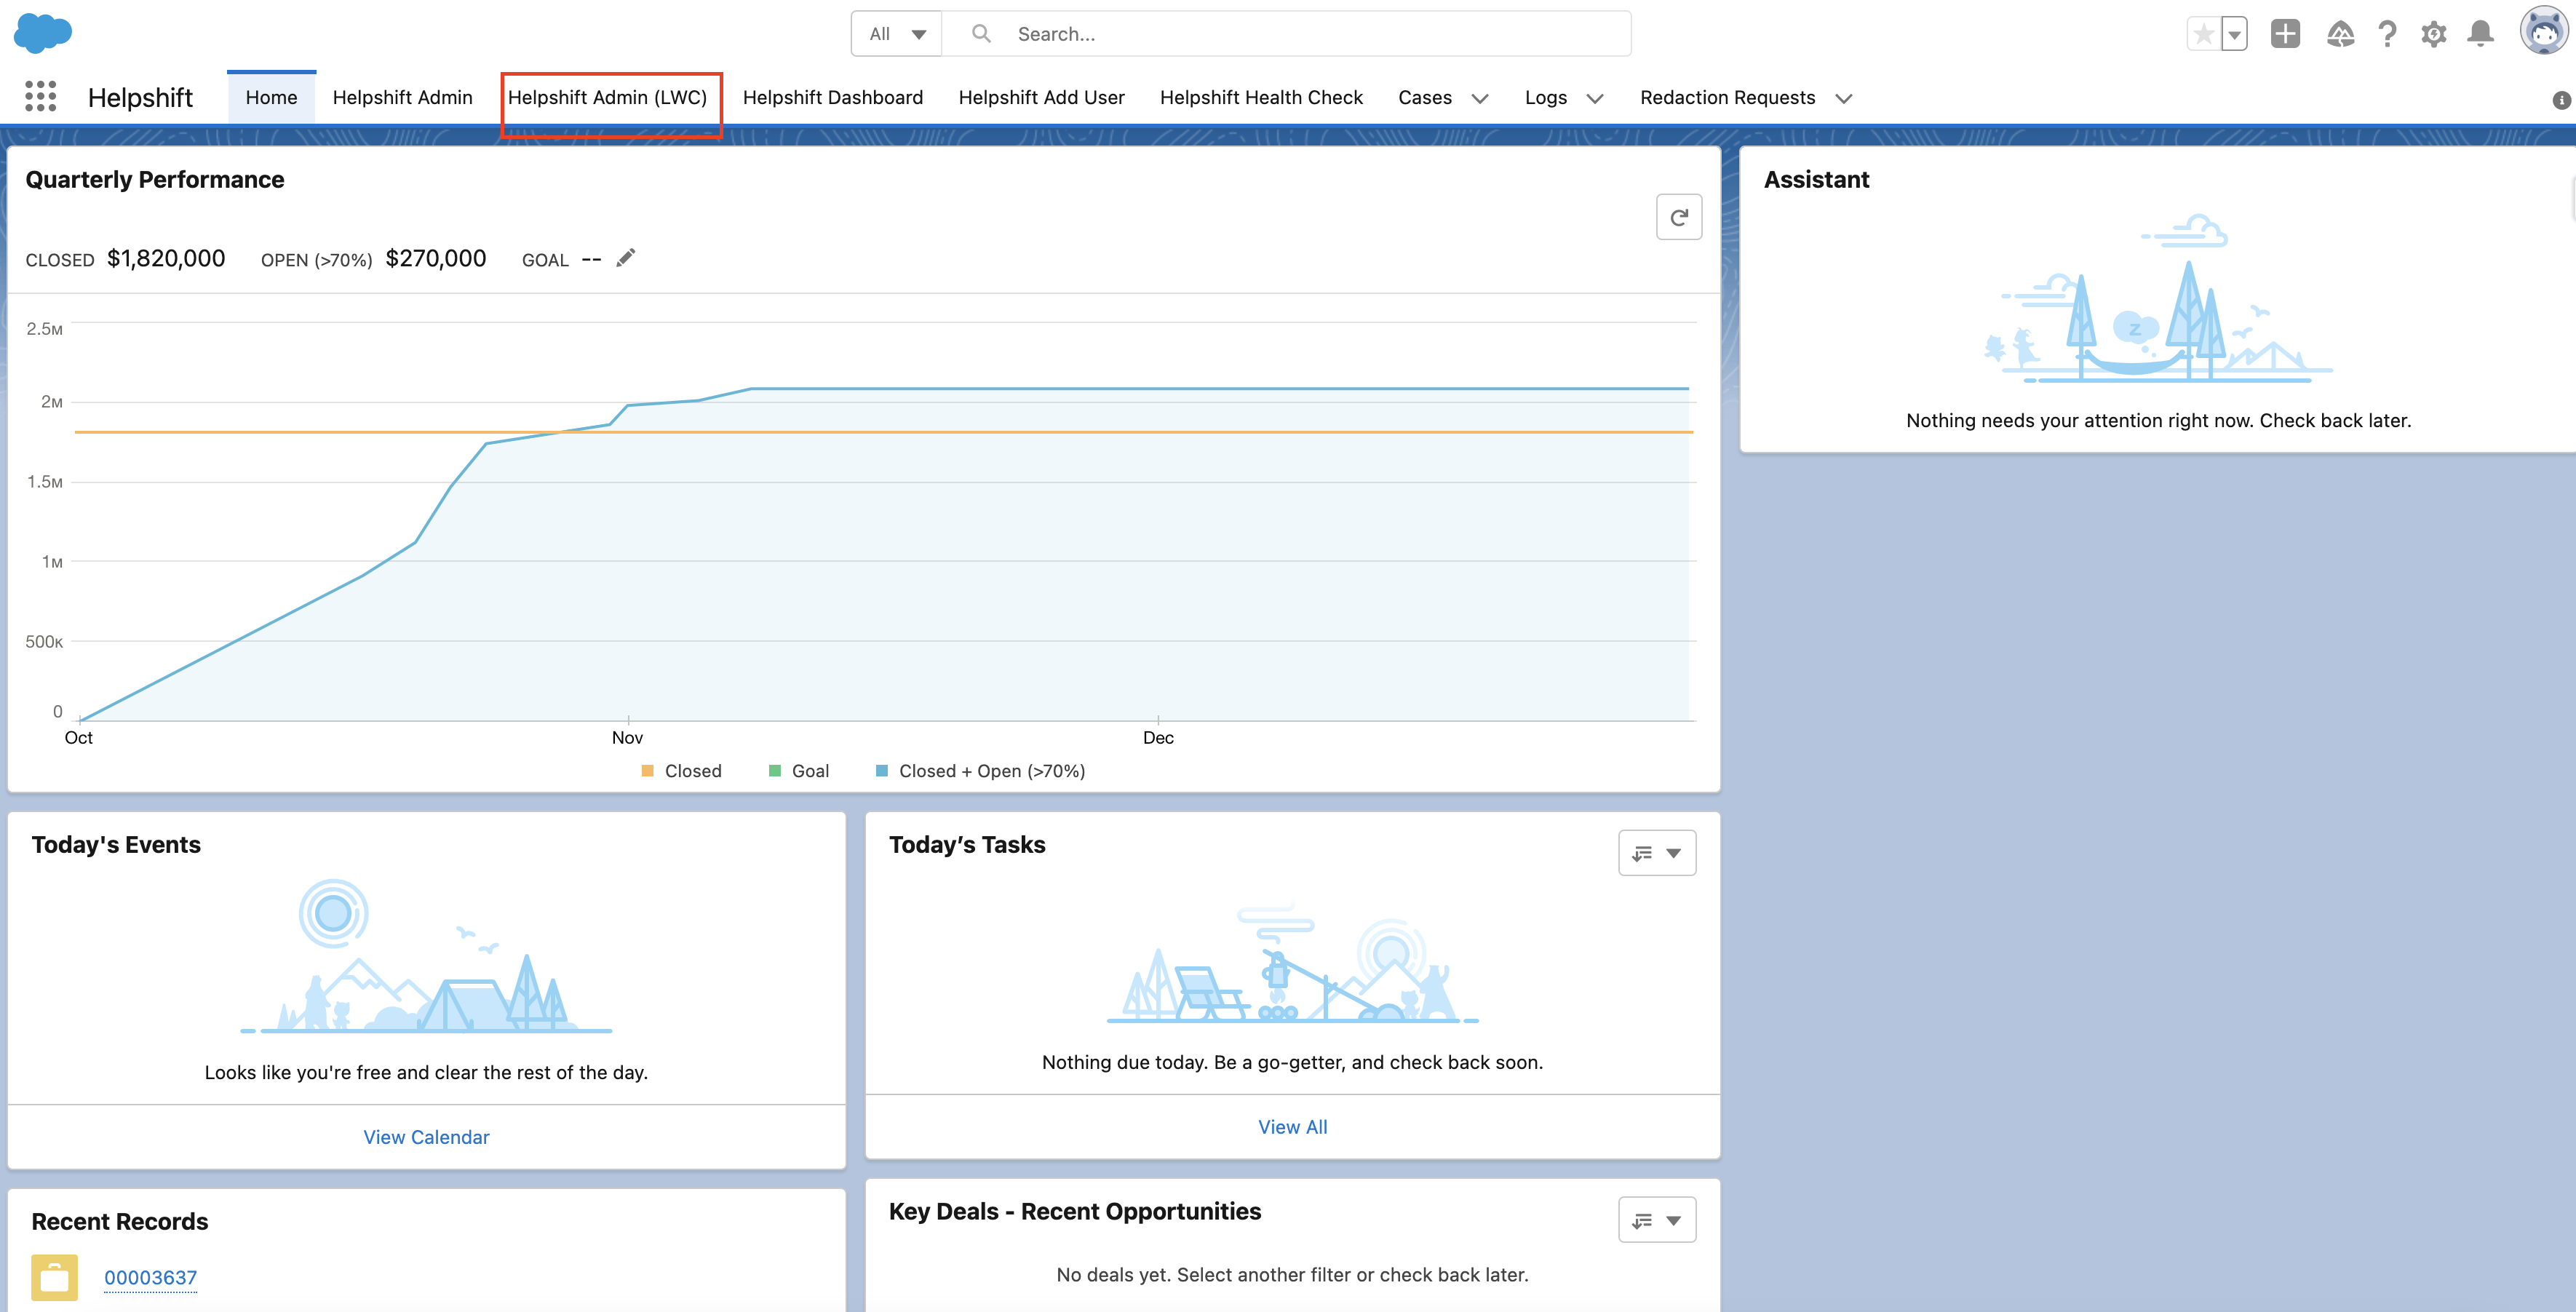
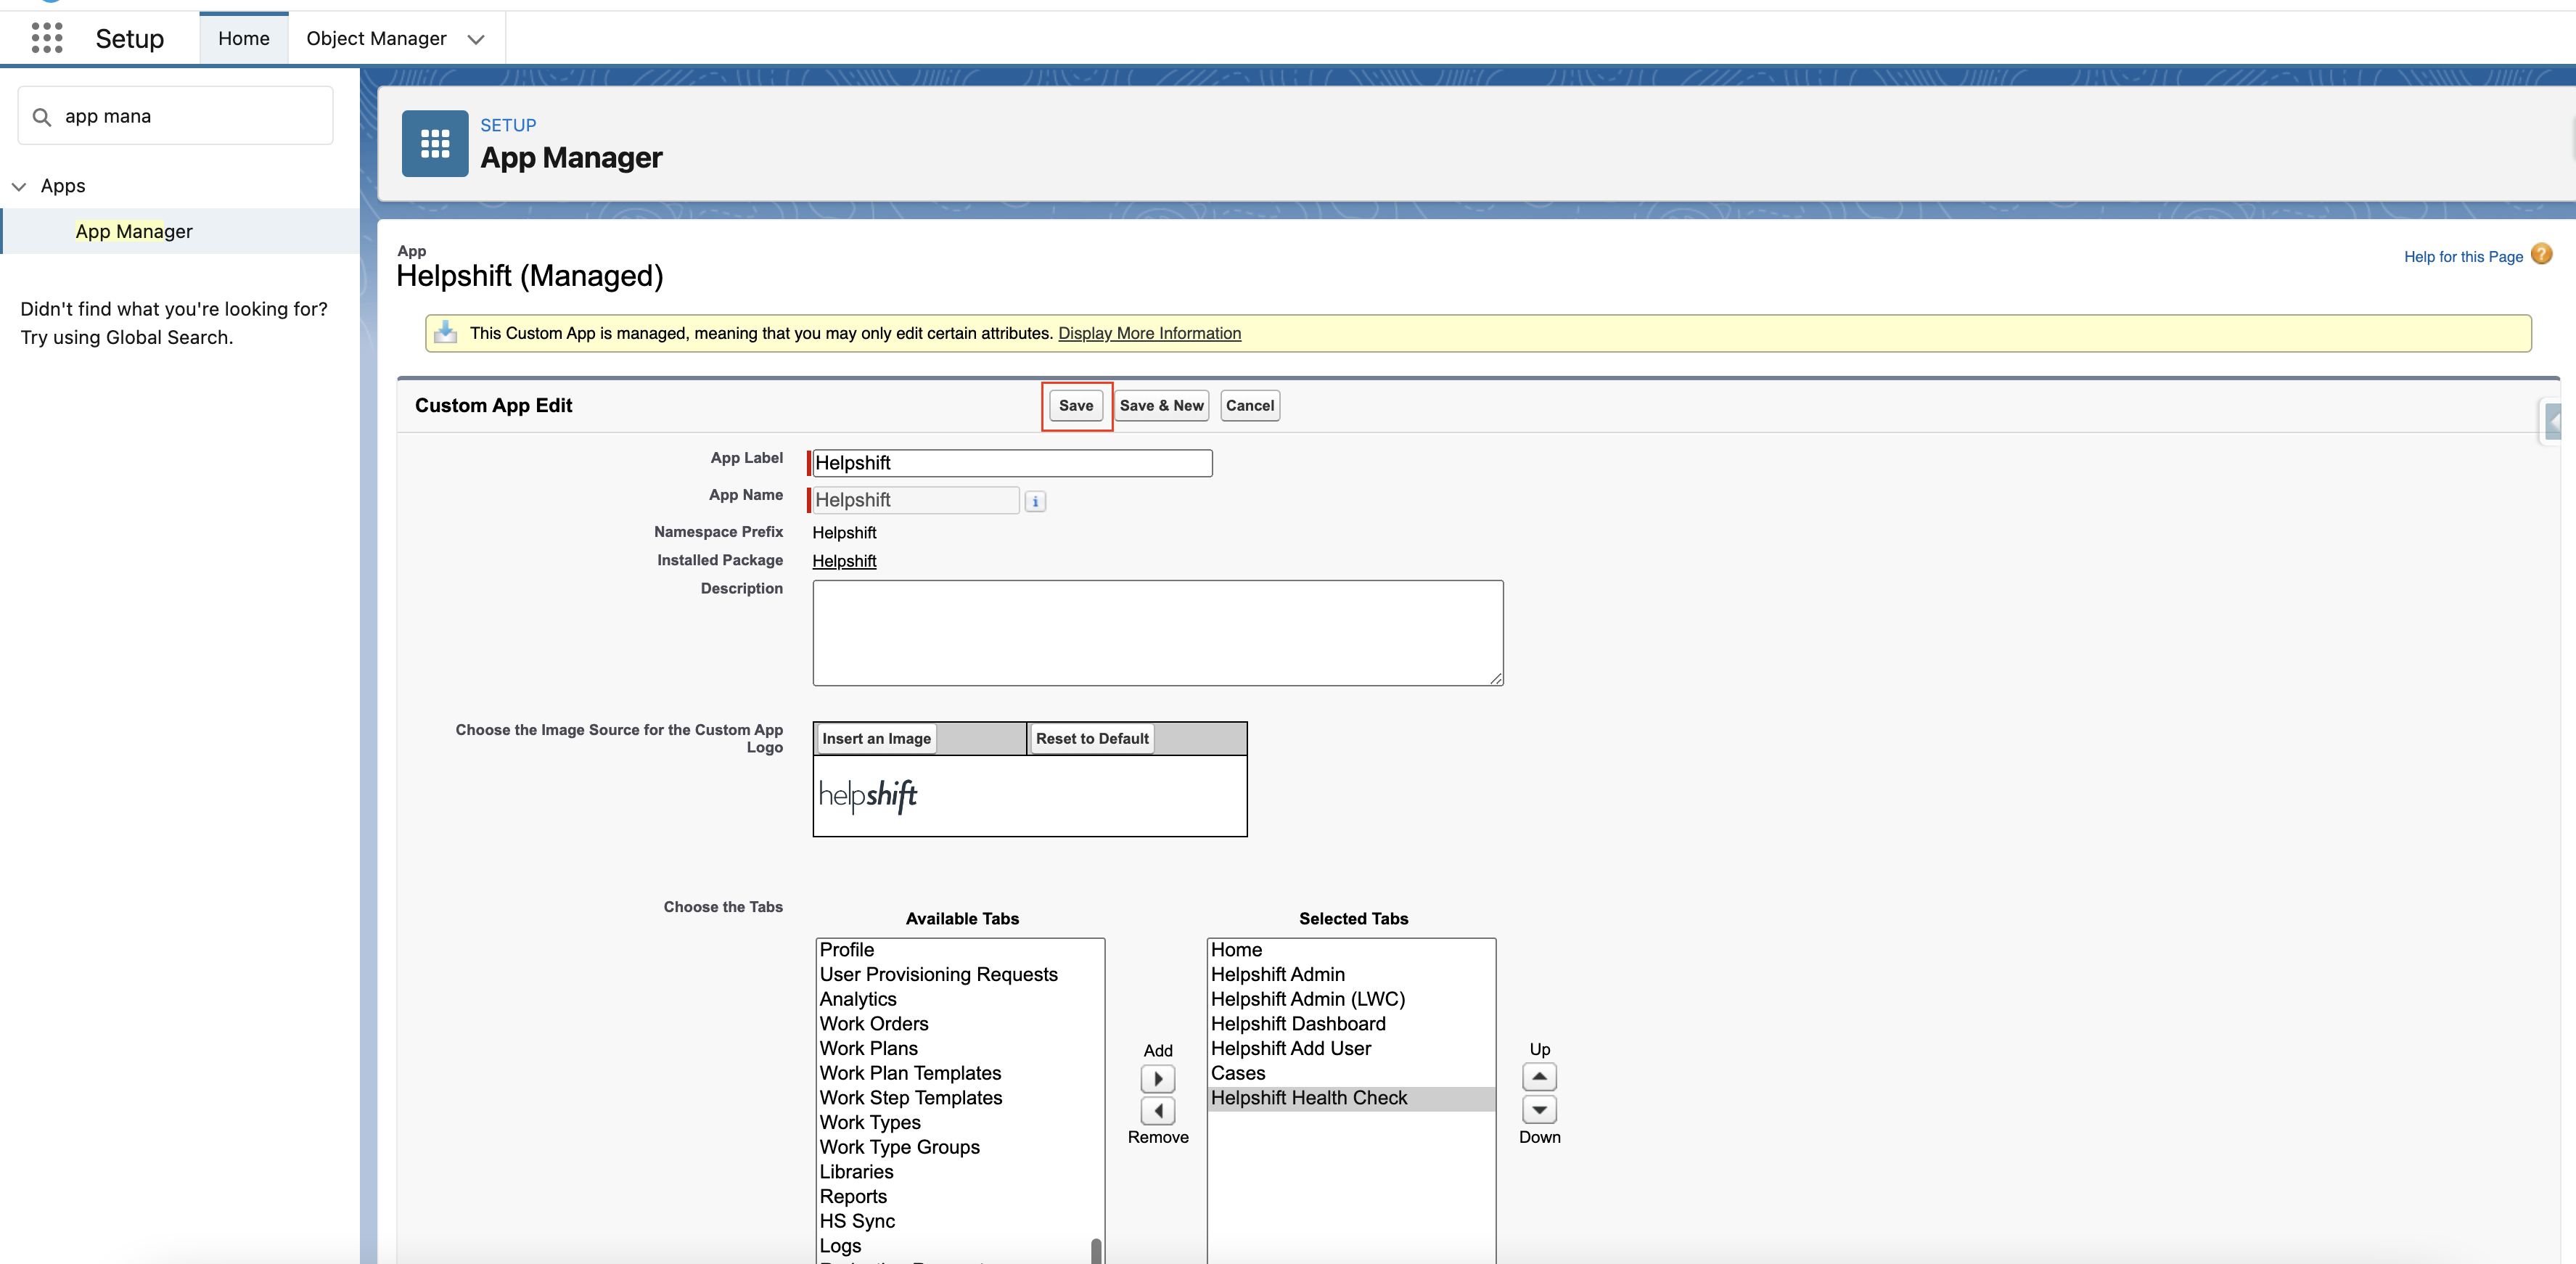
- If Helpshift Admin (LWC) tab is not visible , please follow below steps
- Click on Setup icon (⚙️)
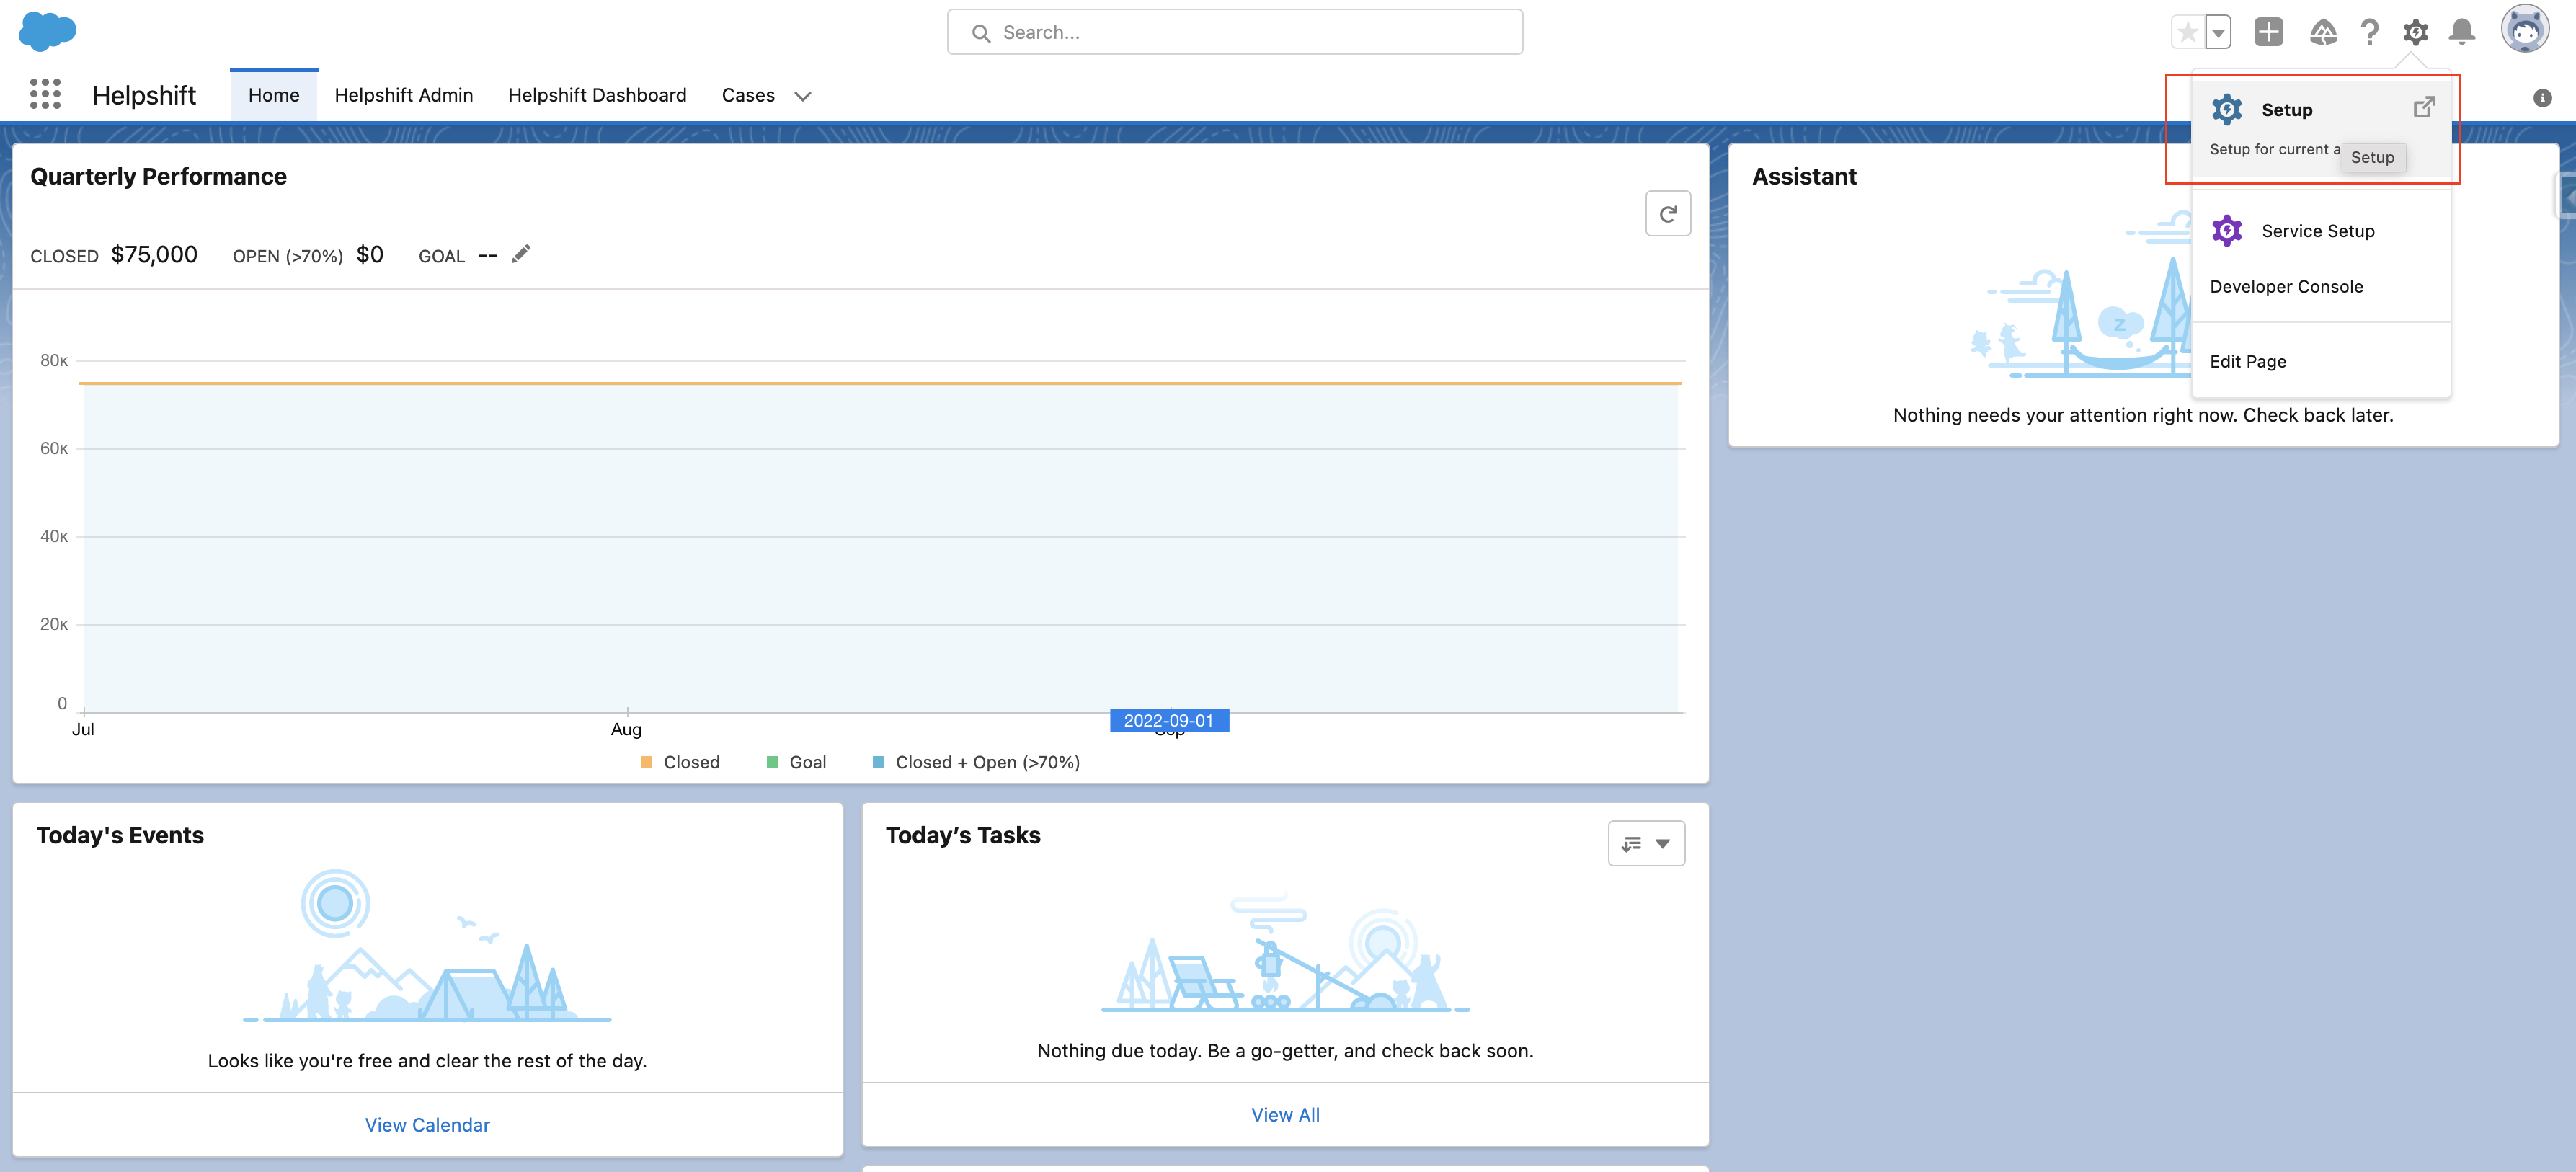
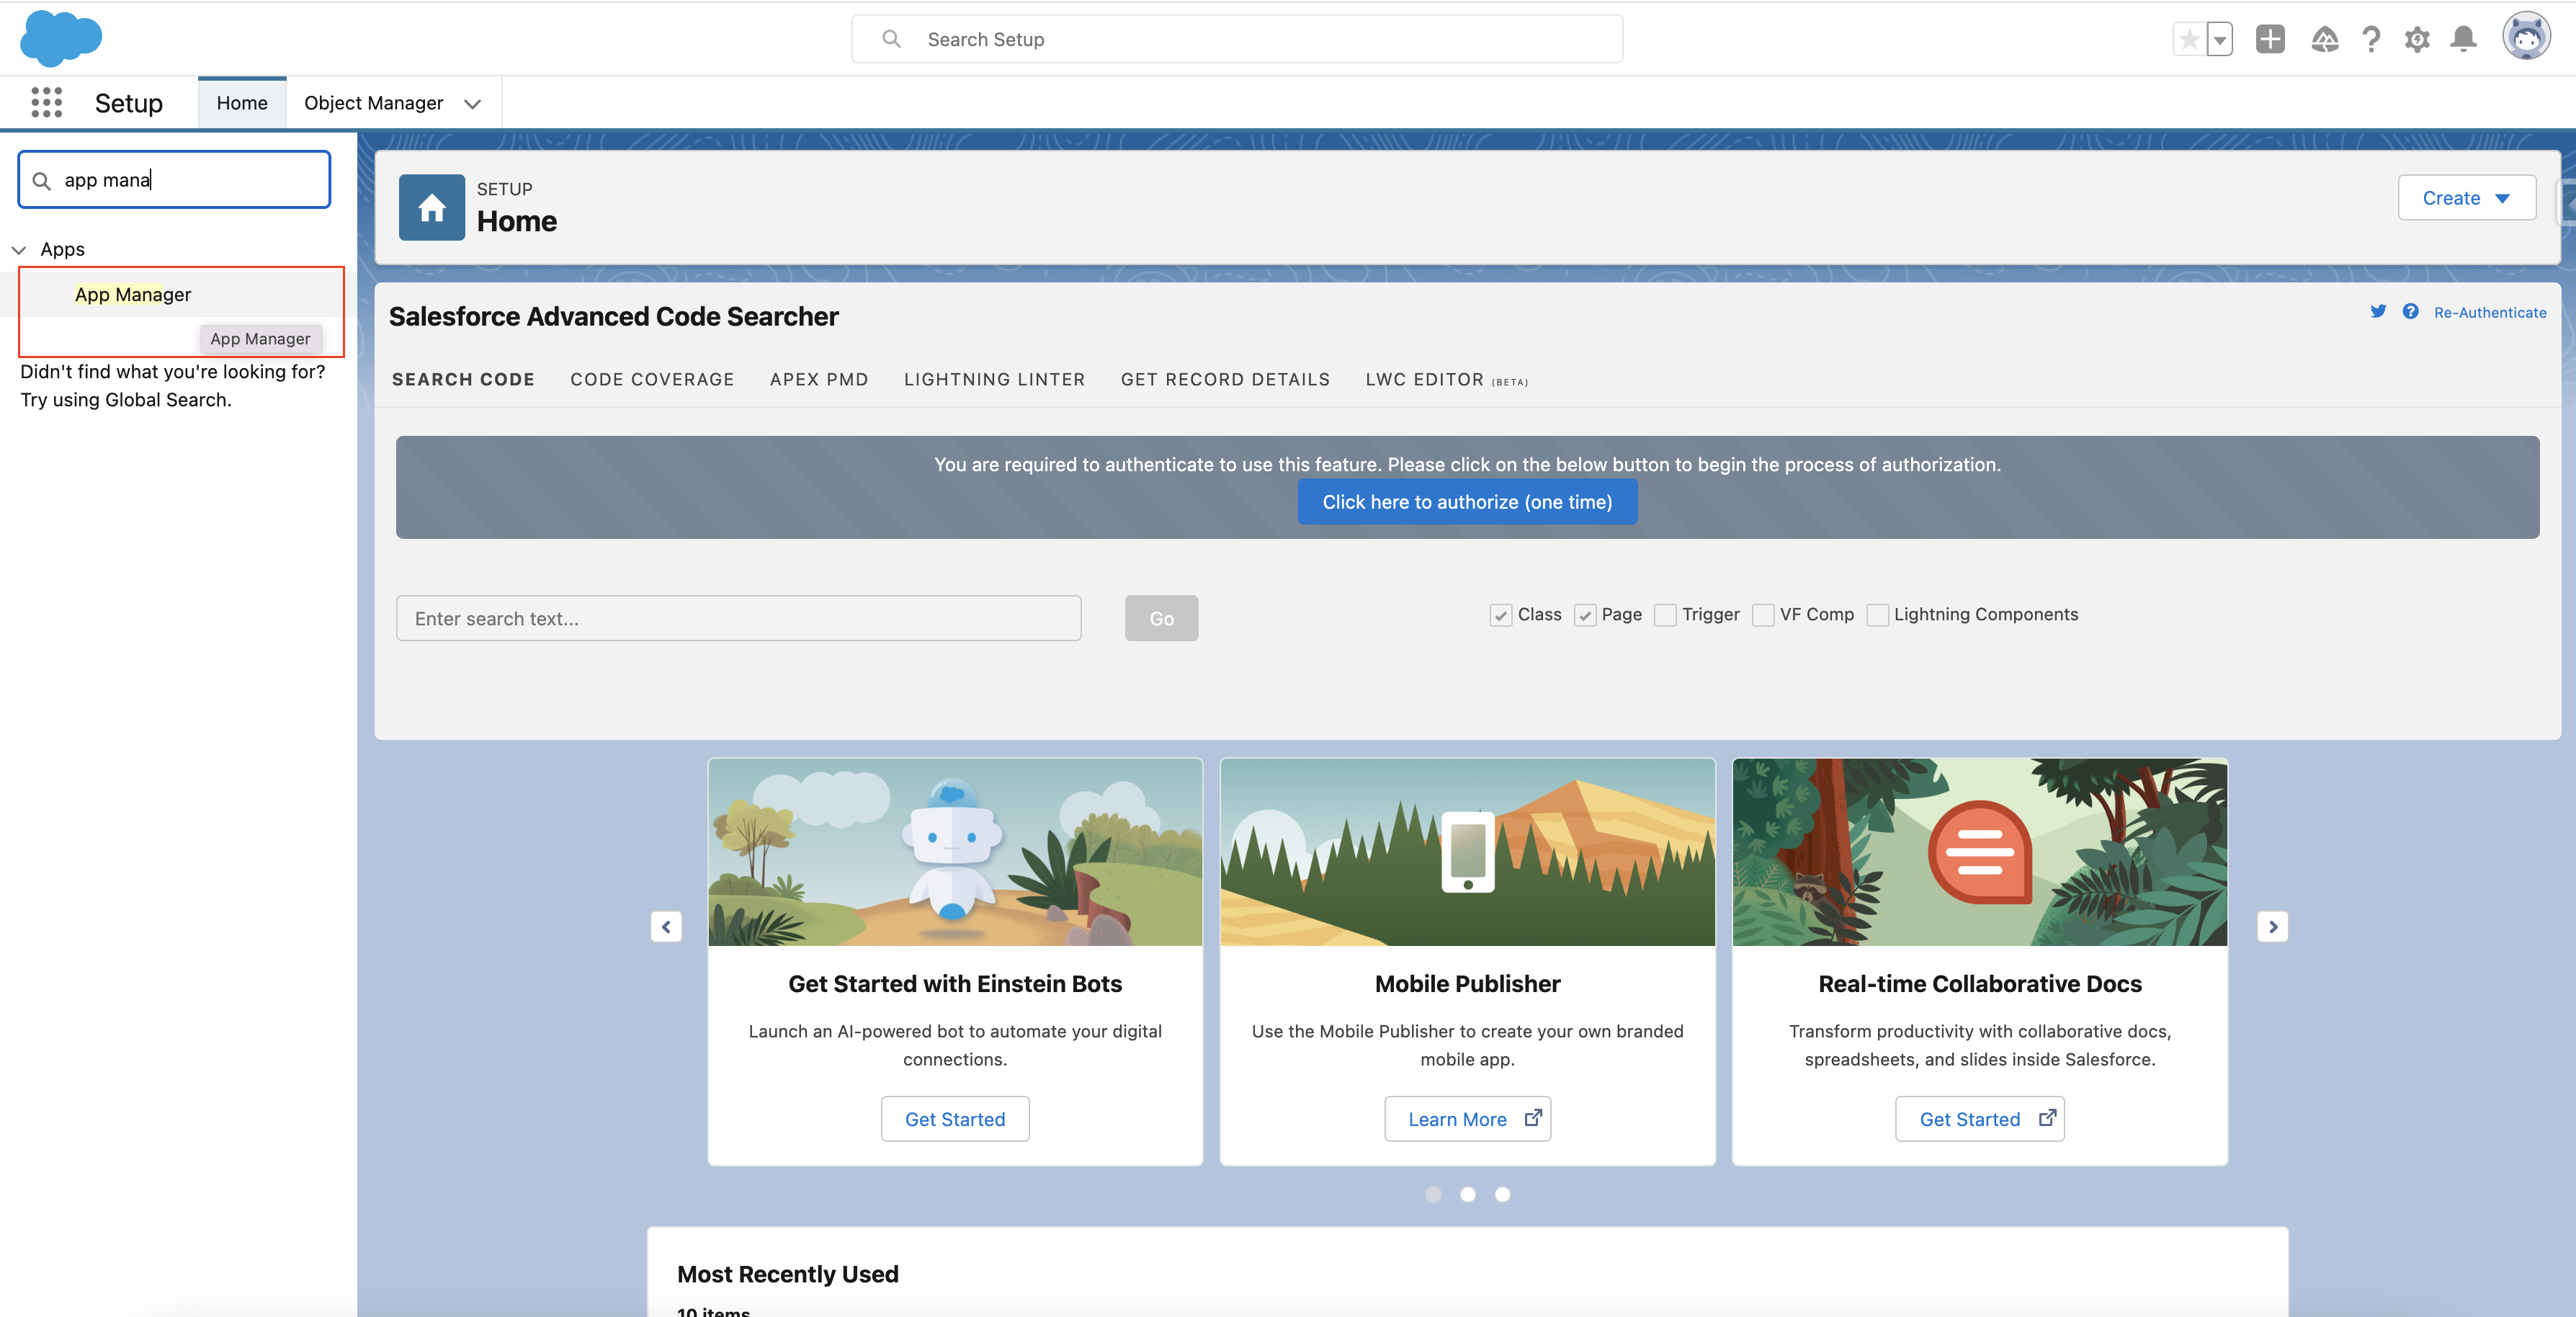
- Search for App Manager in search and click on it
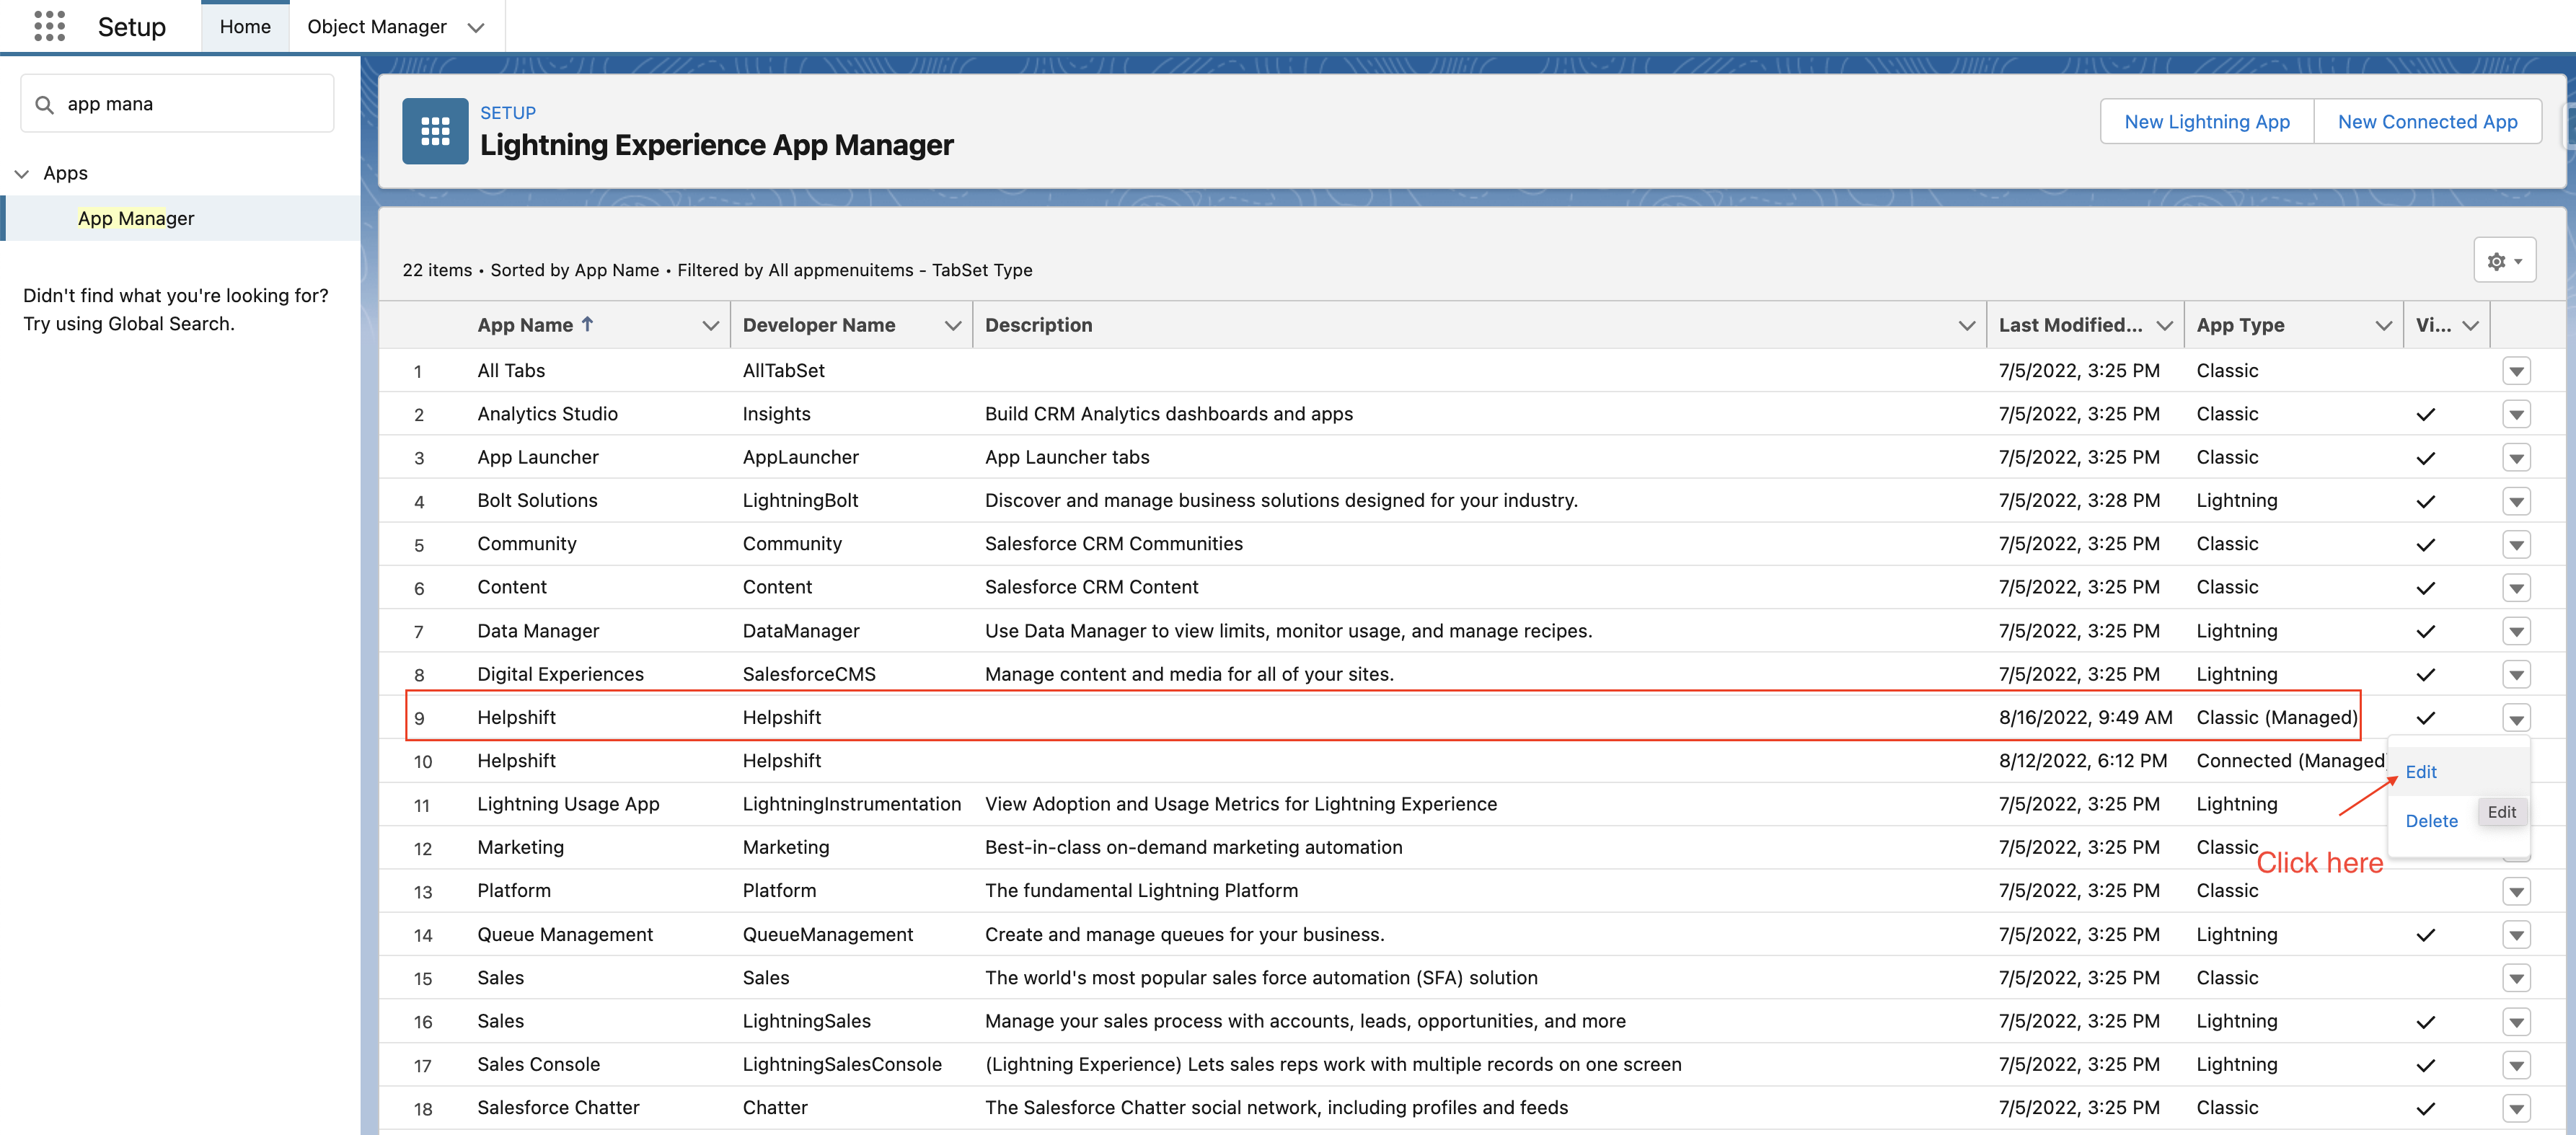
- Search for Helpshift classic app and click on edit
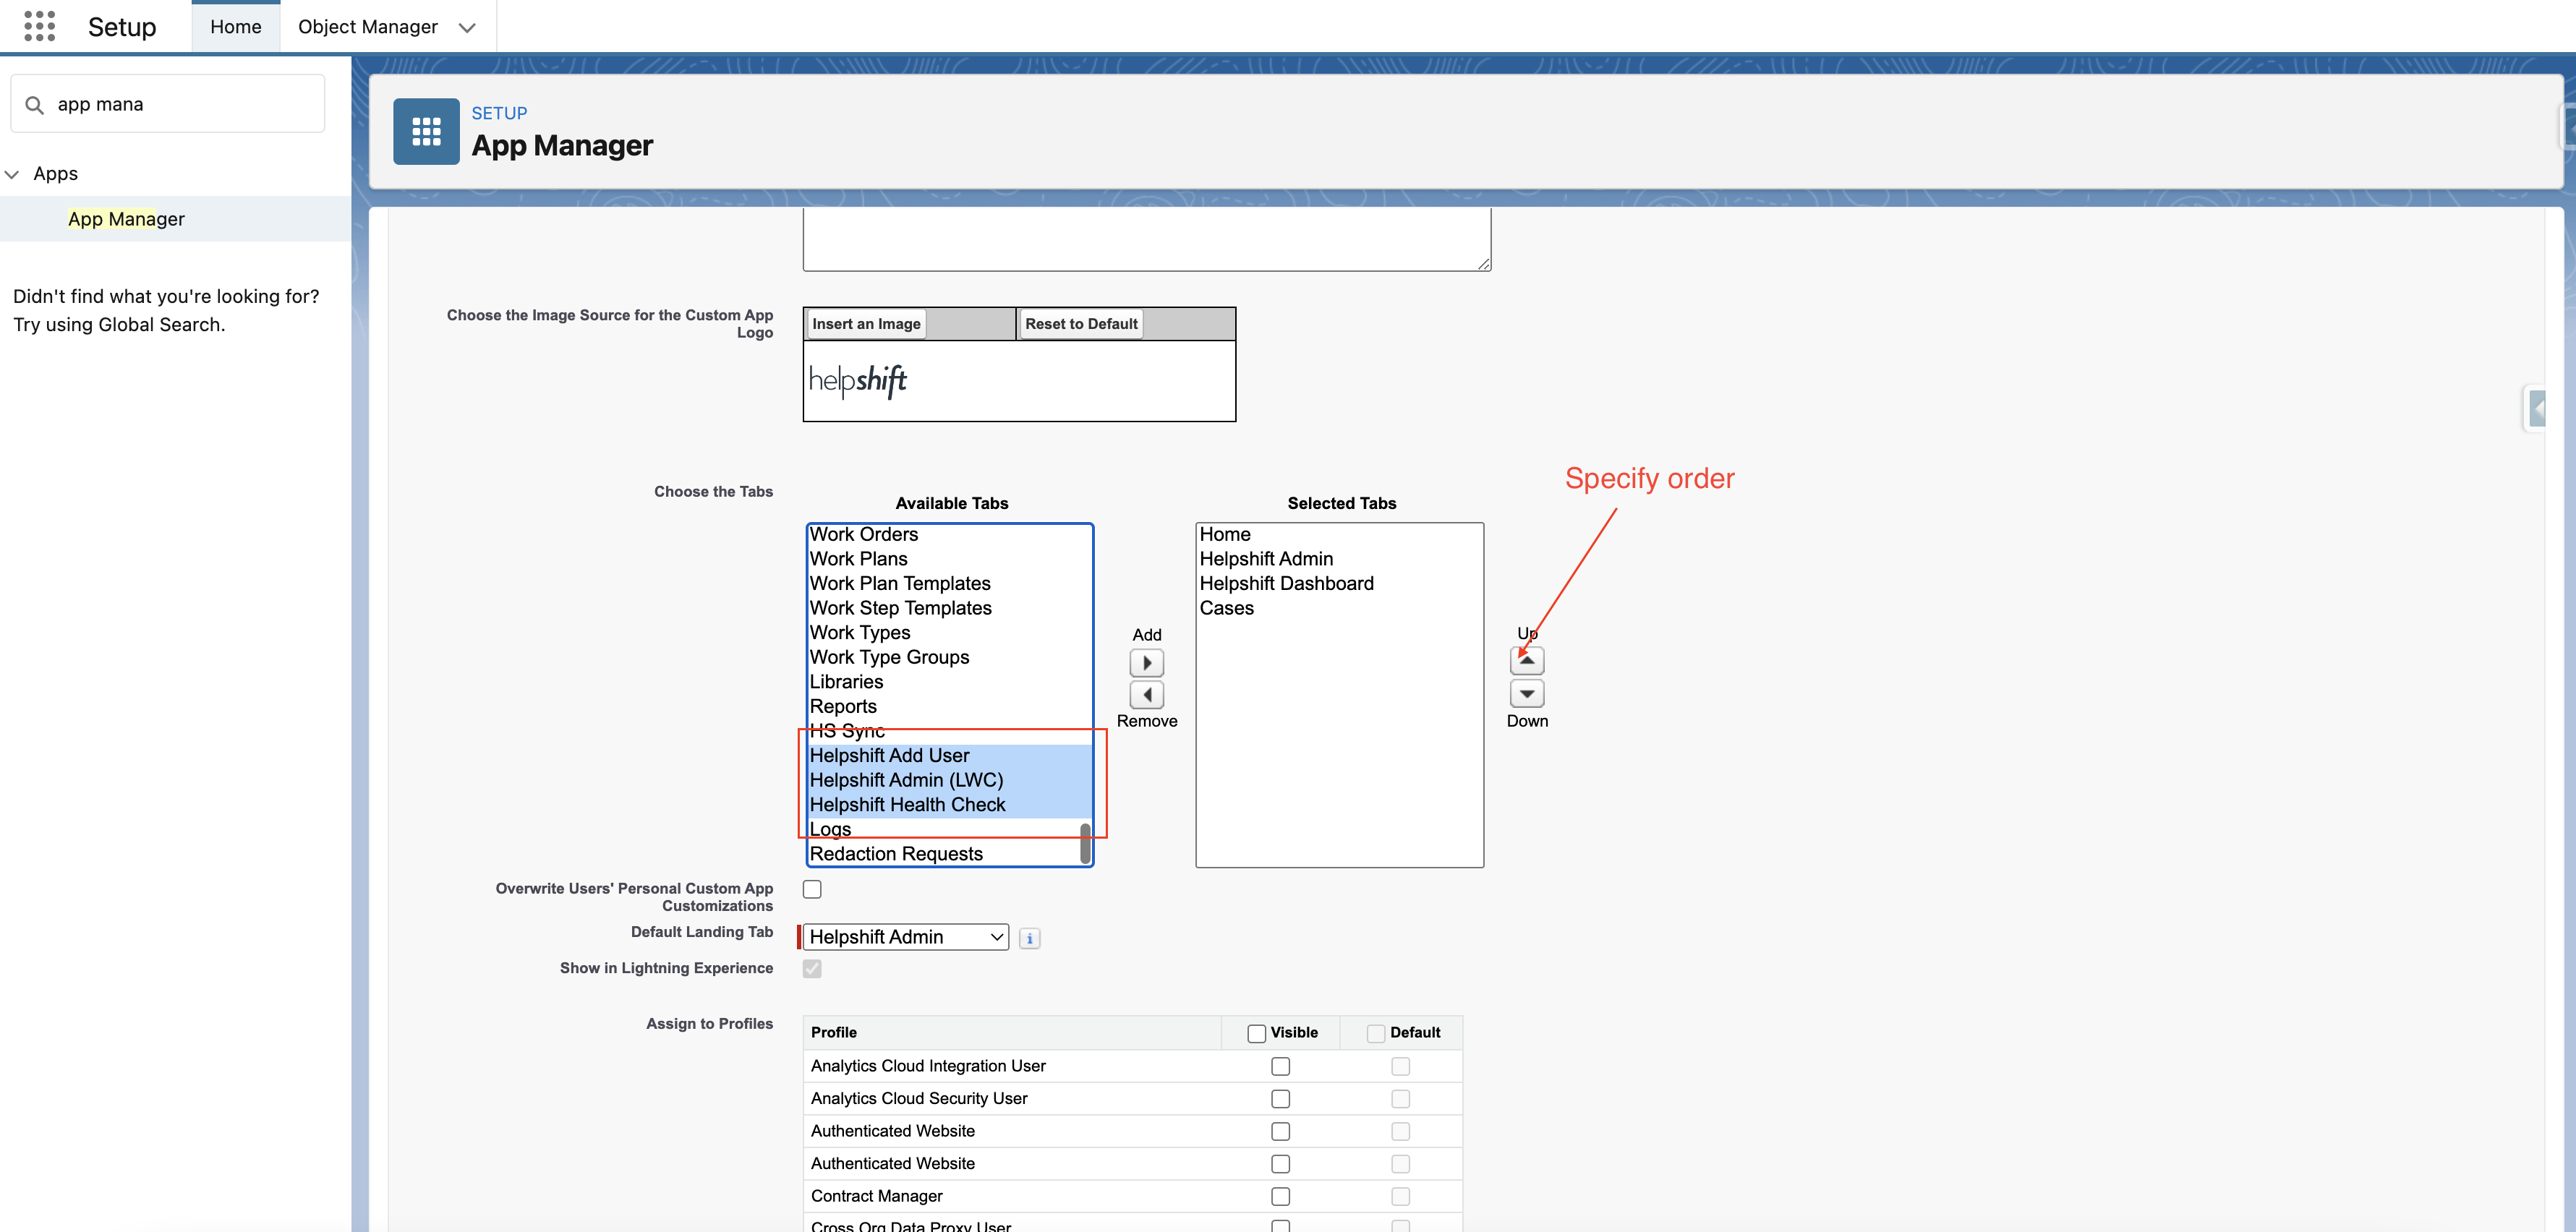
- Add all the required Helpshift tabs as seen
- Click on Save as below
- Click on Setup icon (⚙️)
- Manually add the new Helpshift Messenger to the case record page. (Steps for this are described in the next section.)
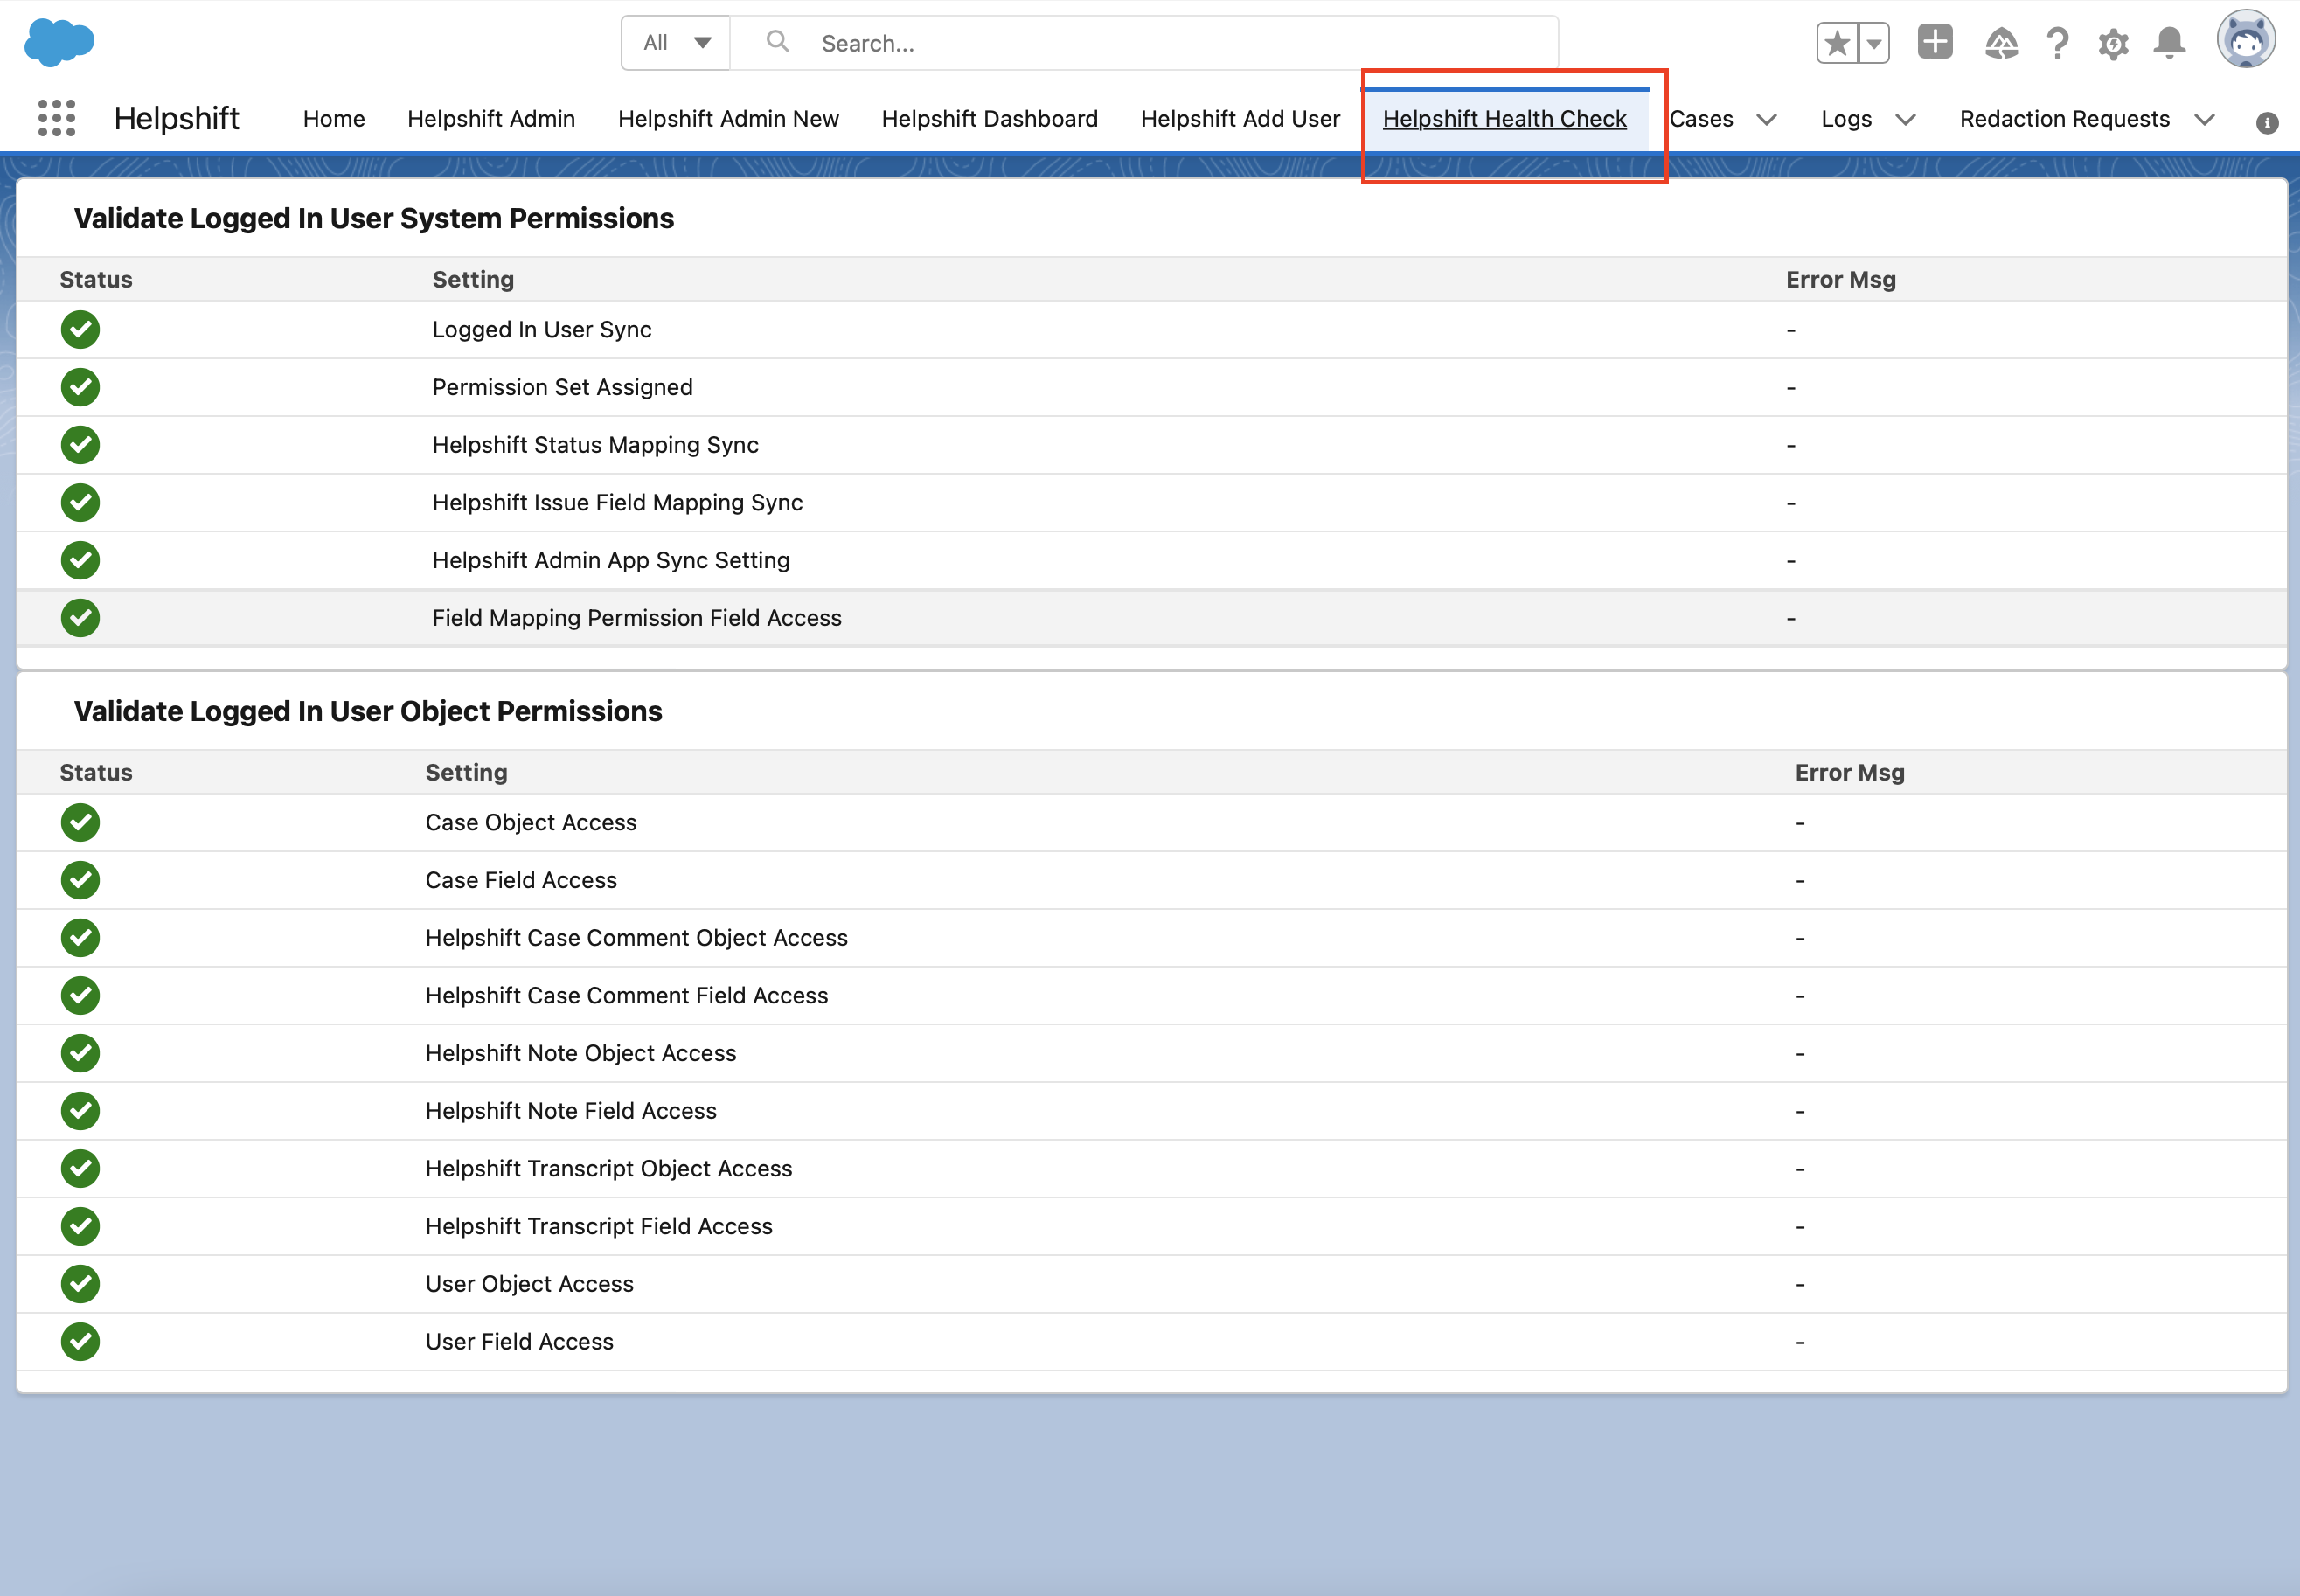
- Click on the Helpshift Health Check tab and ensure there are no errors
Steps for adding new messenger
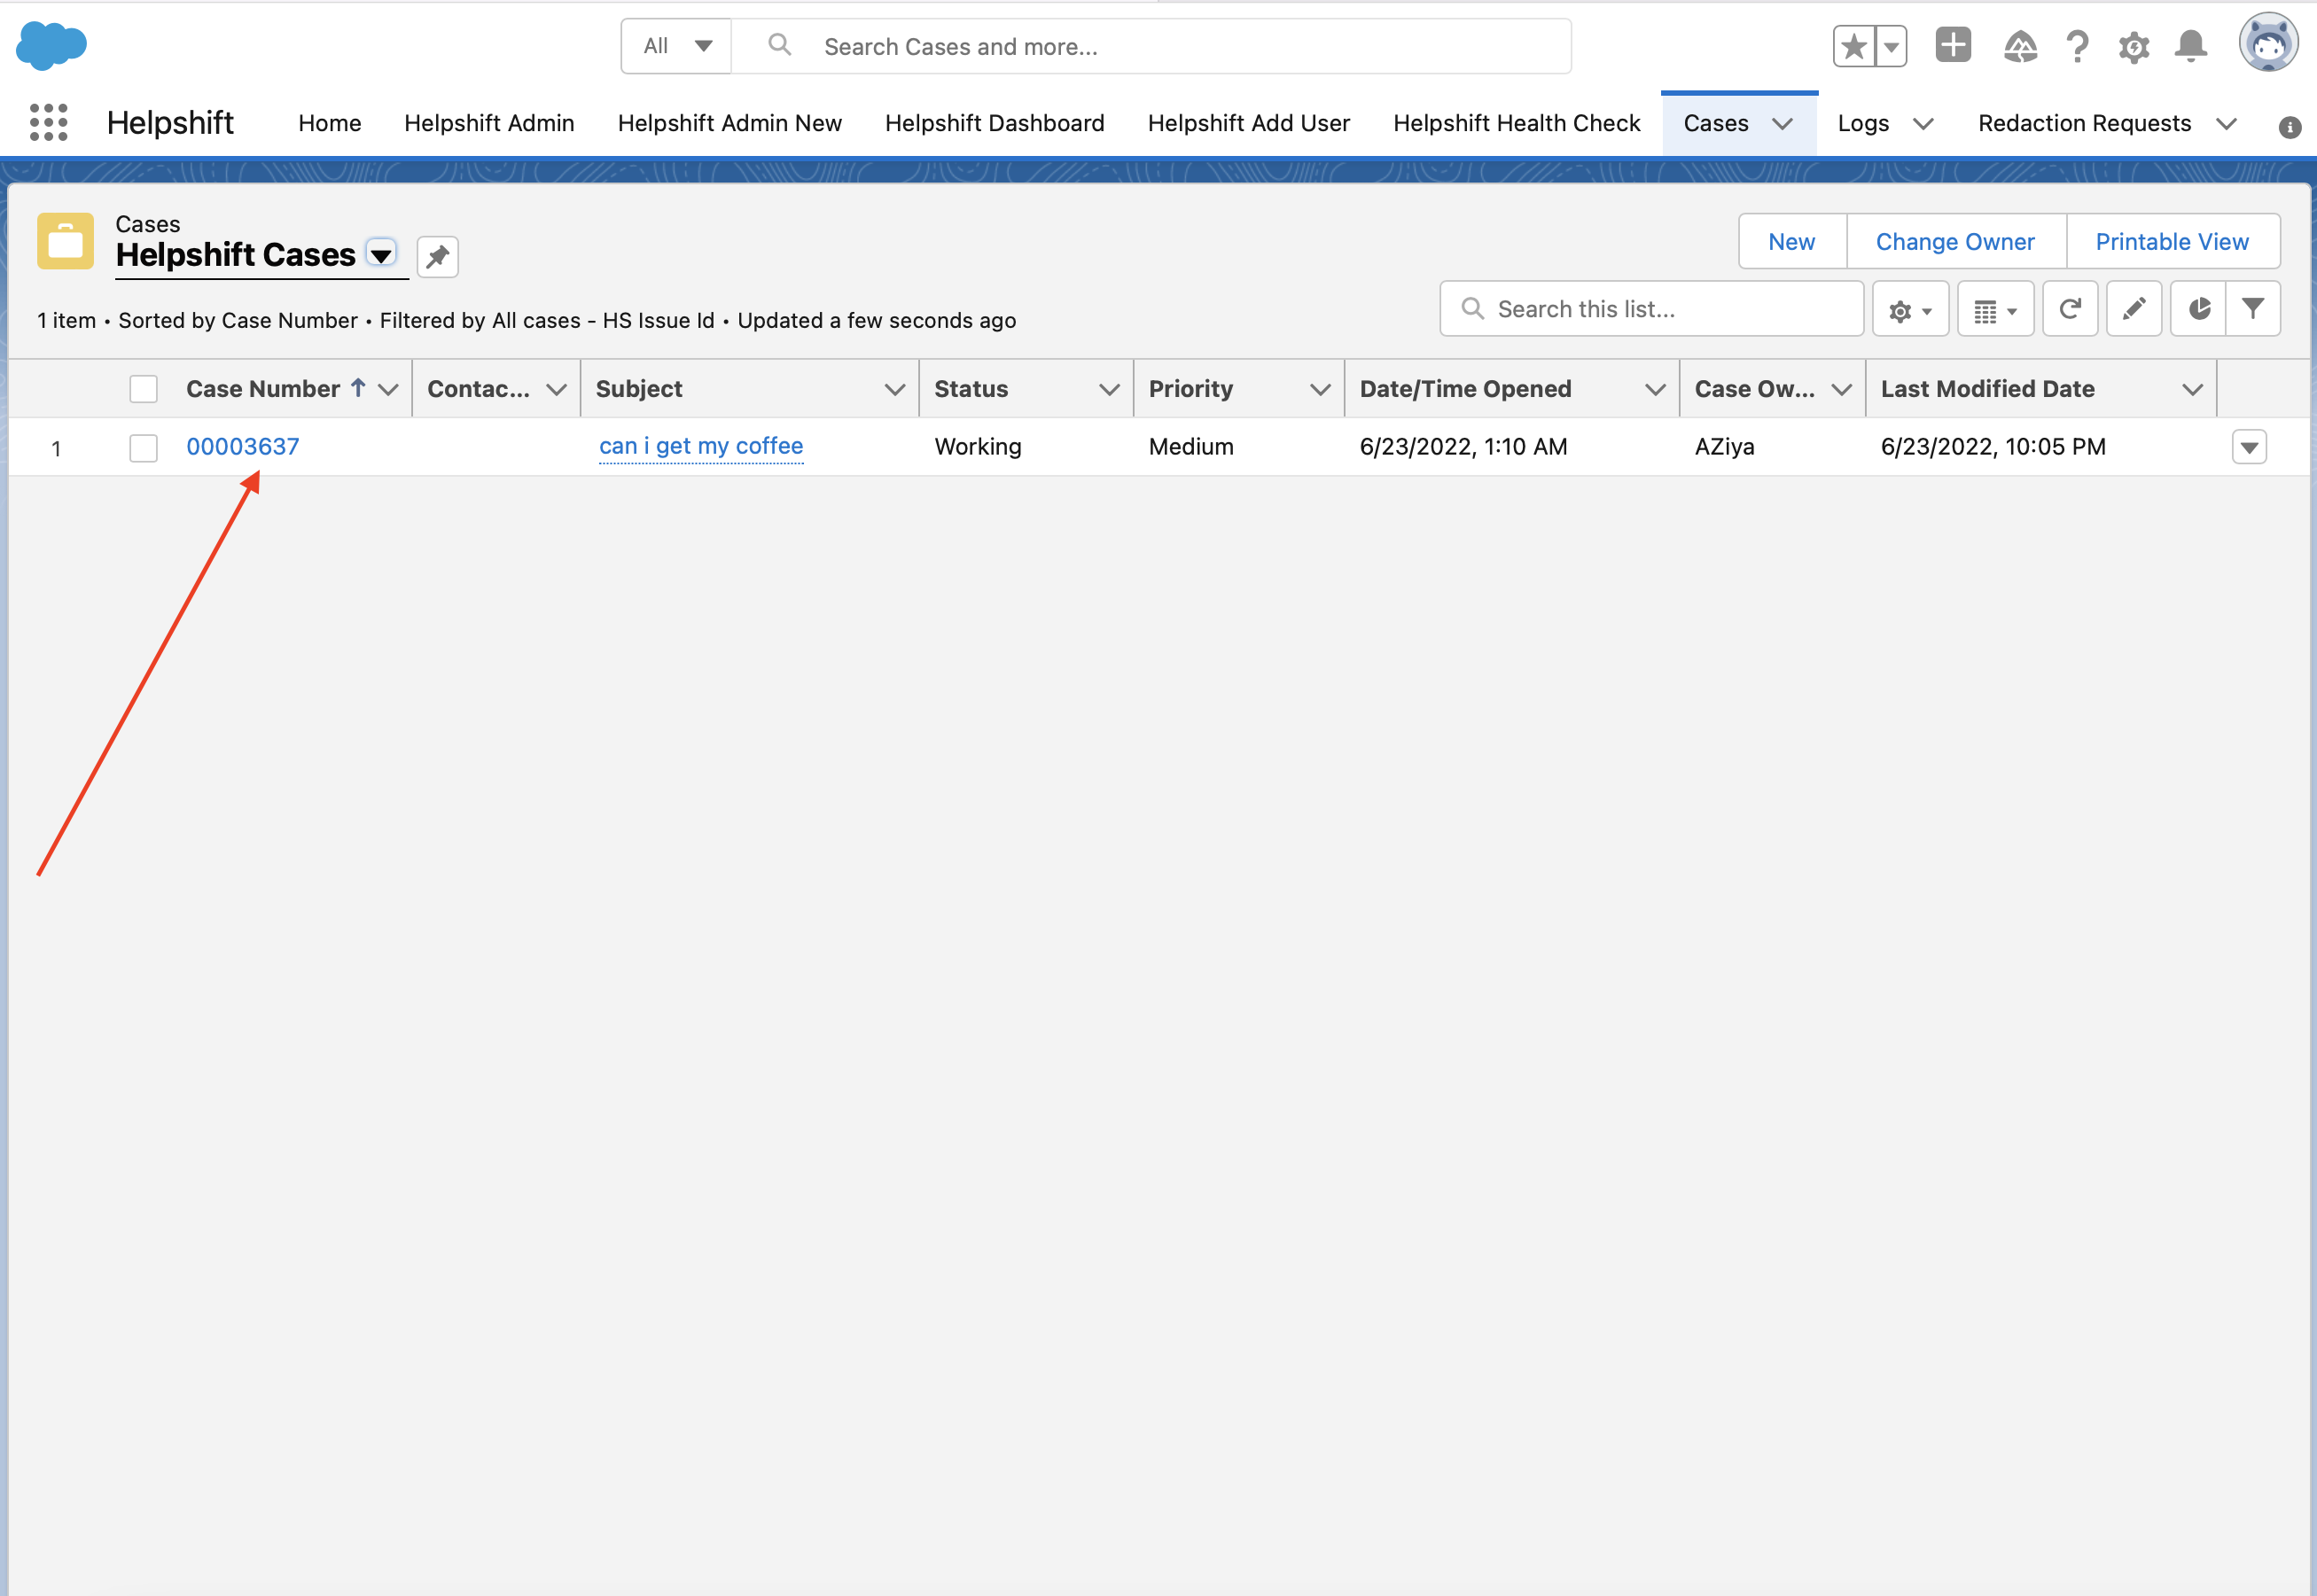
- Navigate to any Helpshift case record from the list view
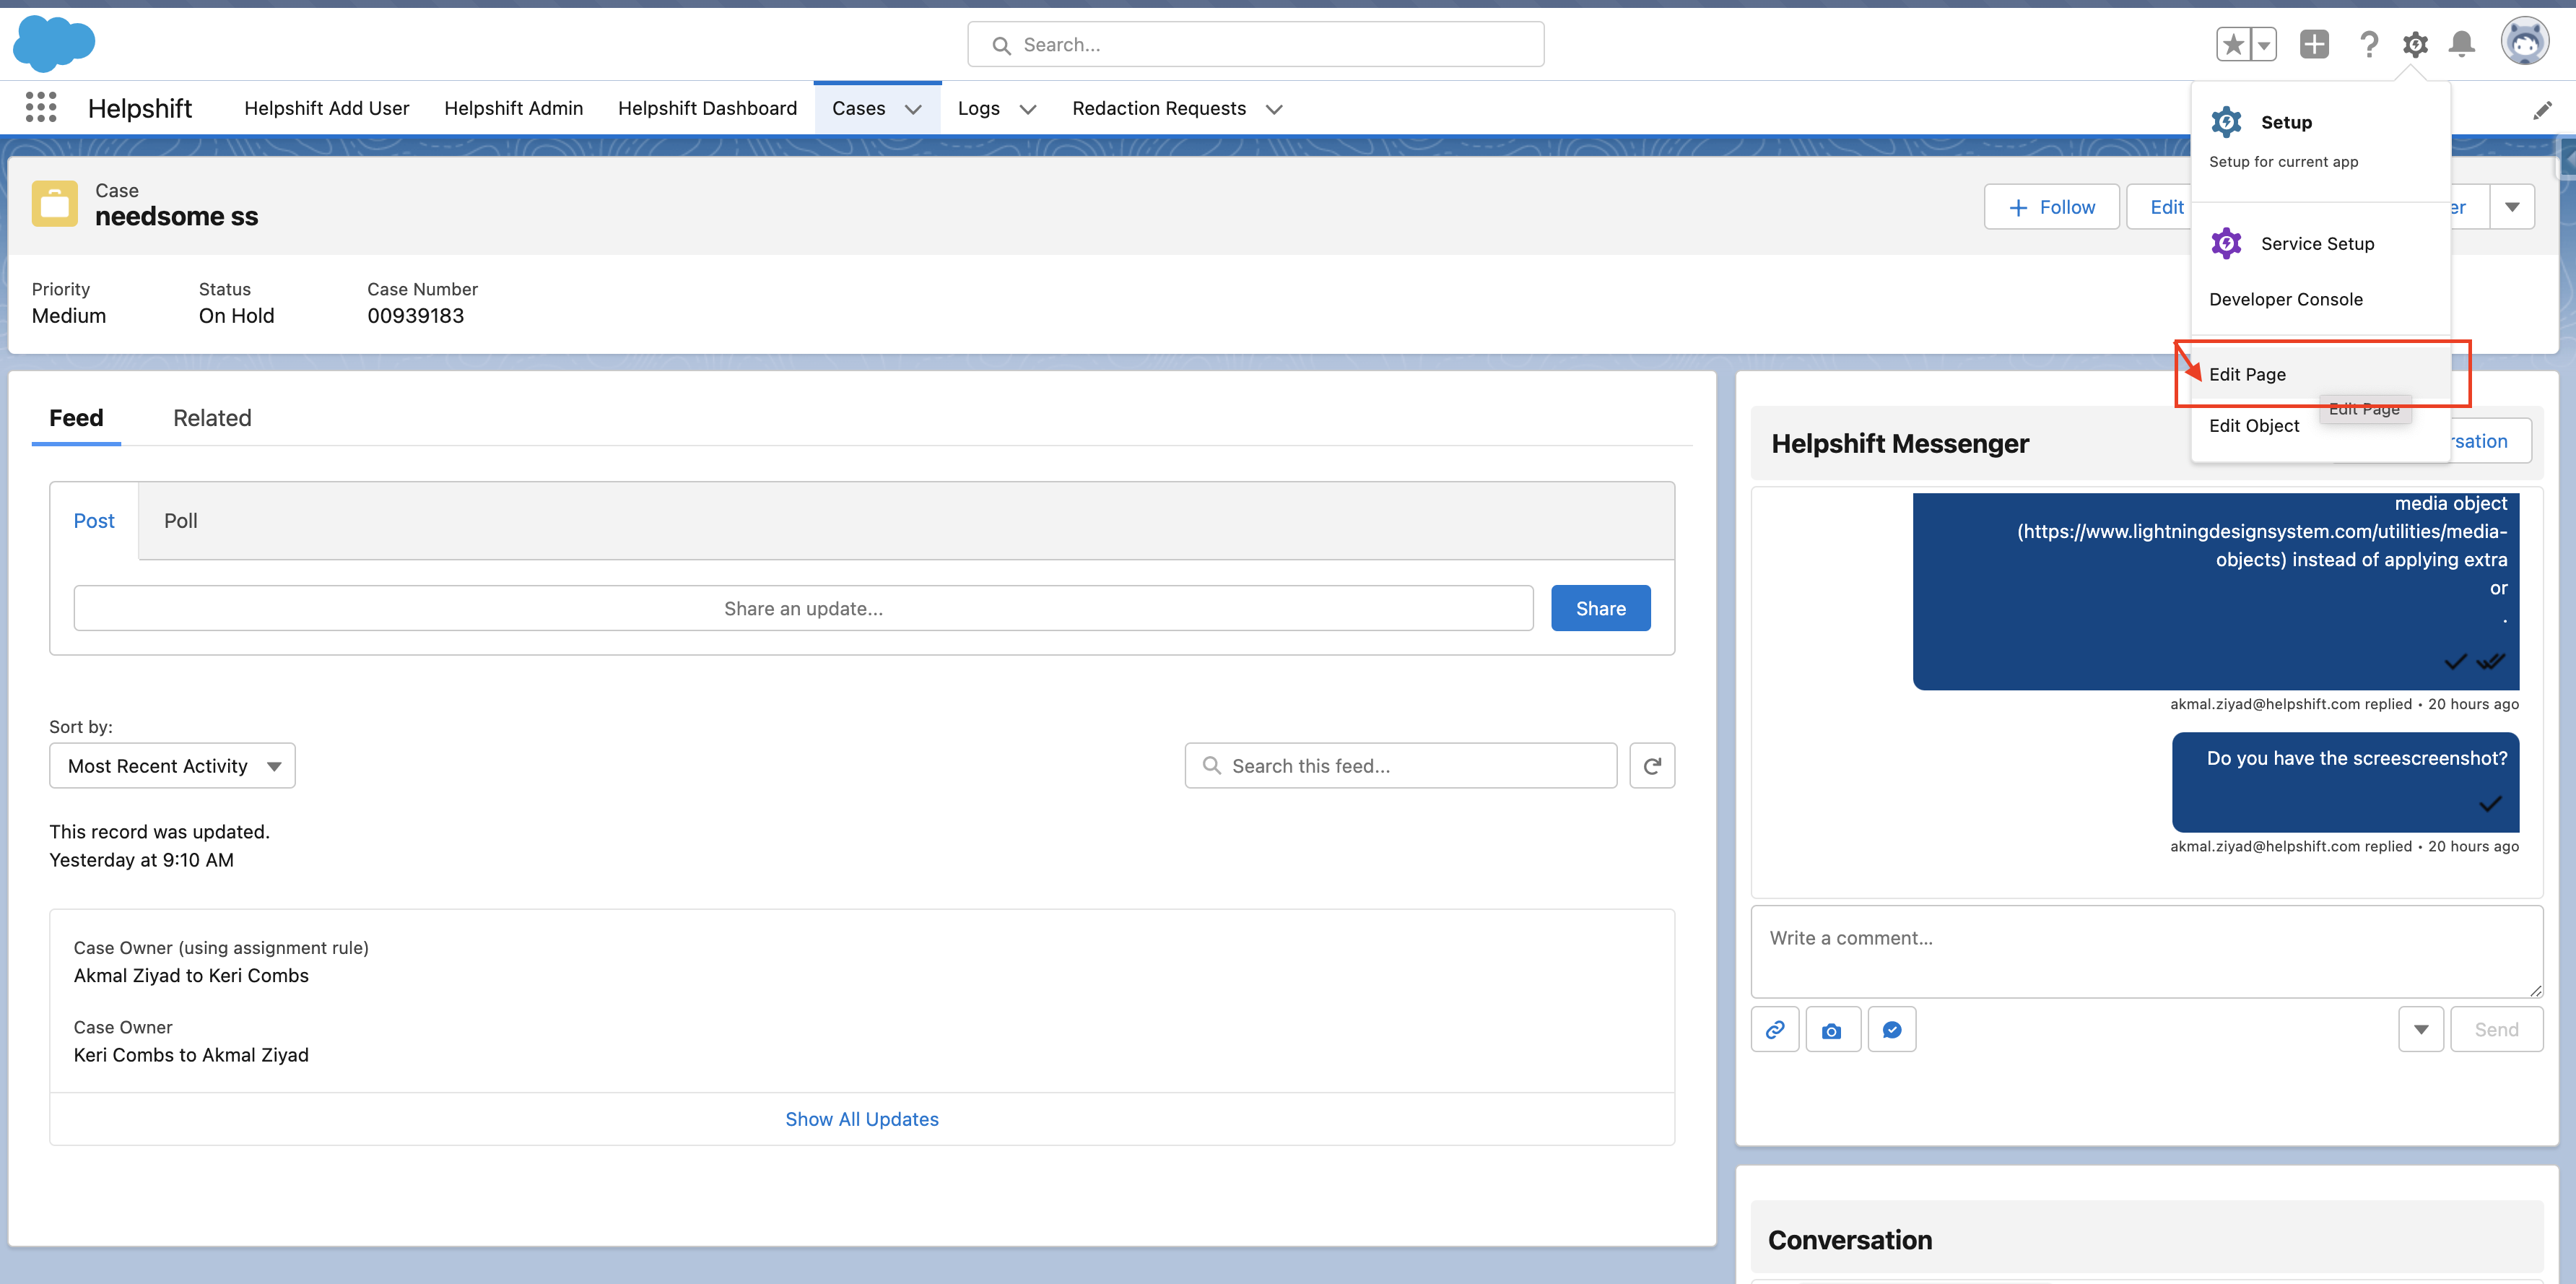
- Click on the Gear icon (⚙️) and choose Edit Page
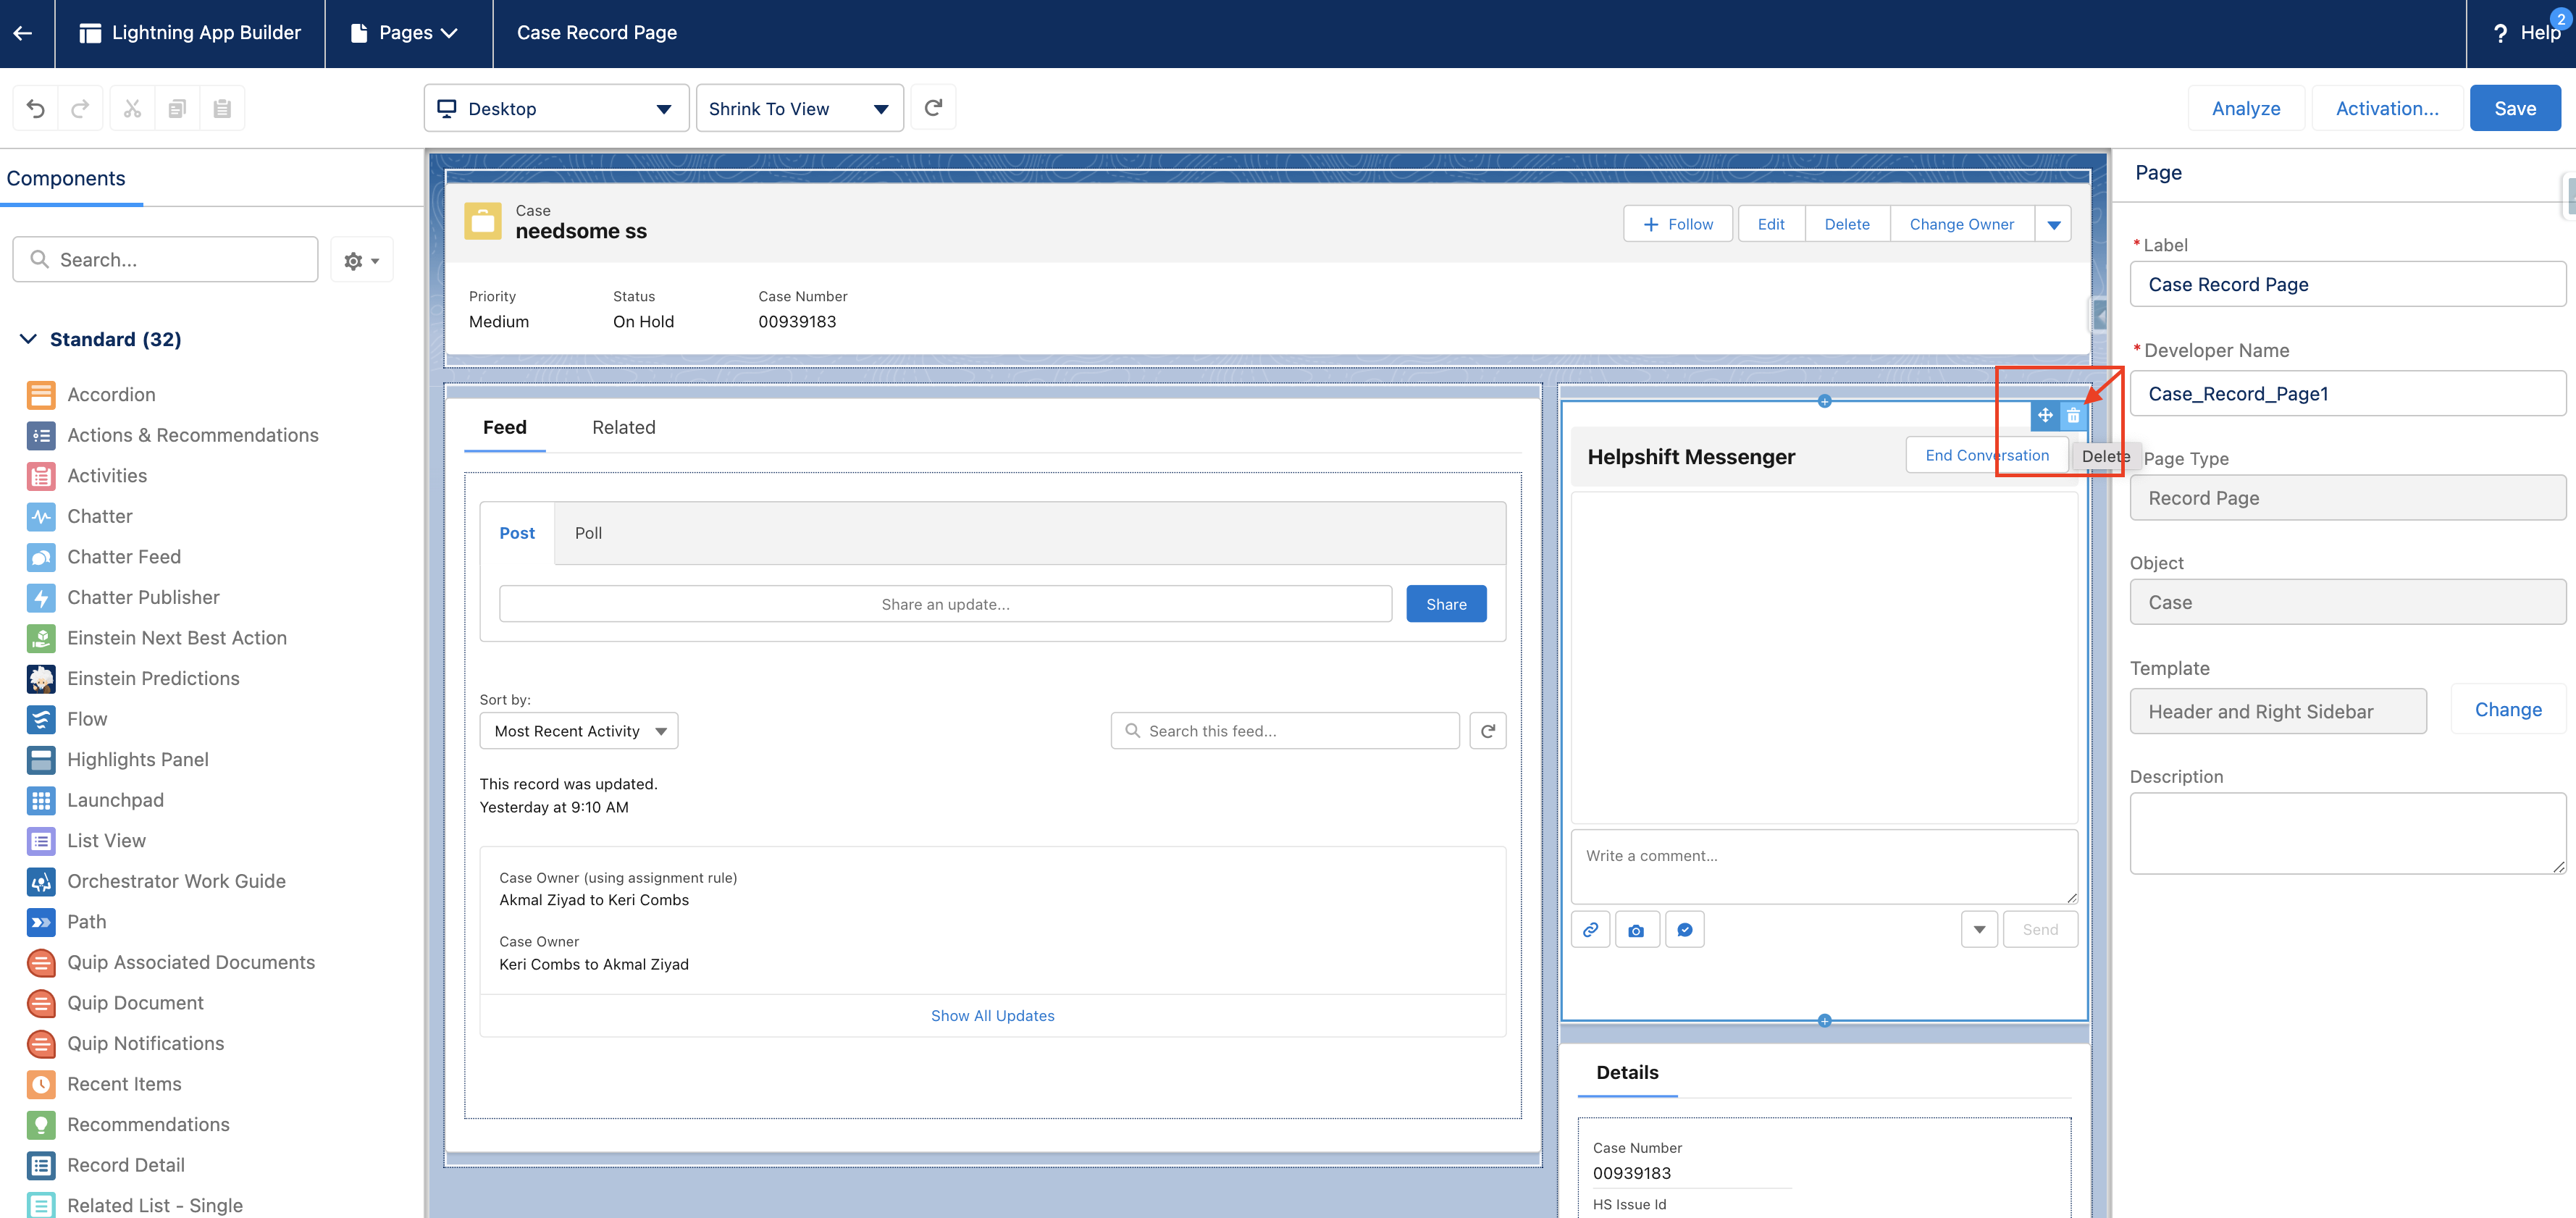
- Remove the old messenger component by clicking on the delete icon
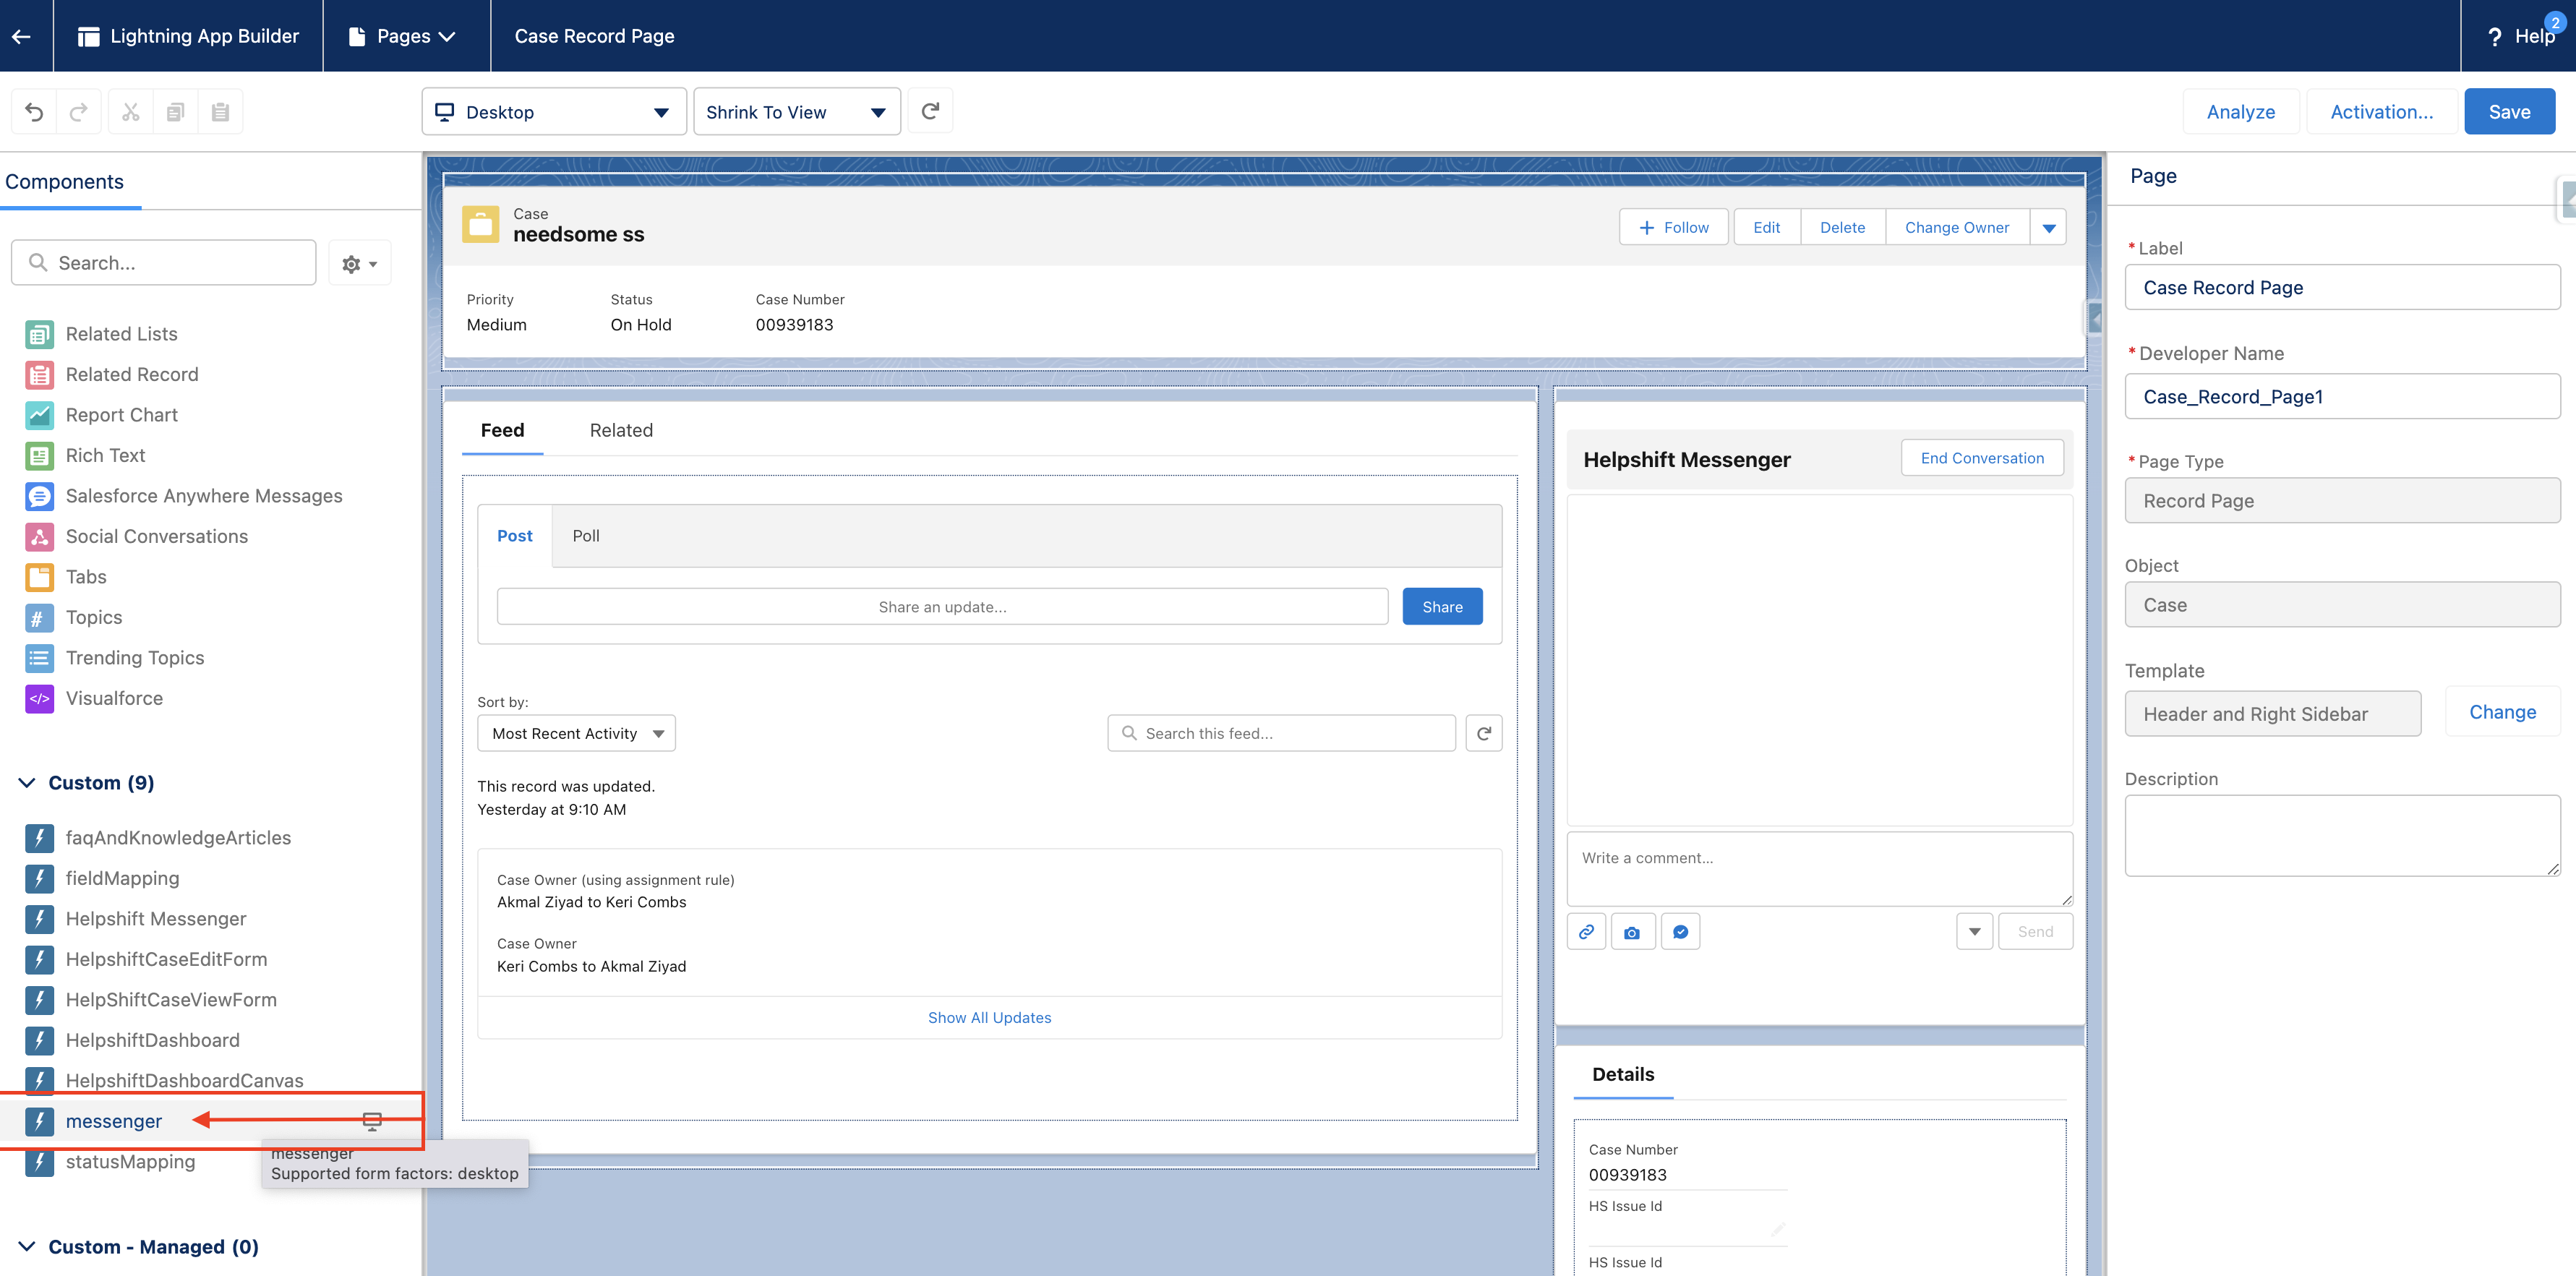
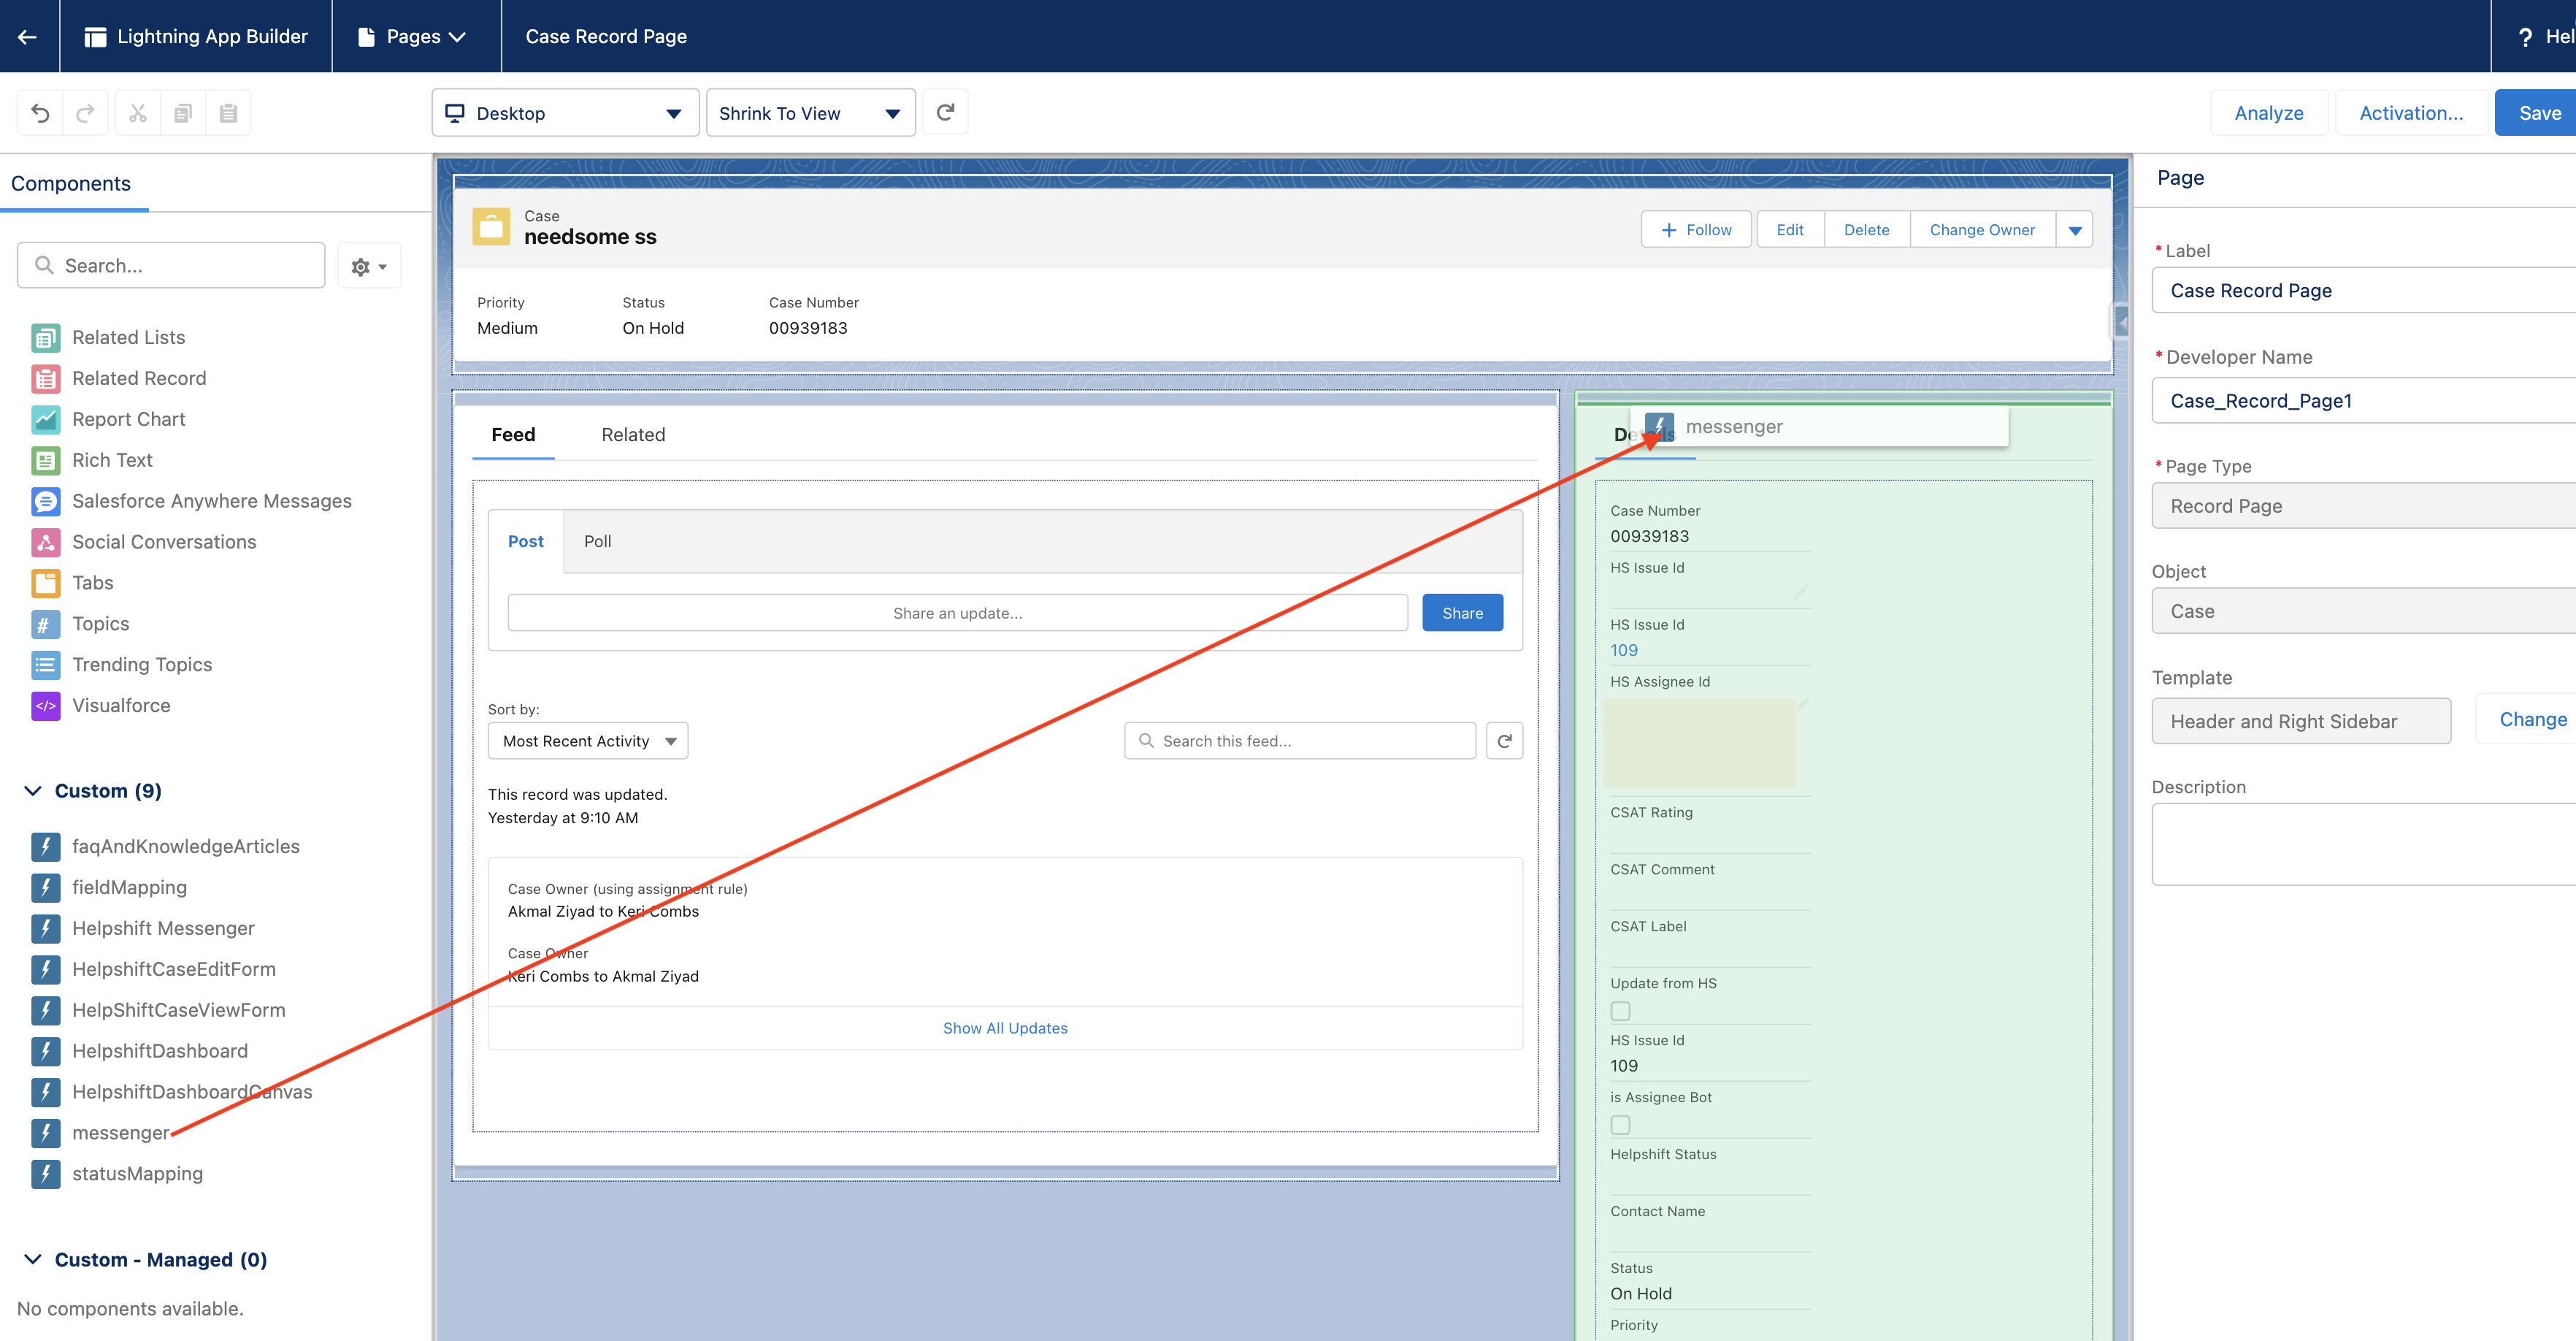
- From the Components panel, drag the messenger component to the appropriate section(main, left, etc.) on the page
- Save the changes.
- New messenger is ready for use.
UX changes
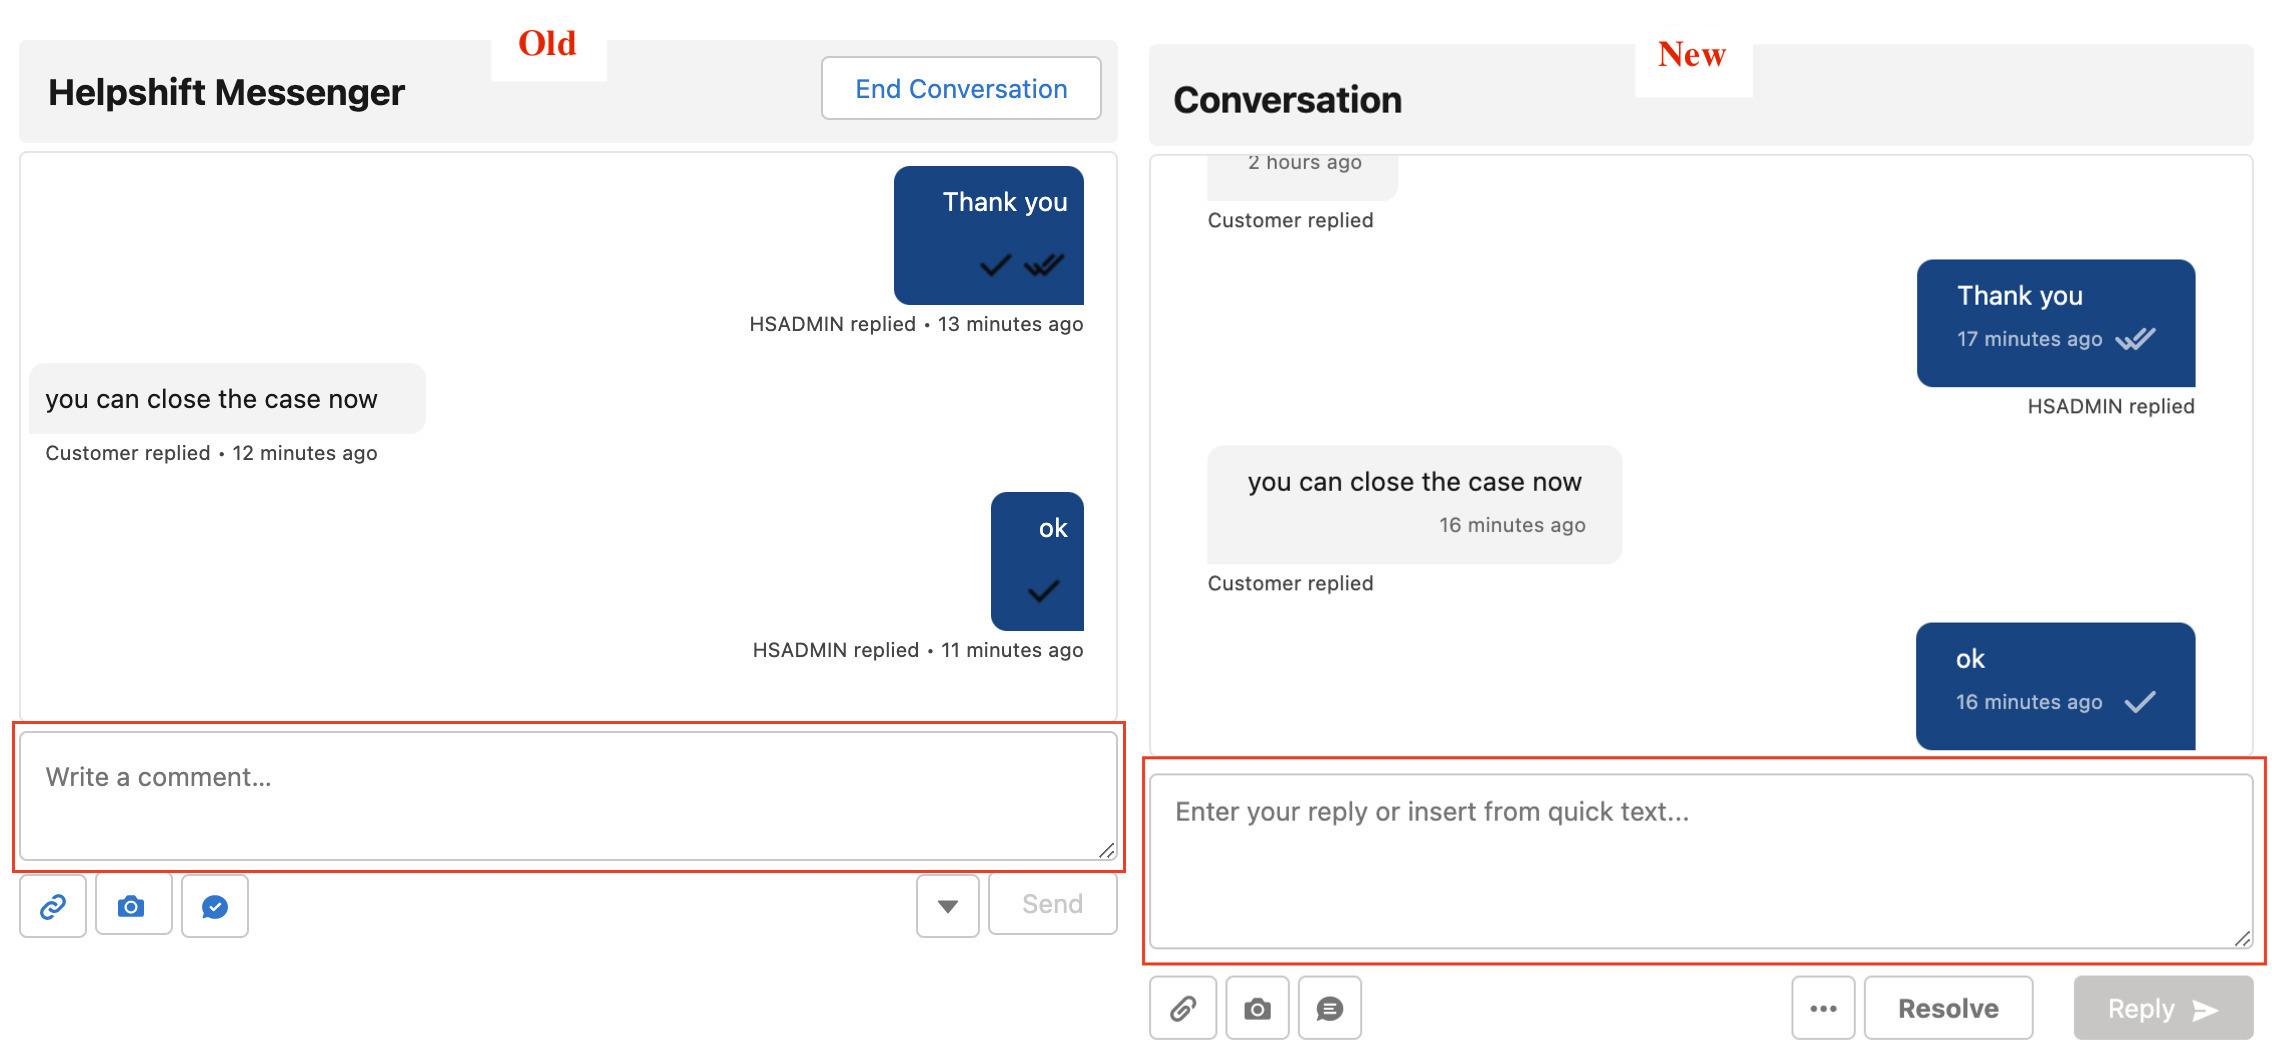
Message send button renamed as 'Reply'
- The message send button has become more intuitive using the button icon.
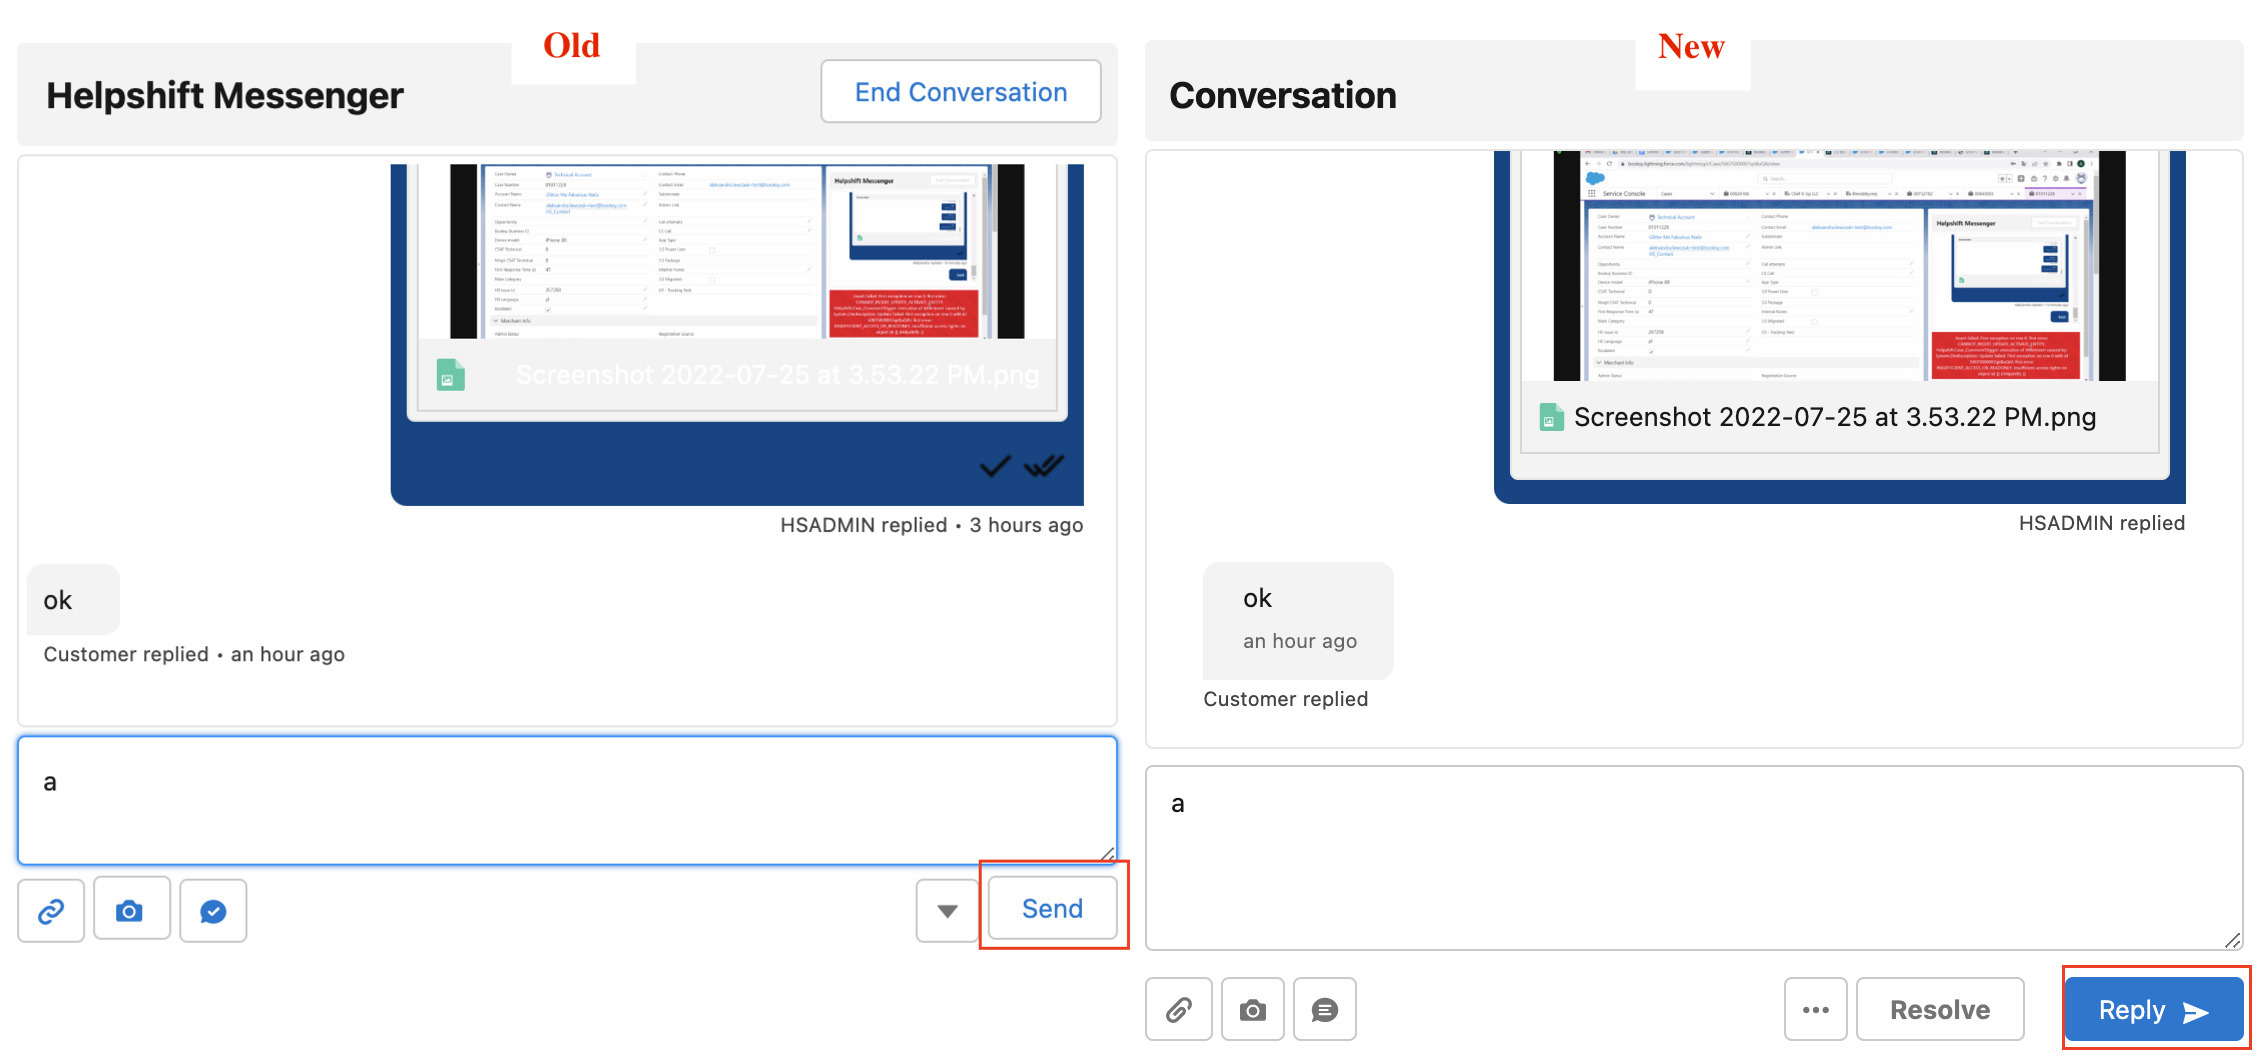
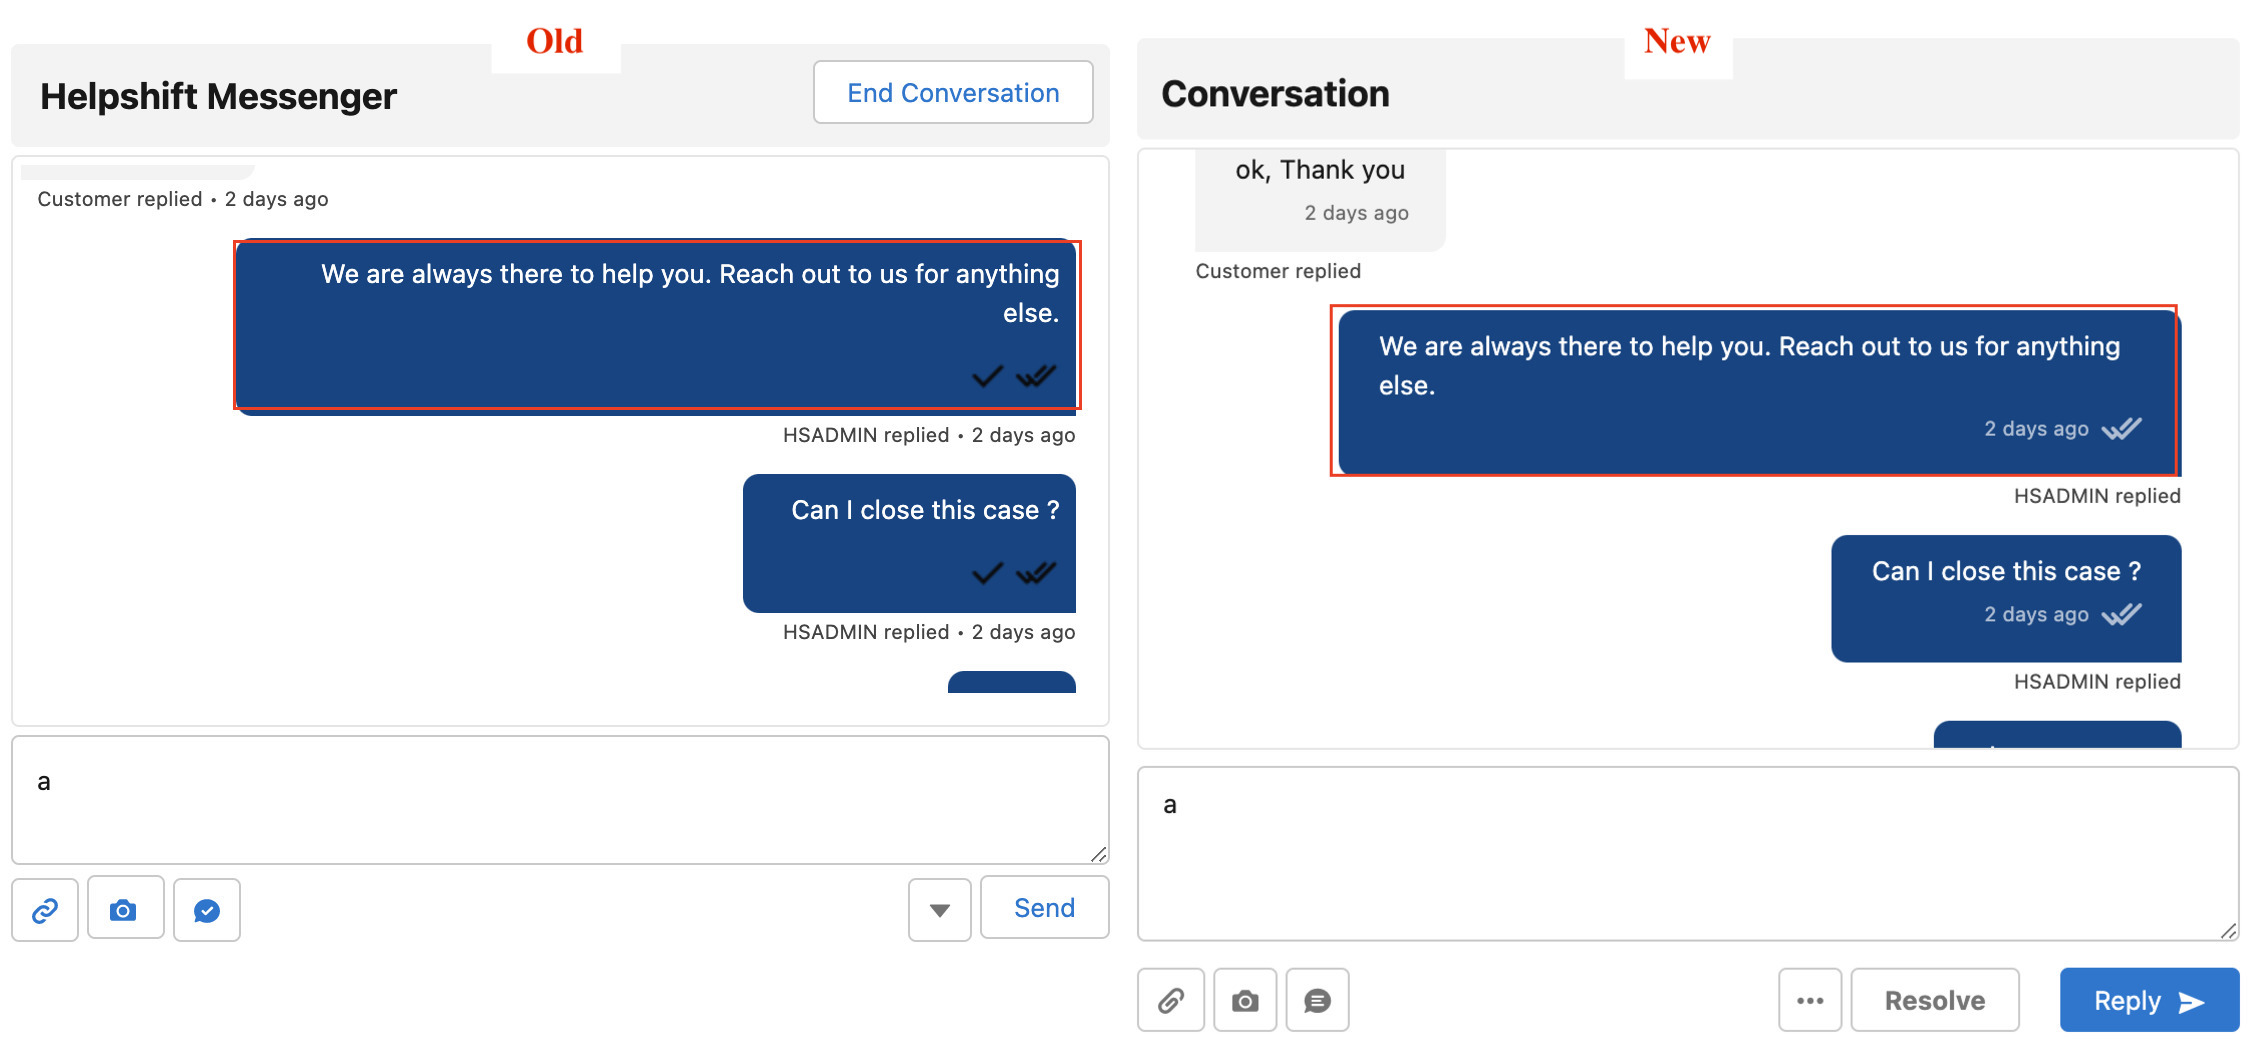
Outbound messages are left aligned
- Messages sent by an agent would be left aligned as per common chat interfaces.
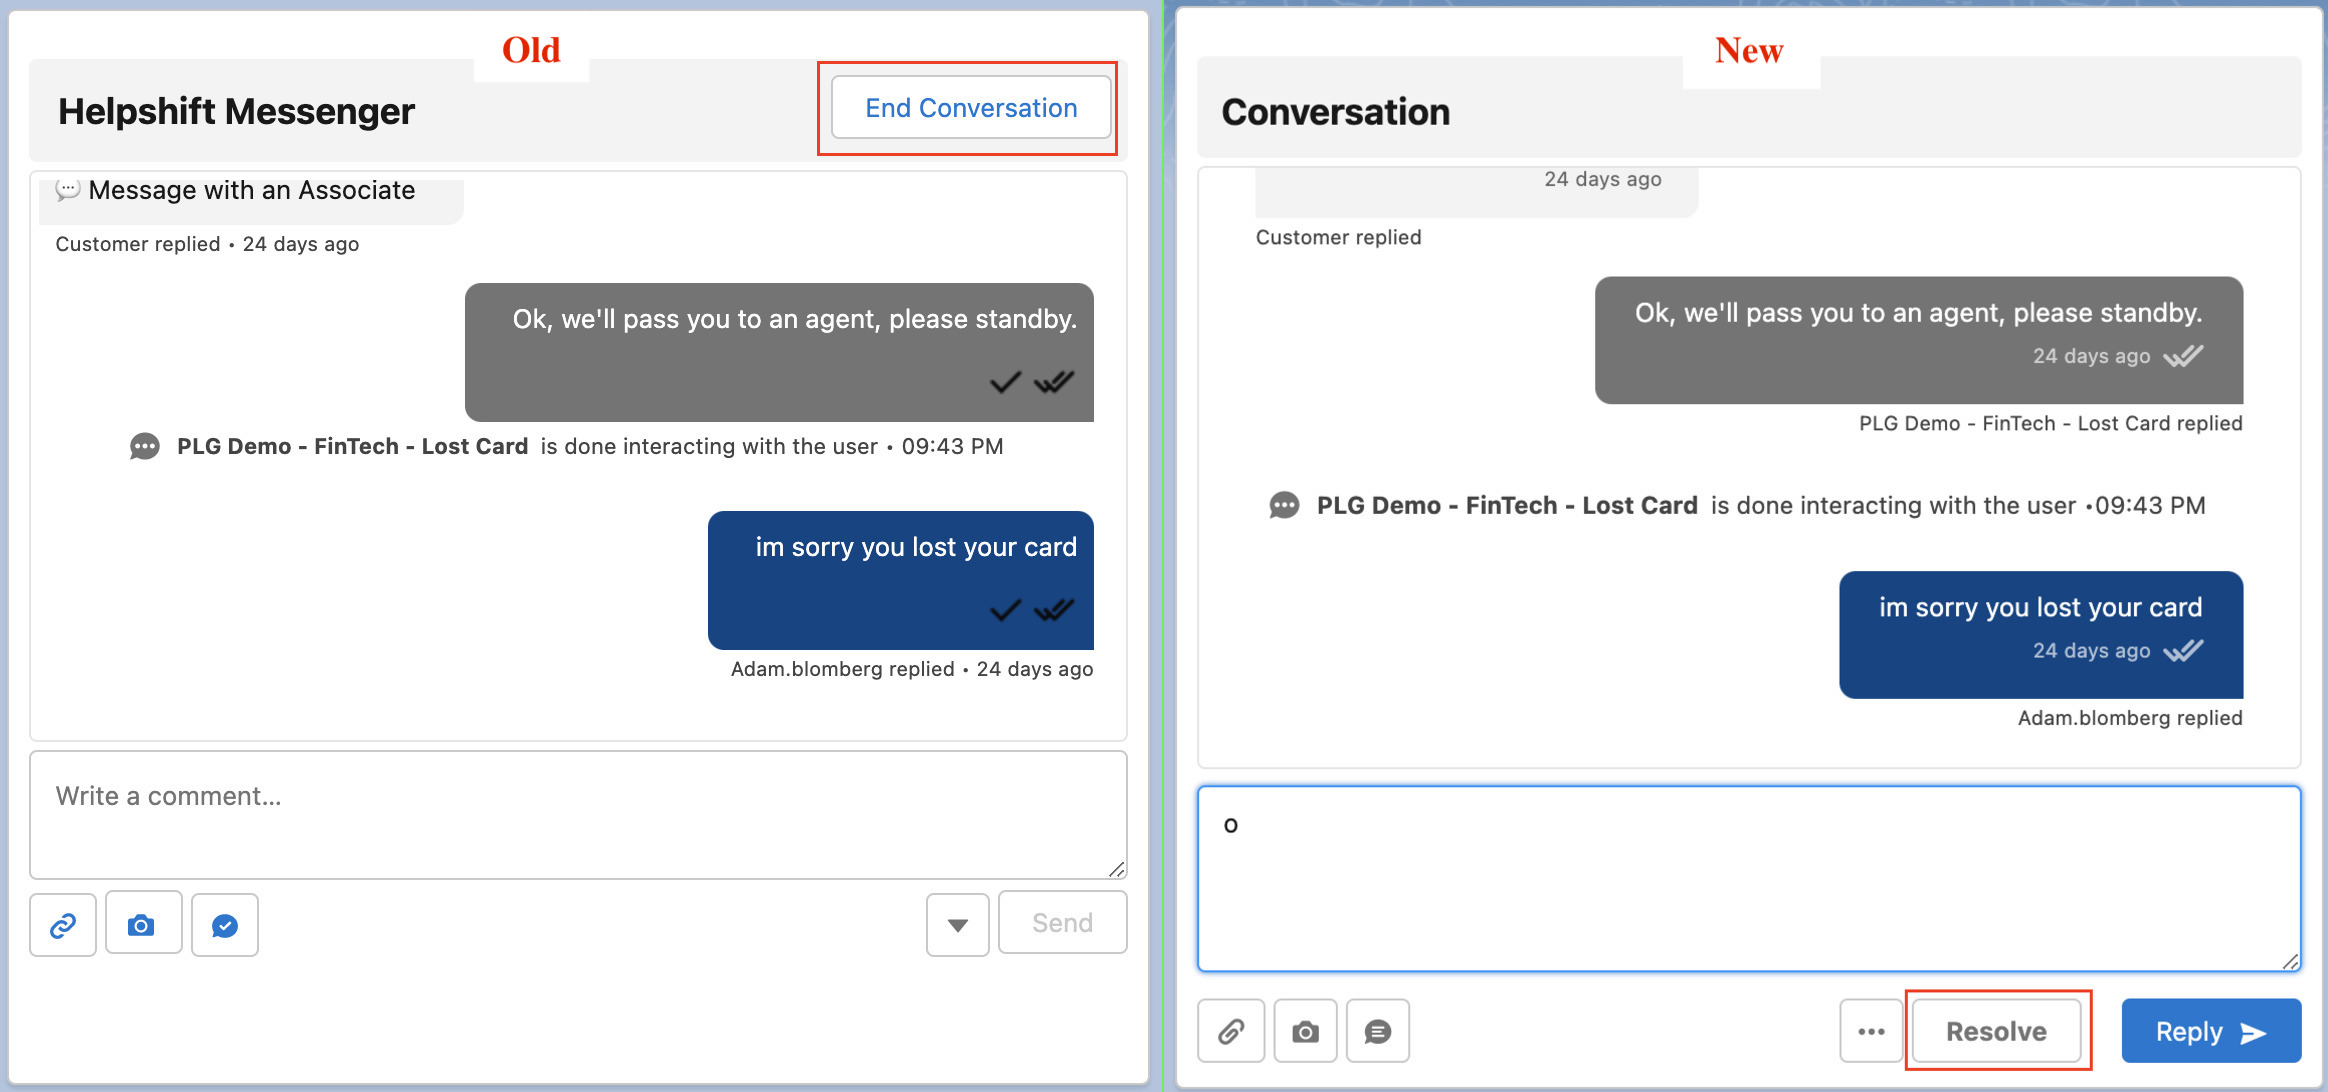
End Conversation button replaced with Resolve at the bottom of the messenger
- Resolve button position similar to Helpshift agent dashboard.
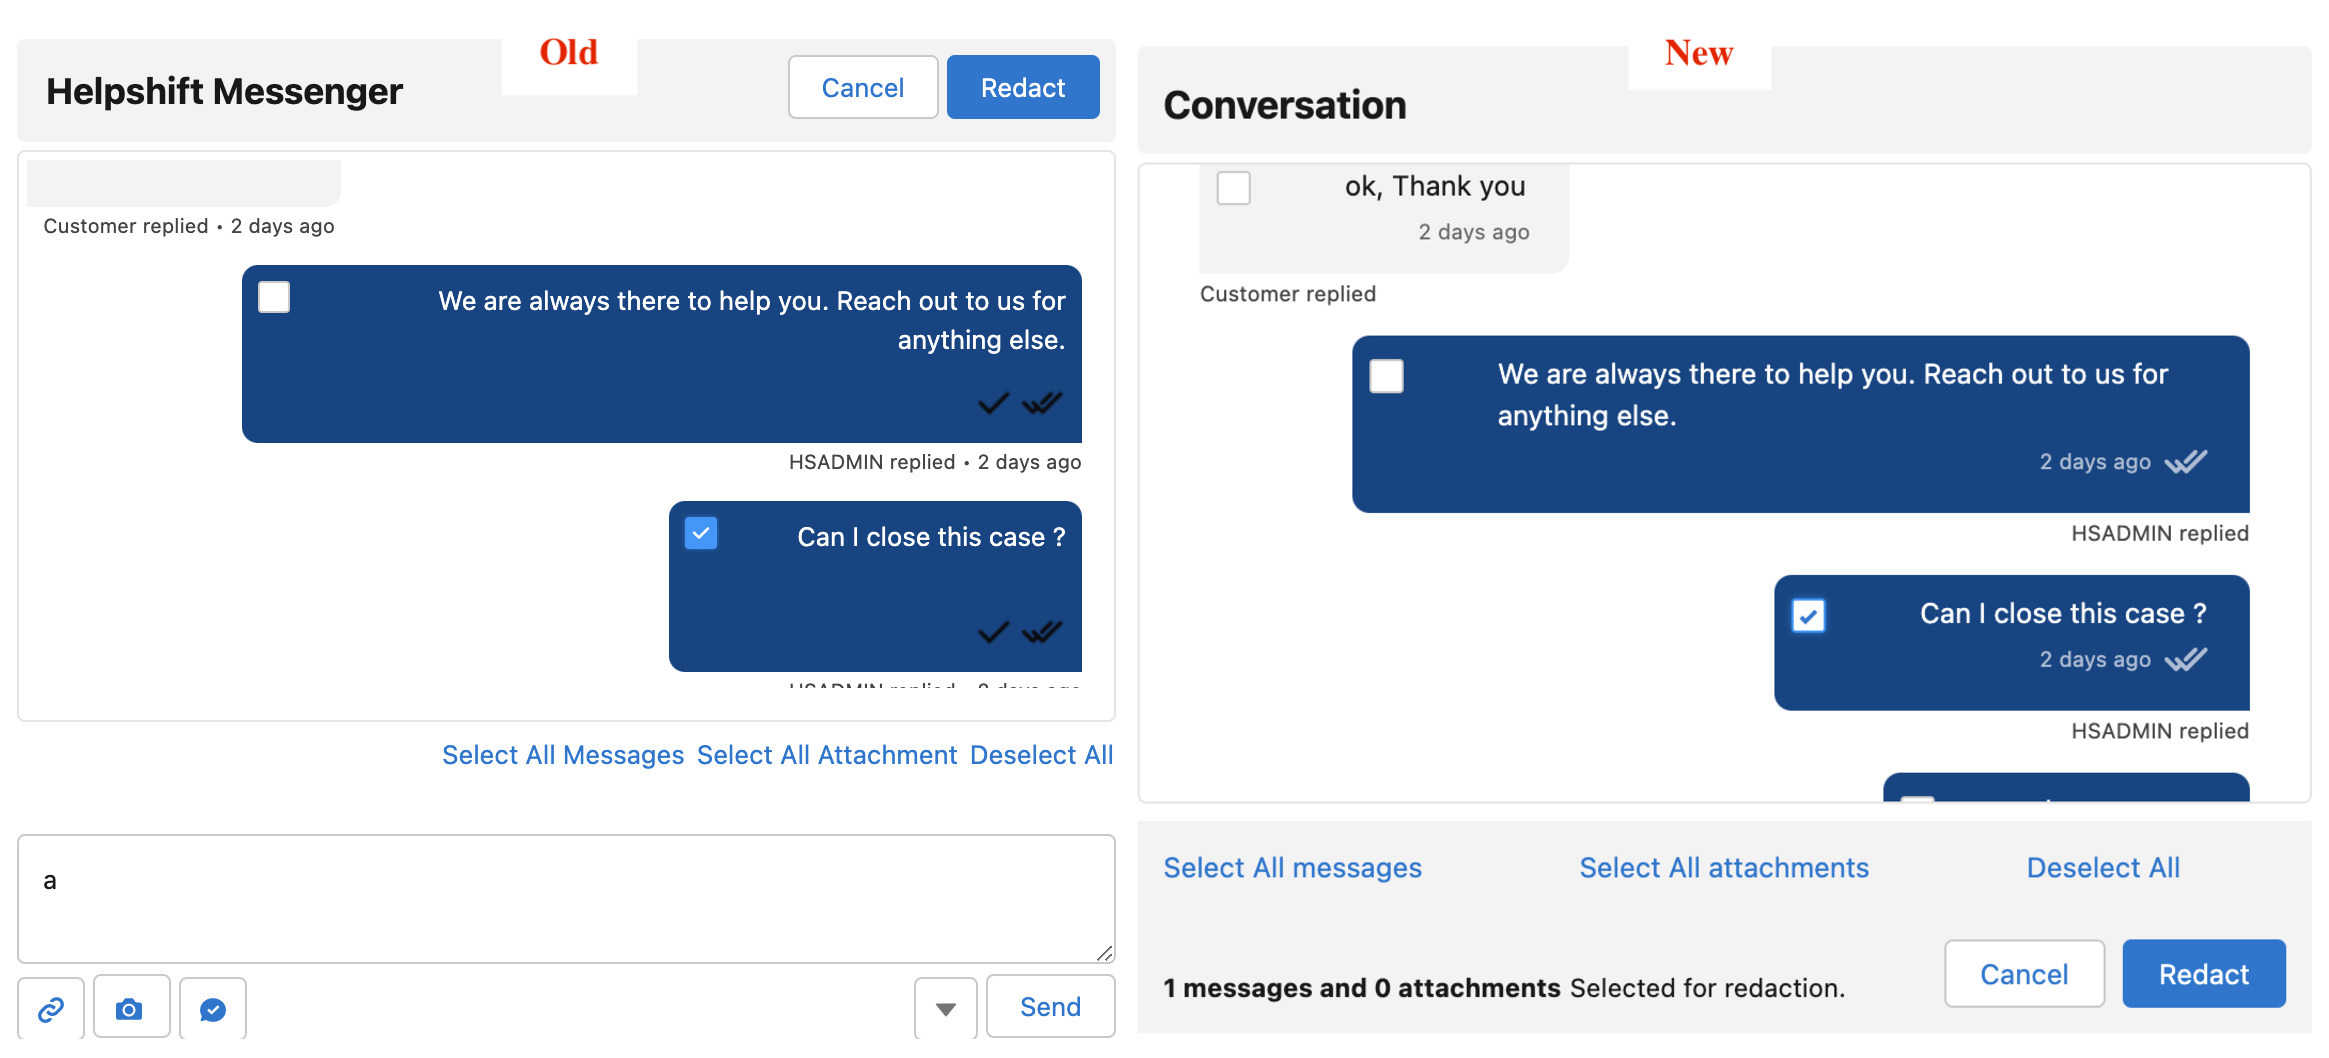
Redaction settings moved to the bottom of messenger
- Redaction operation made easy to use.
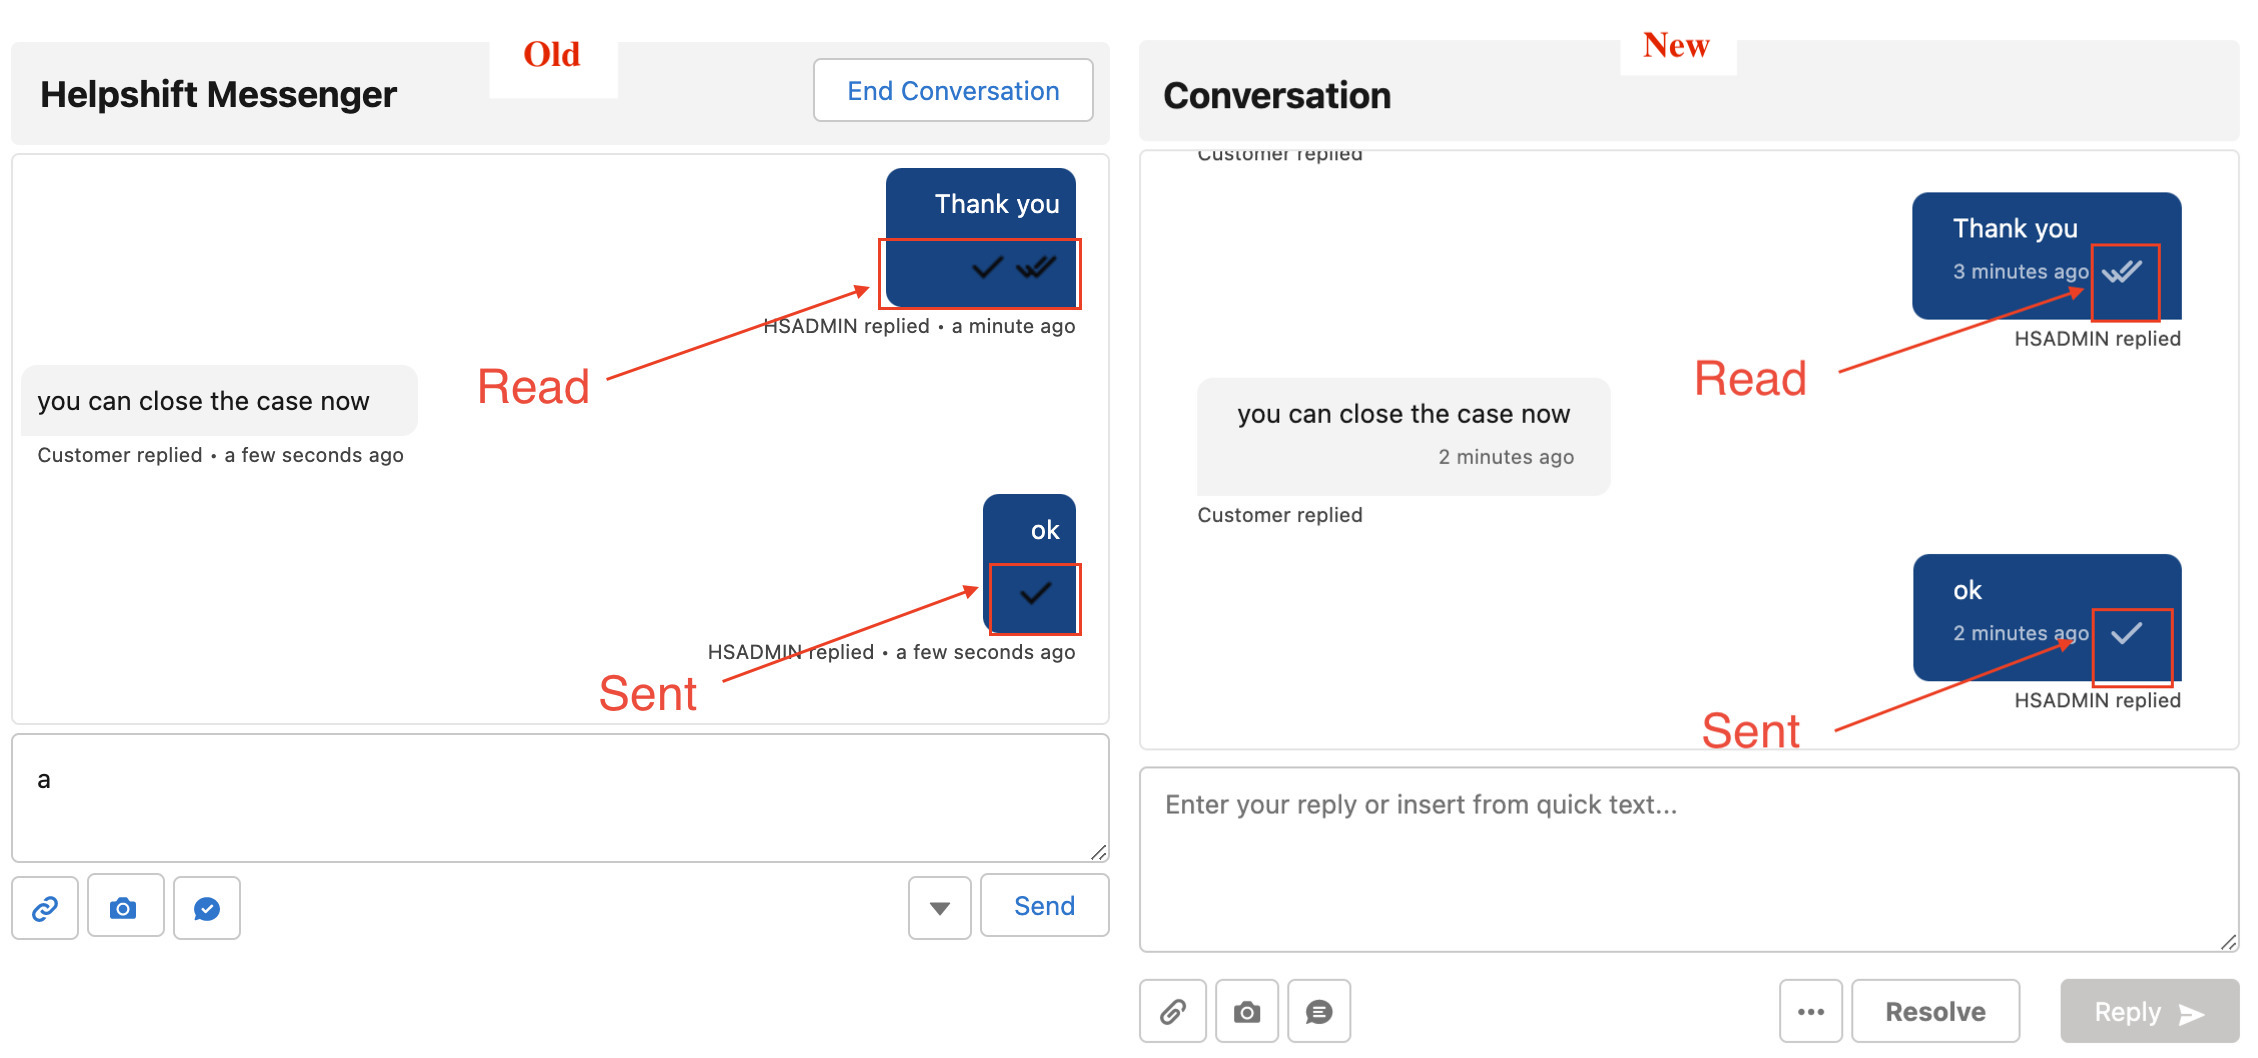
Send/Read receipts appearance change
- Send/Read receipts similar to Helpshift messenger
Chatbox height increase and placeholder text change
- Chatbox height is increased for accommodating longer messages. The height can be further increased by dragging the bottom right corner.
Dashboard URL field label change

Upgrading to 3.3
Tab highlighting can be enabled for Salesforce Console Apps like Service Console.
Step 1 (Add highlight tab component to utility)
- Navigate to Setup and search for App Manager.
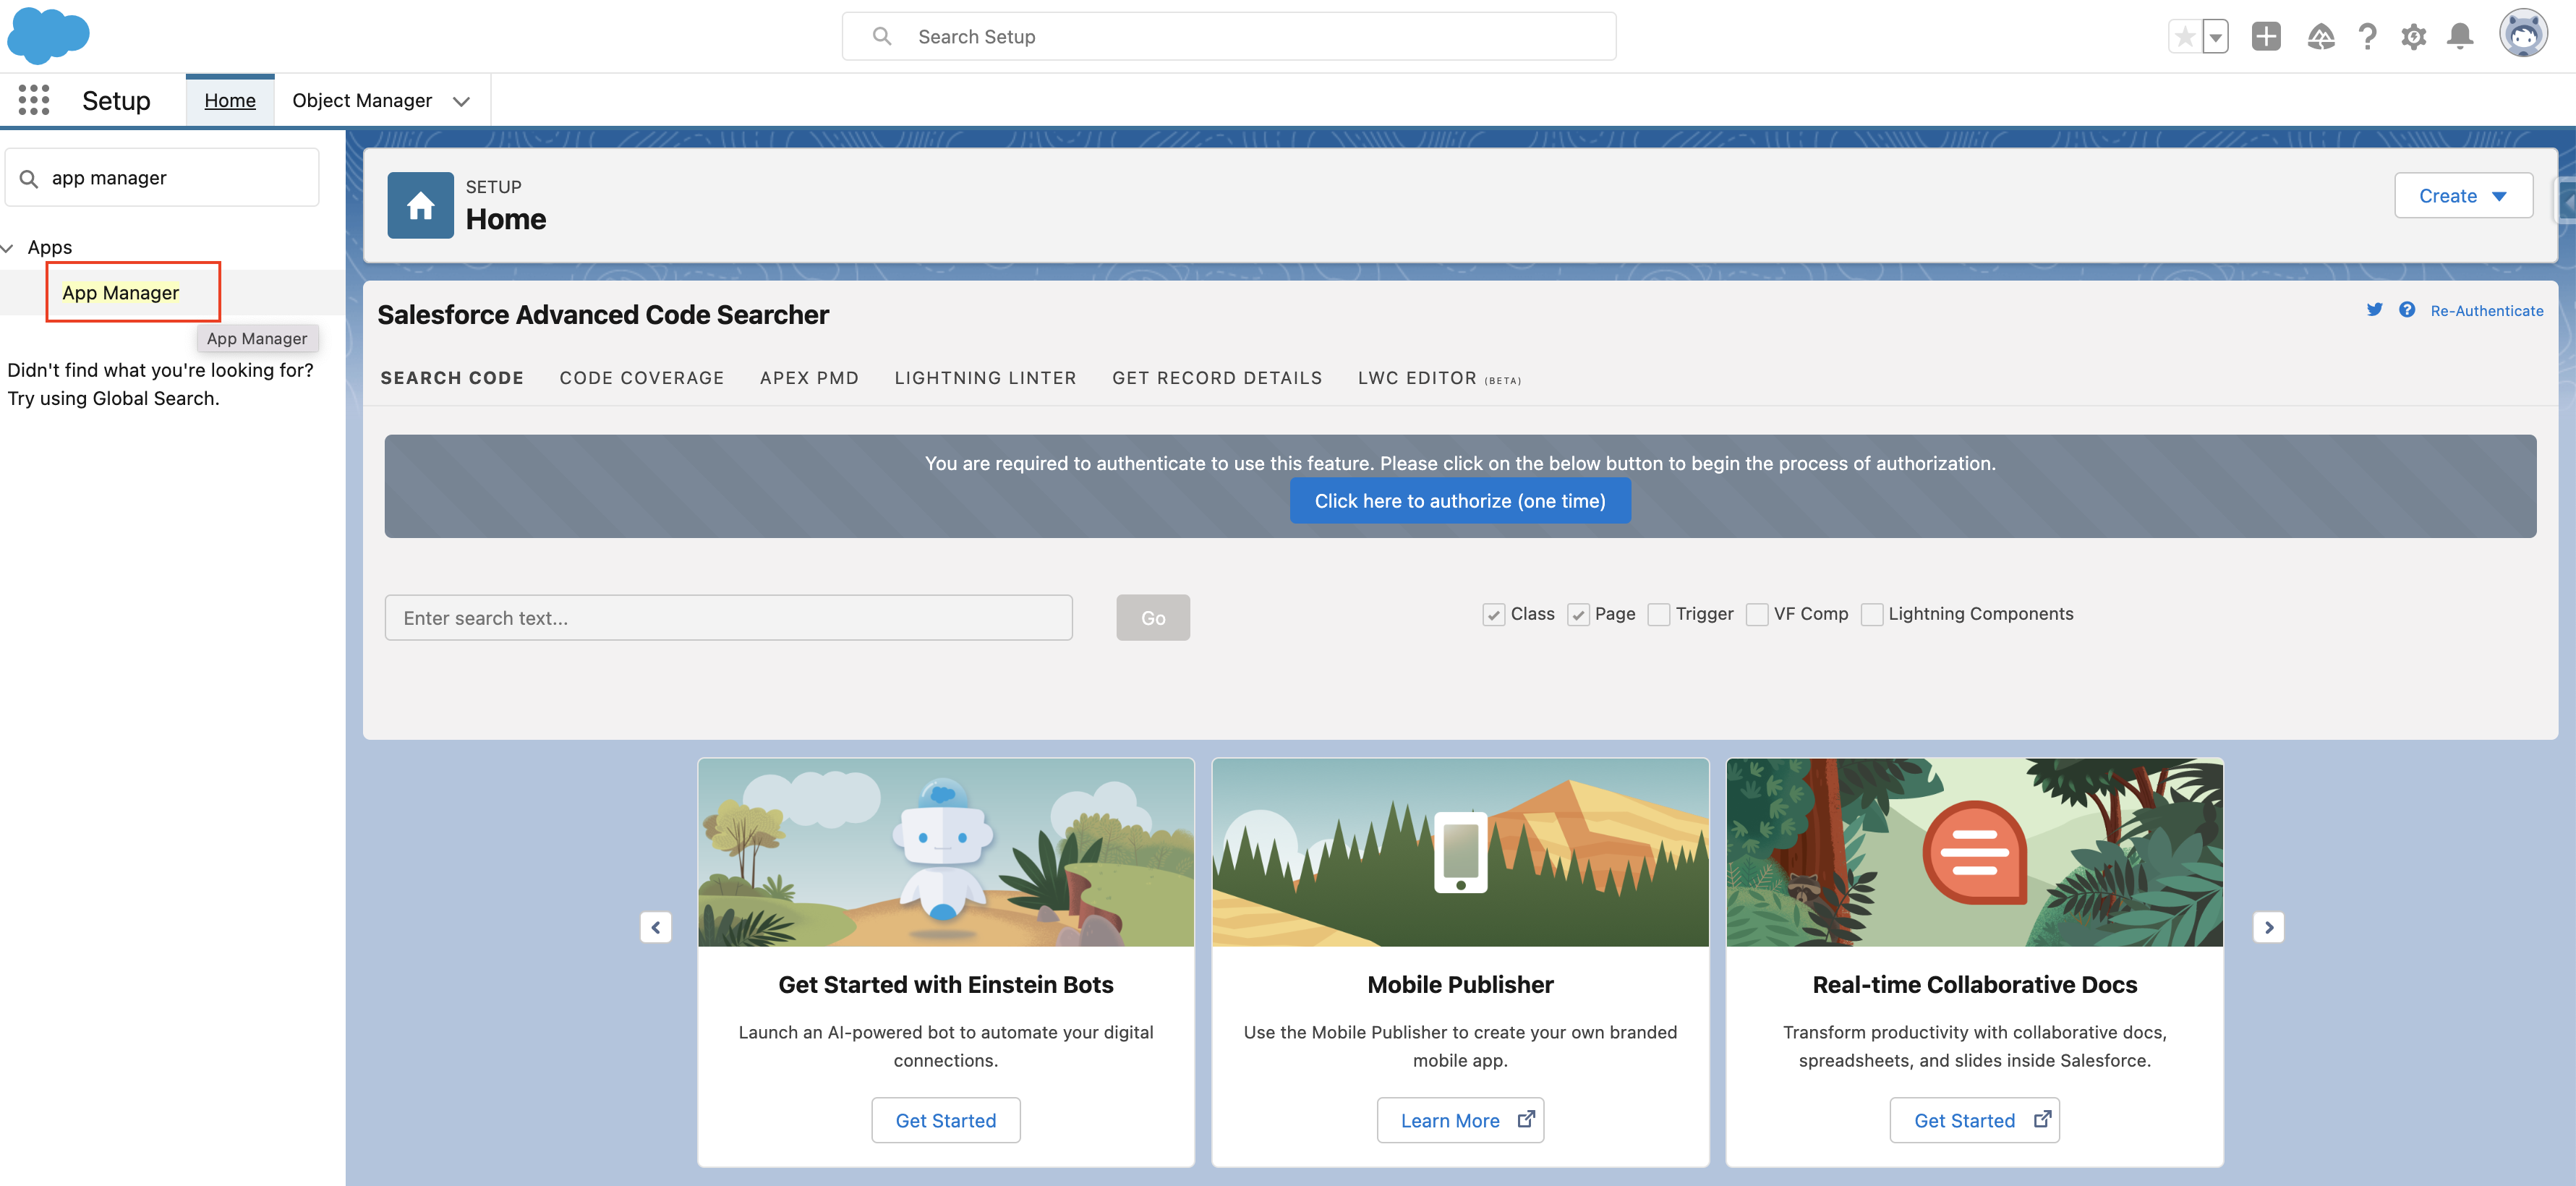
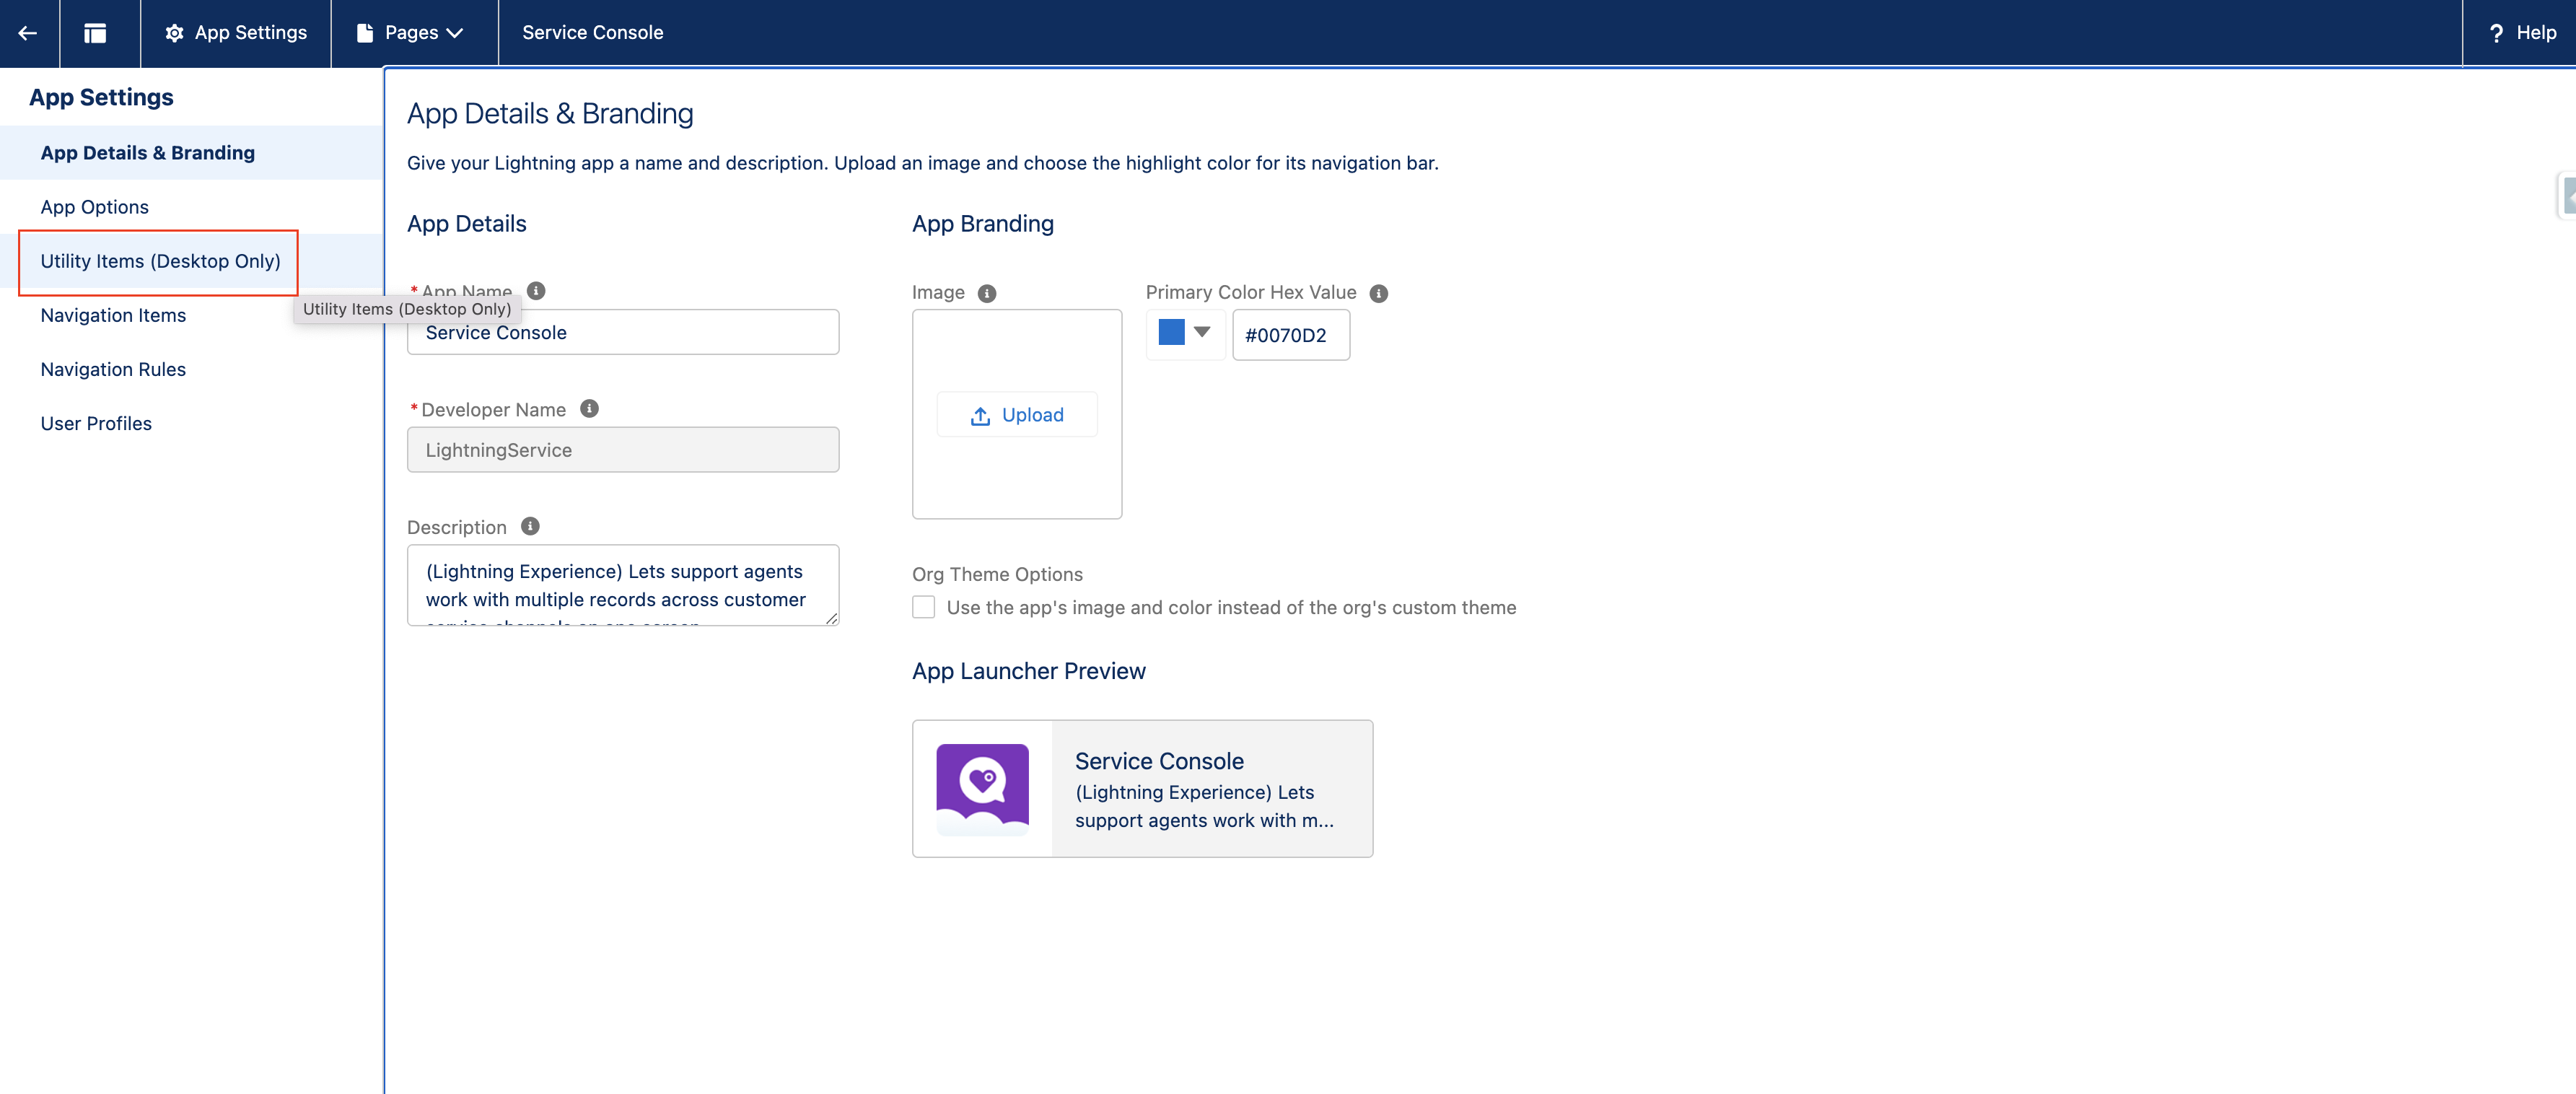
- Search for the desired console app and click on edit as shown below :

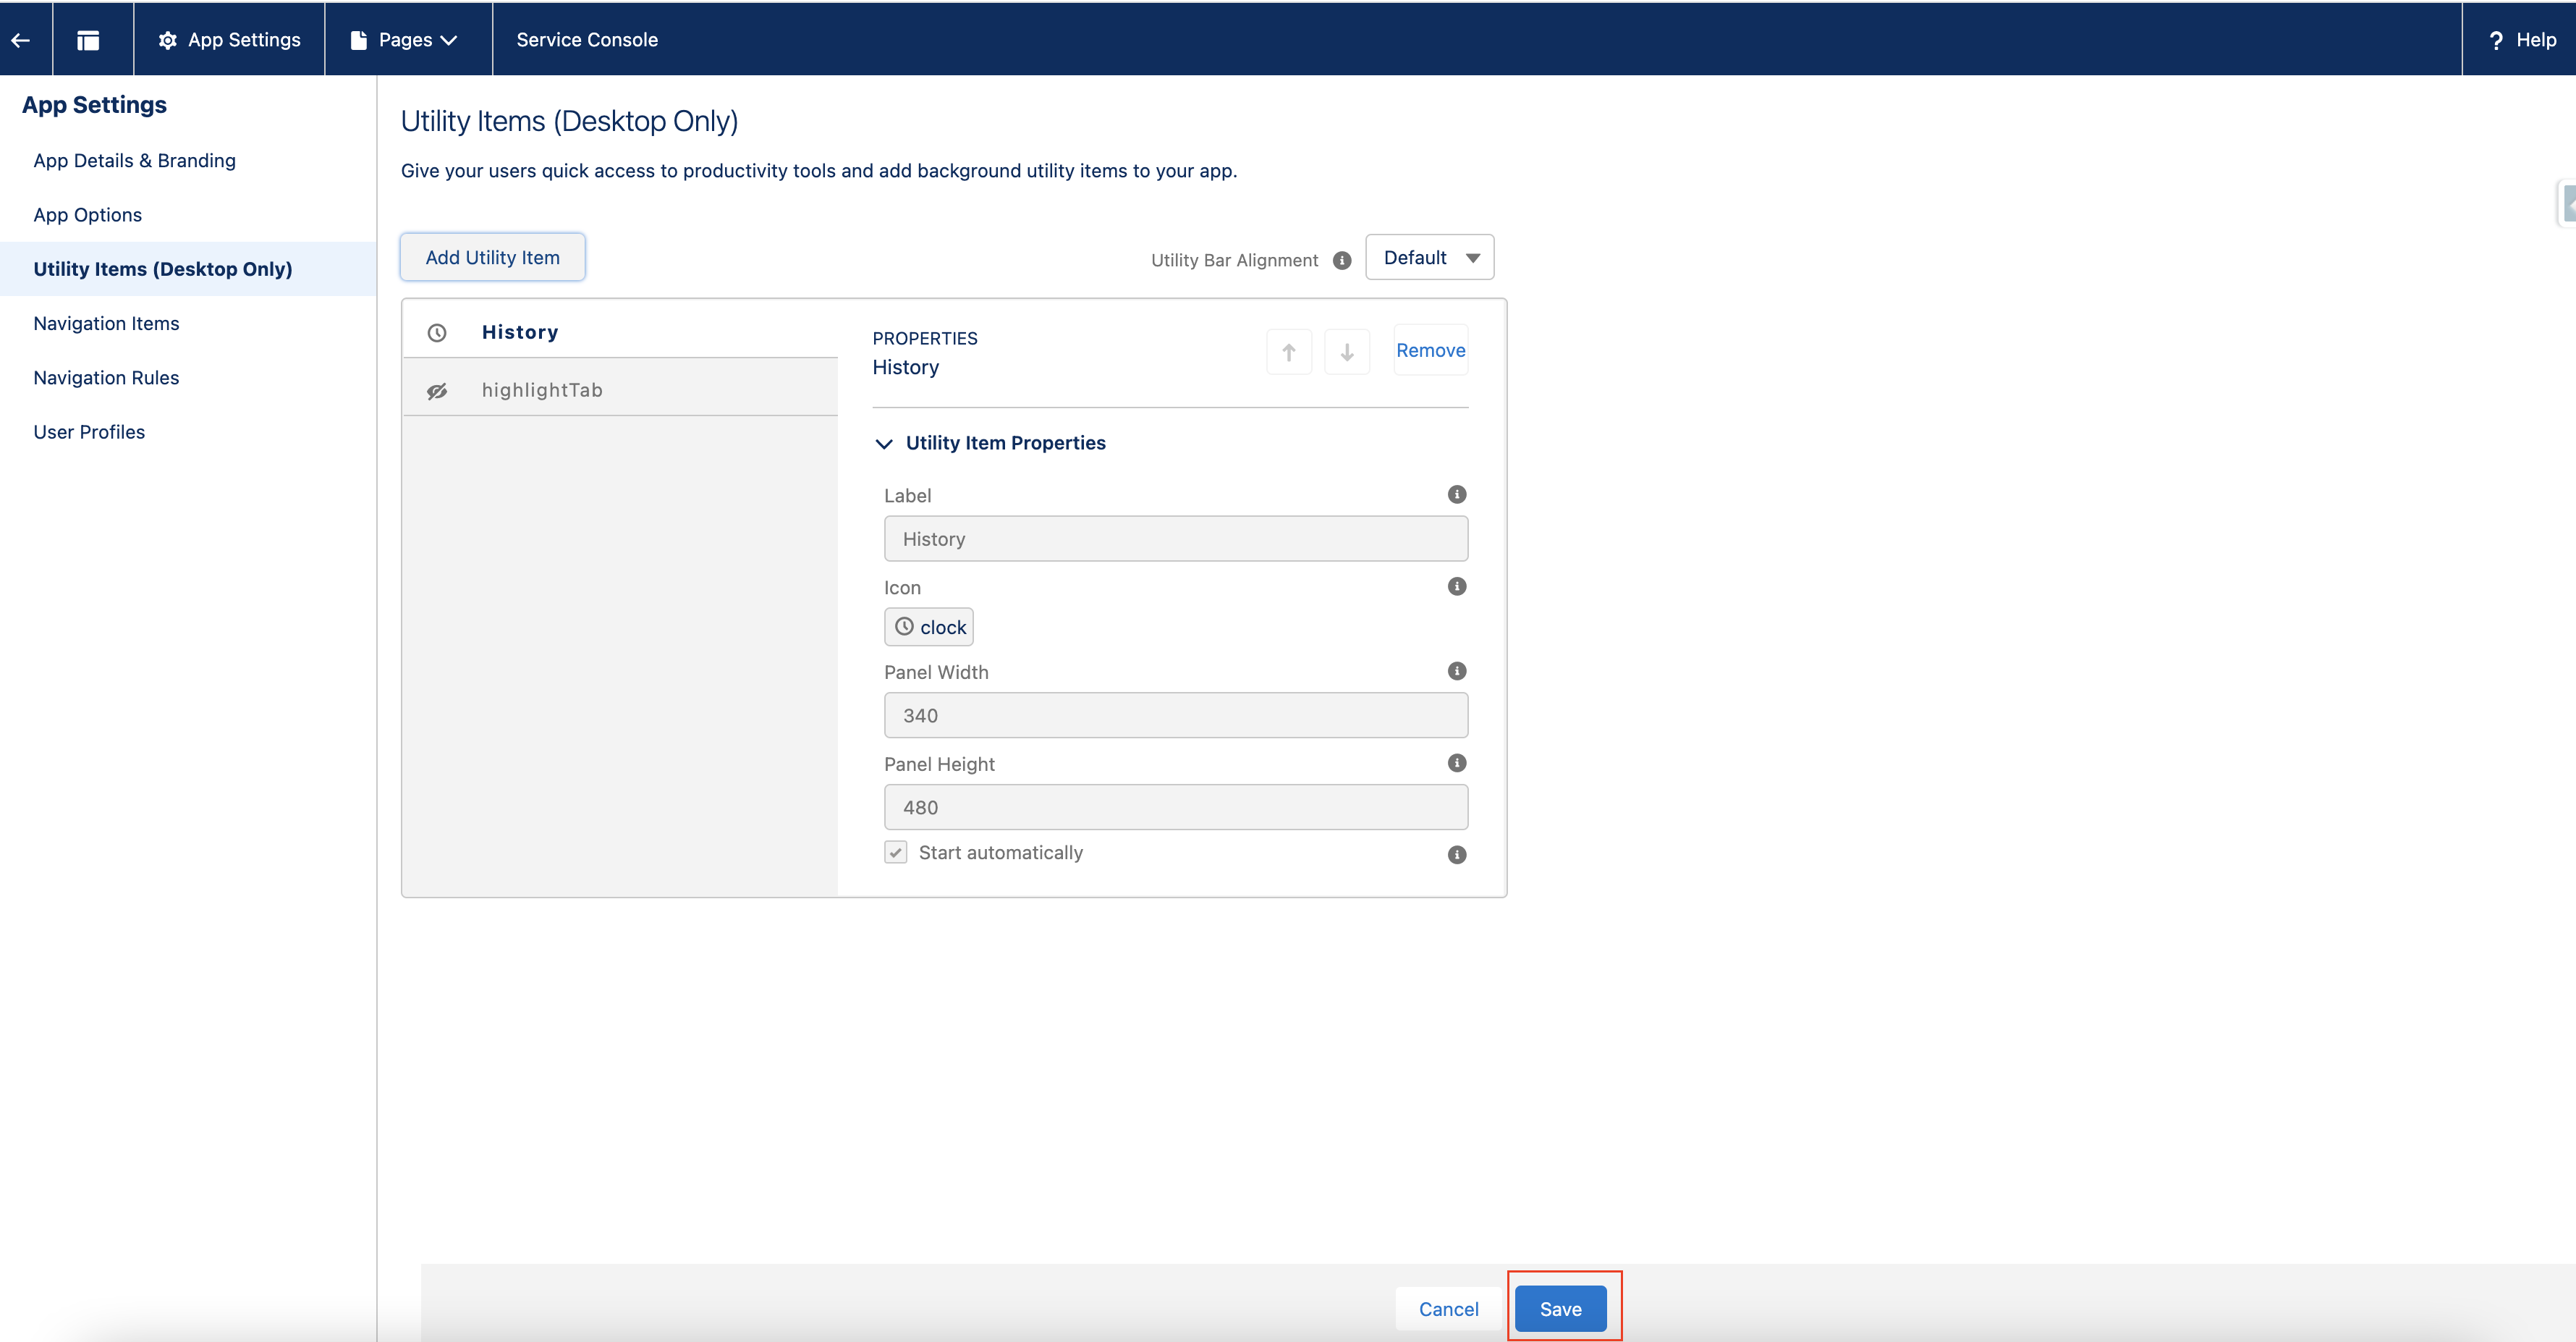
- In the editor, click on Utility Items (Desktop Only) as shown below :
- Click on Add Utility Item and search for highlightTab :
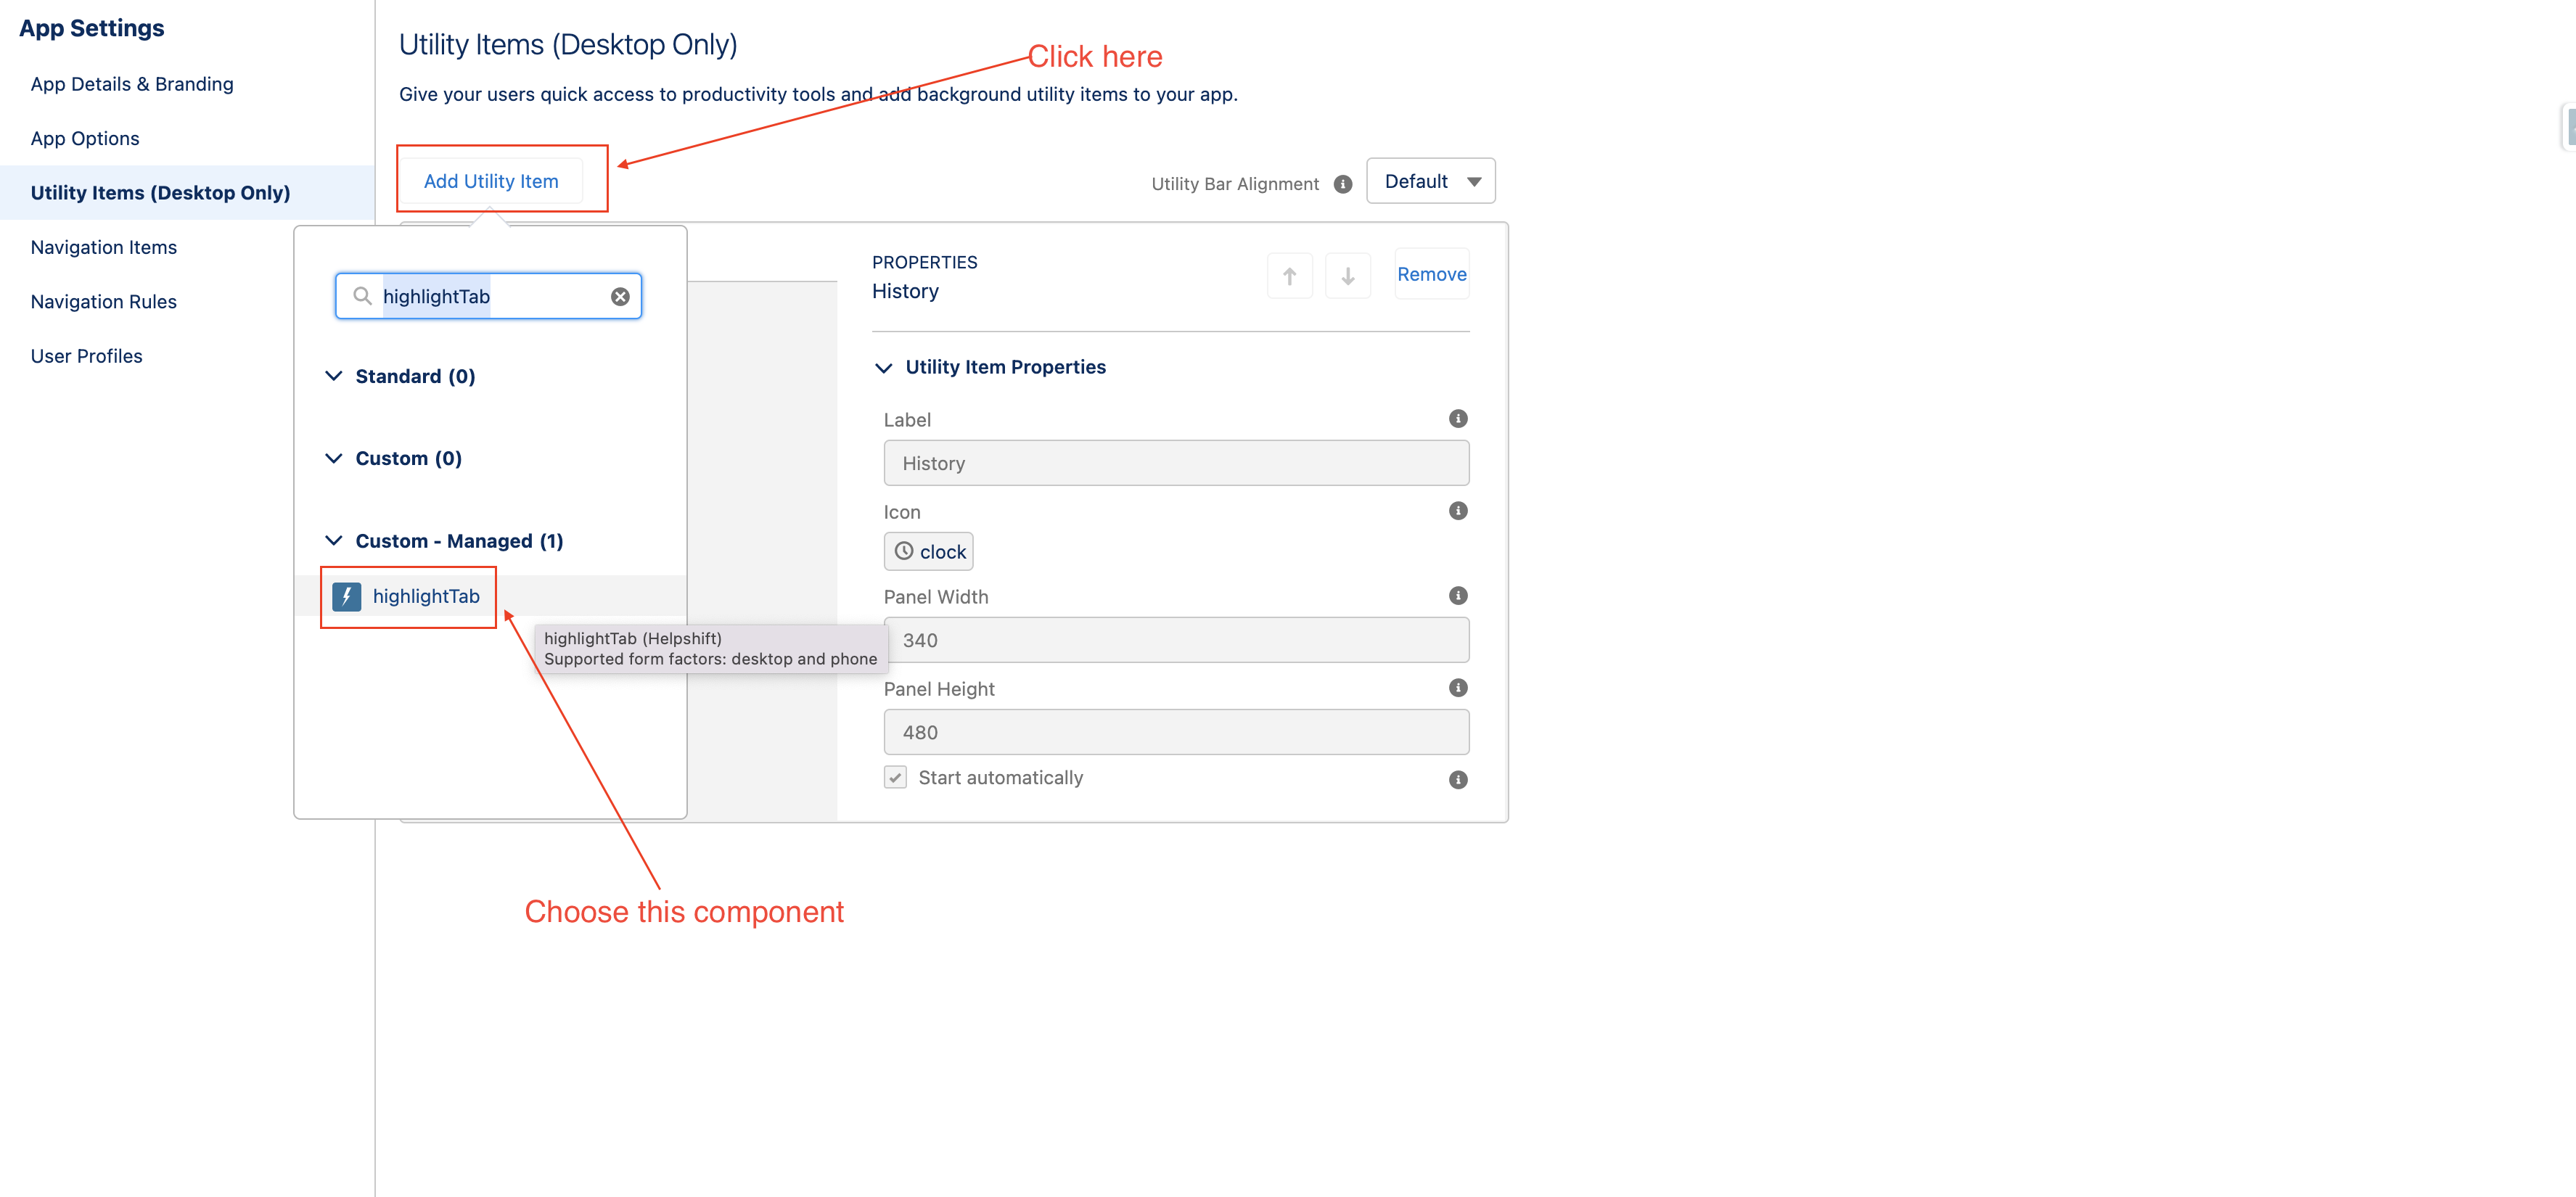
- After choosing the highlightTab component, click on Save :
Step 2 (Add new dashboard to the app)
New Helpshift Dashboard is automatically included in the Helpshift App. If it’s not visible, please follow the below steps :
- Click on the Setup icon
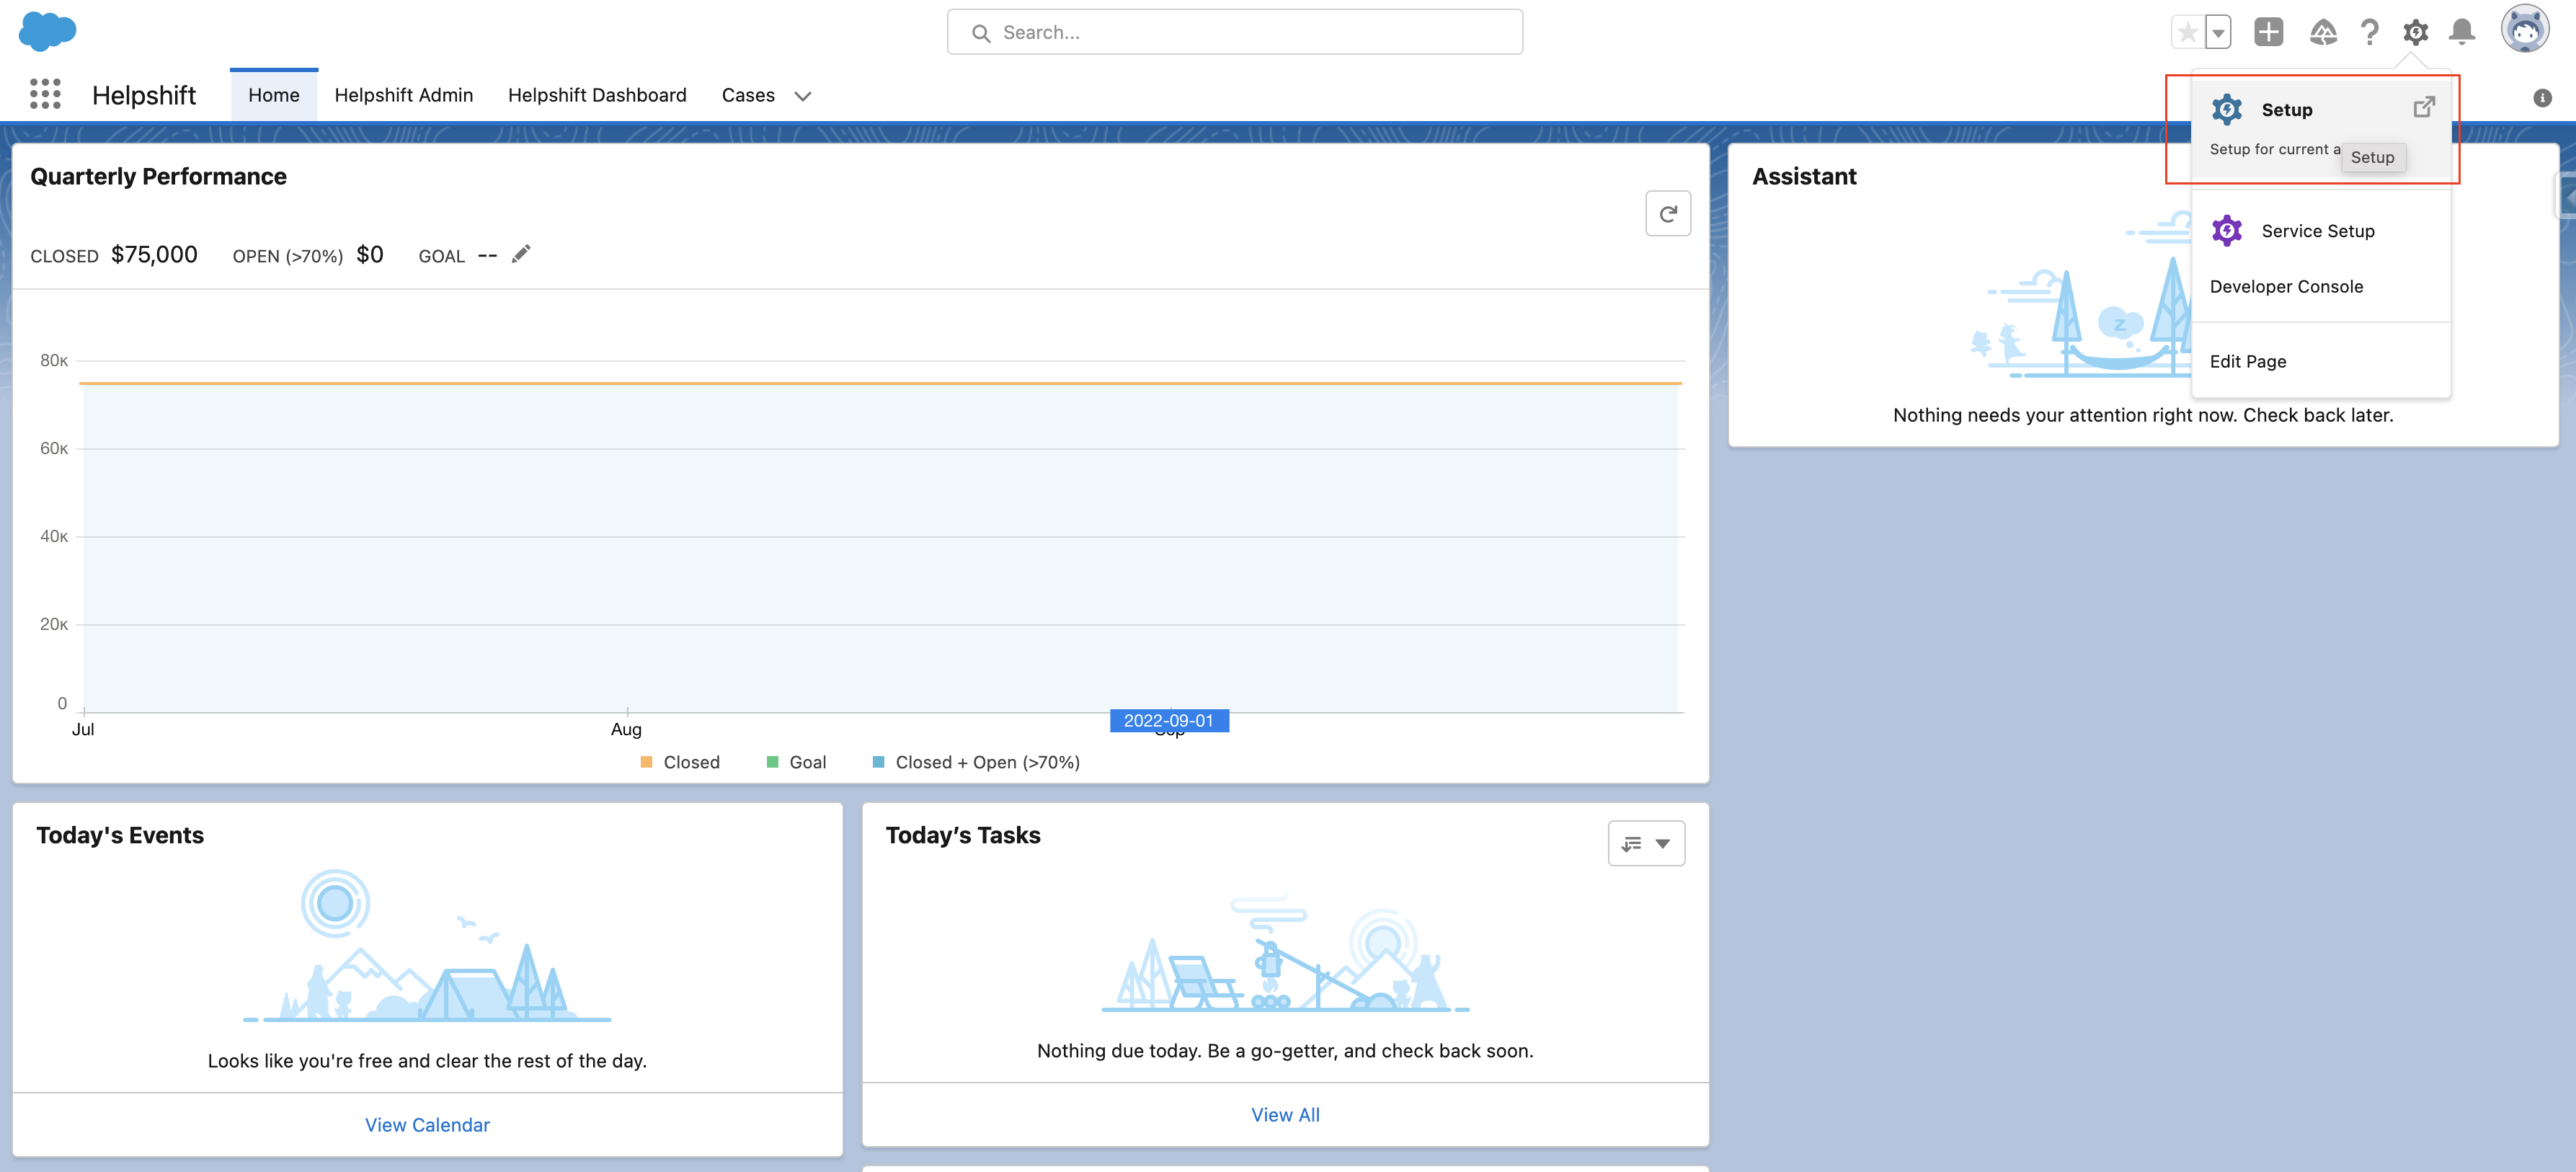
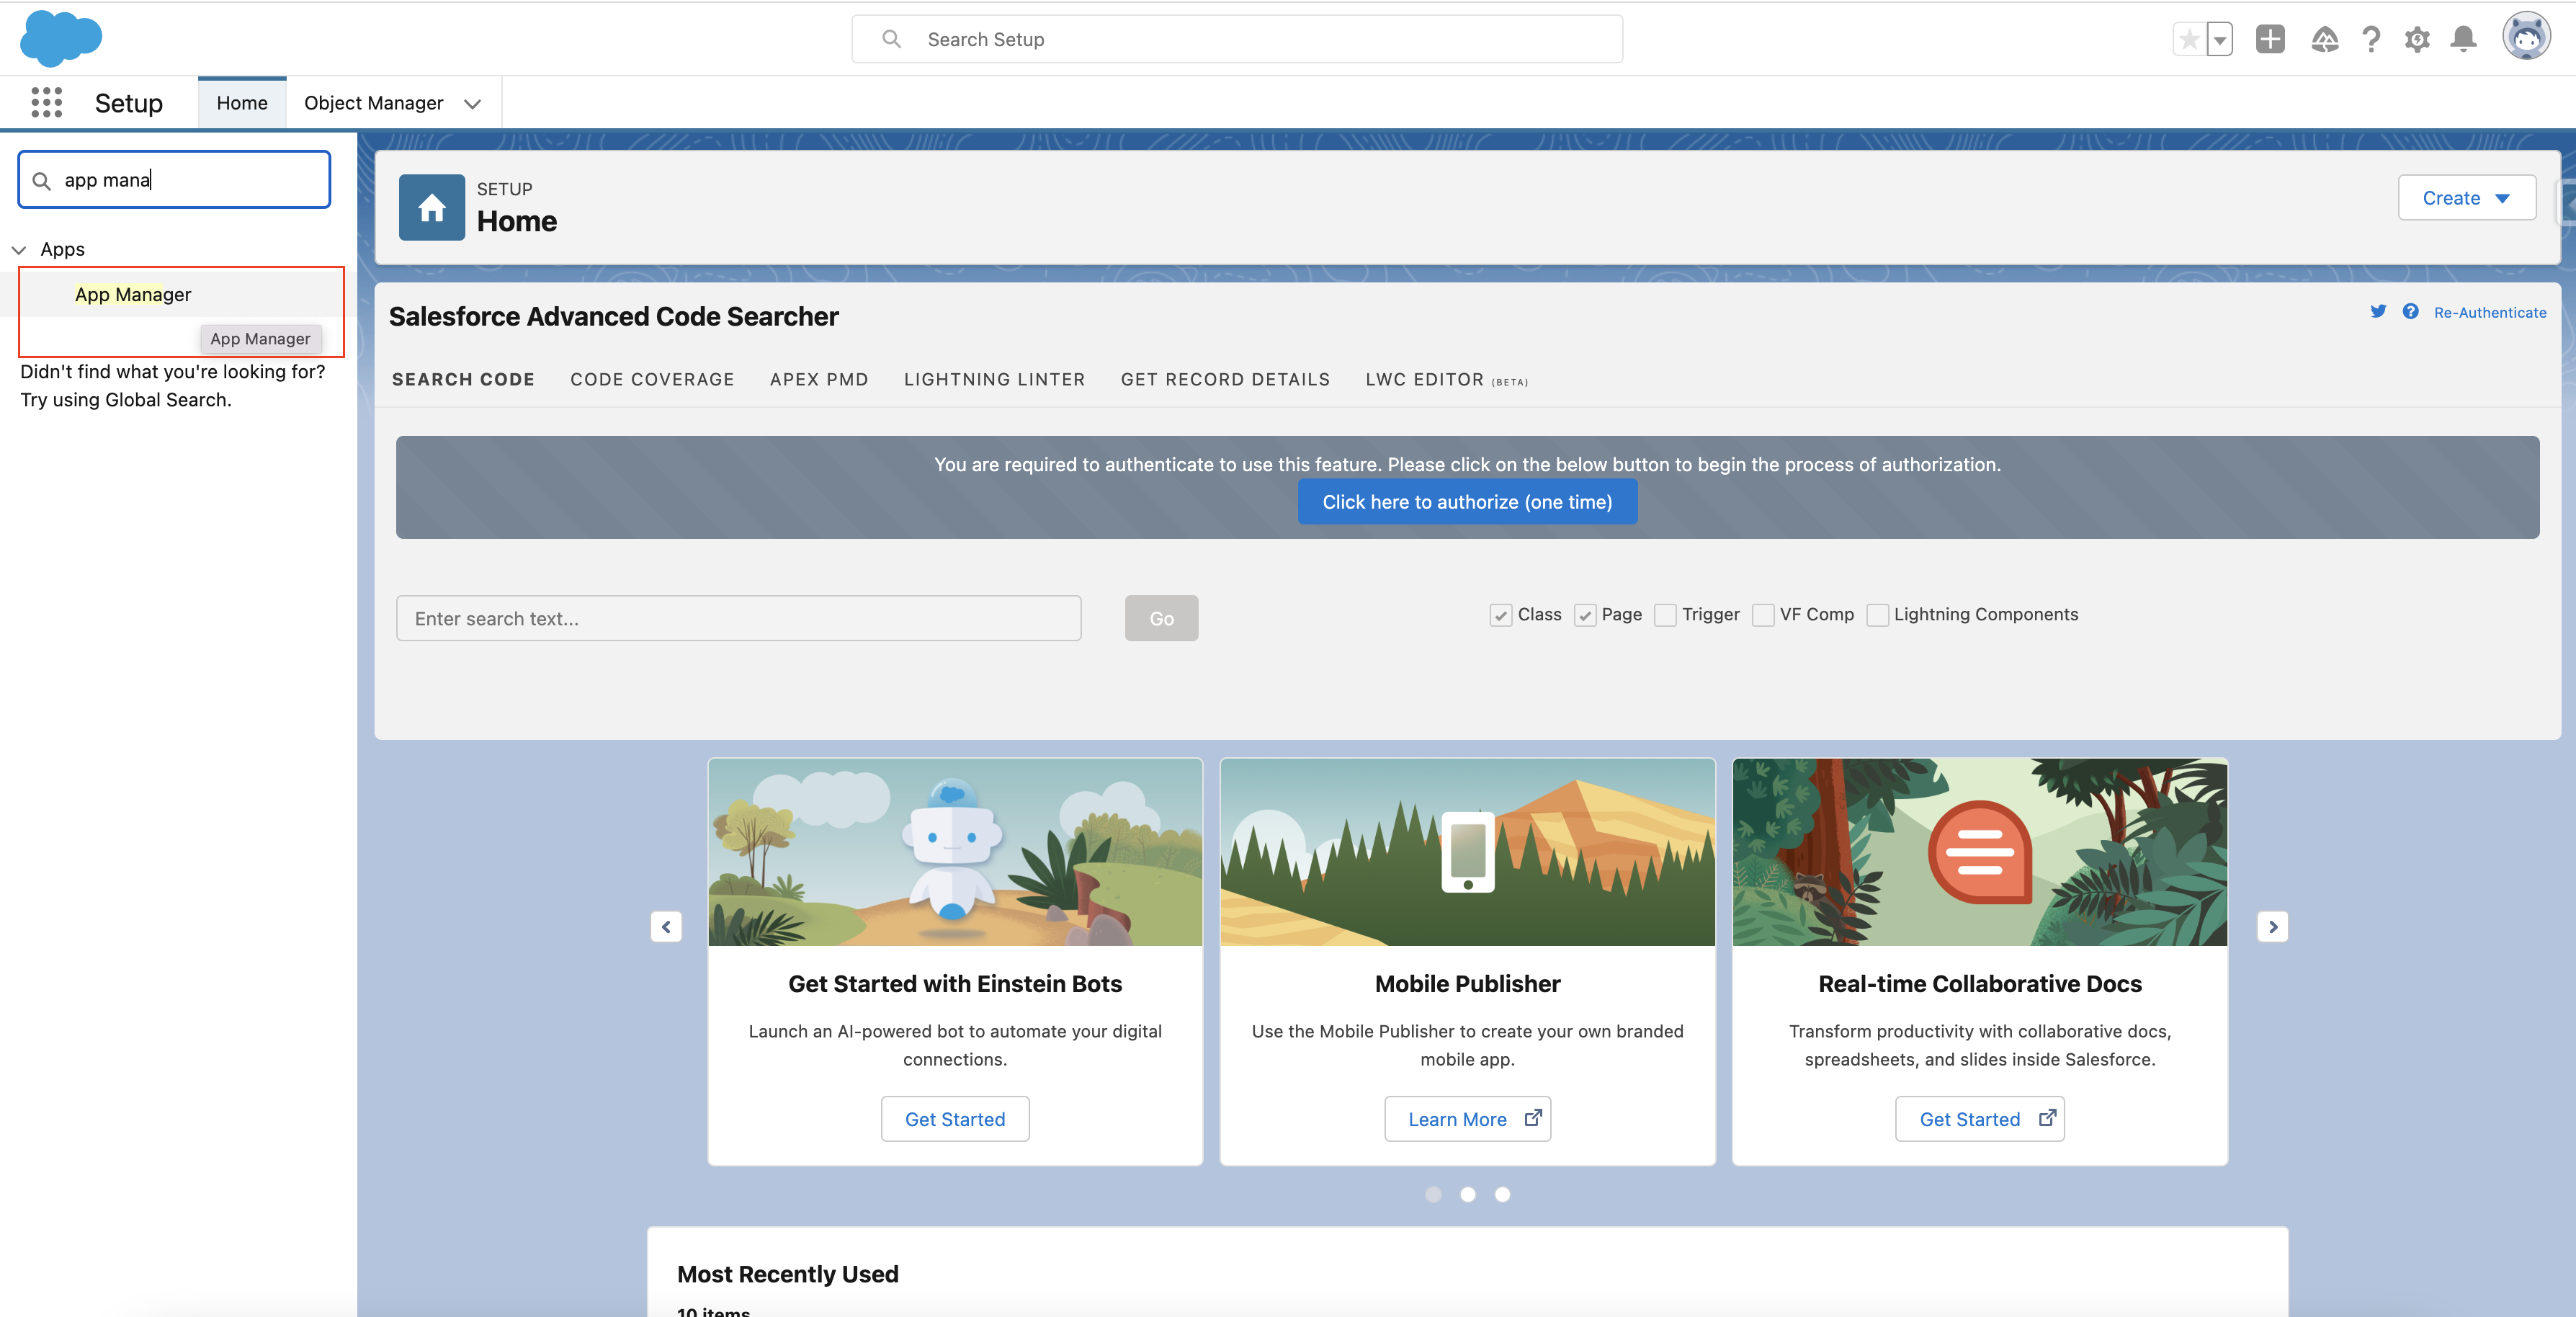
- Search for App Manager in search and click on it
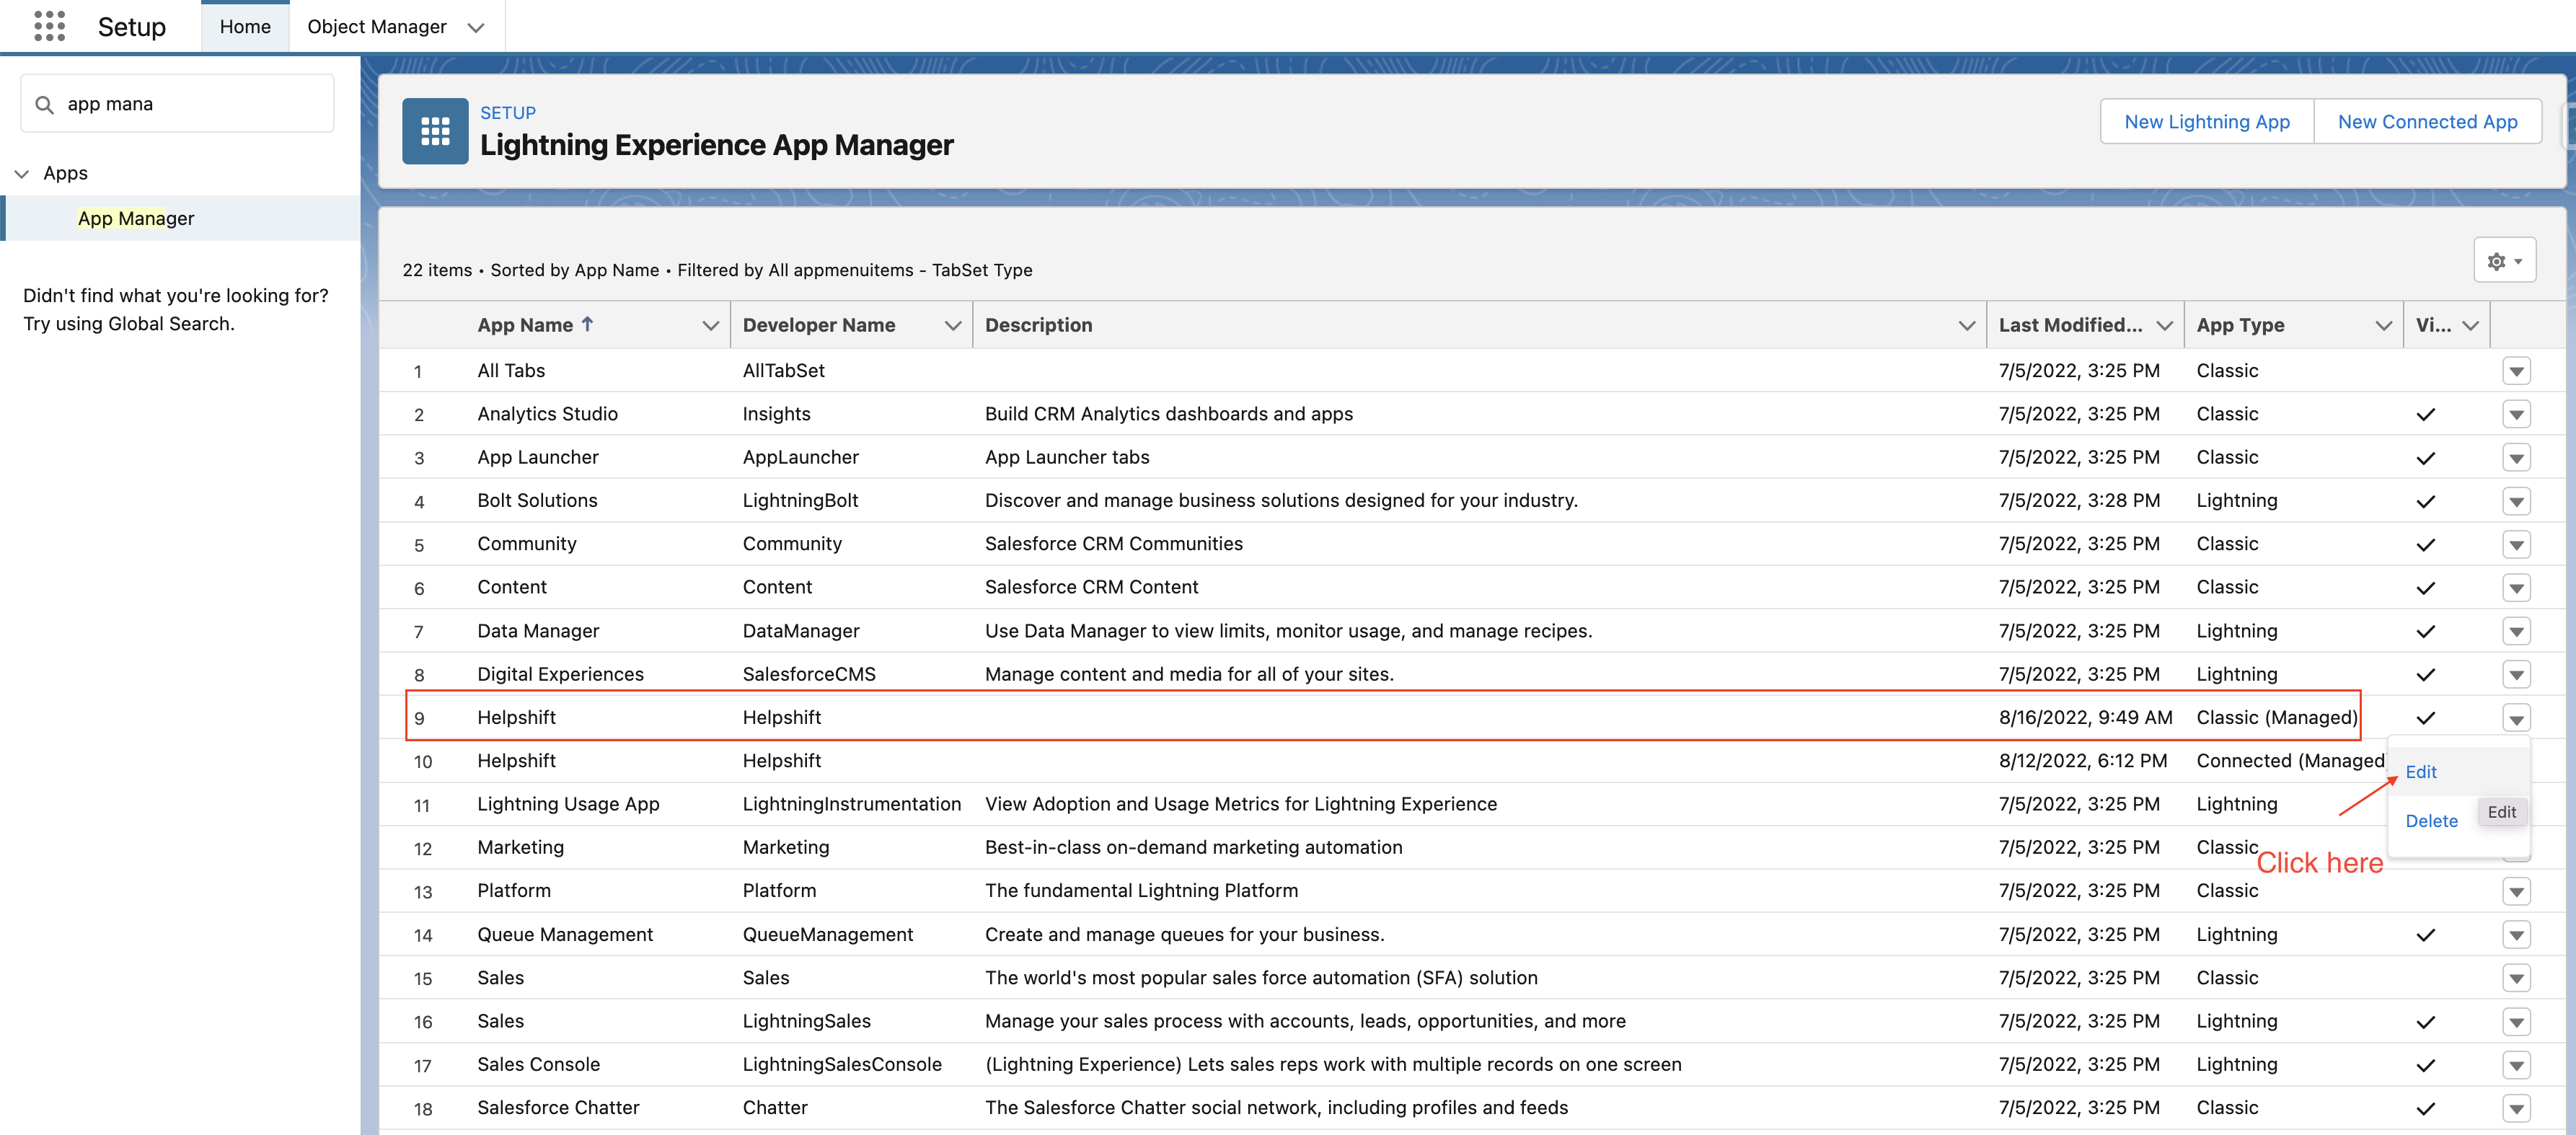
- Search for the Helpshift classic app and click on edit
- Add the New Dashboard tab as shown below :
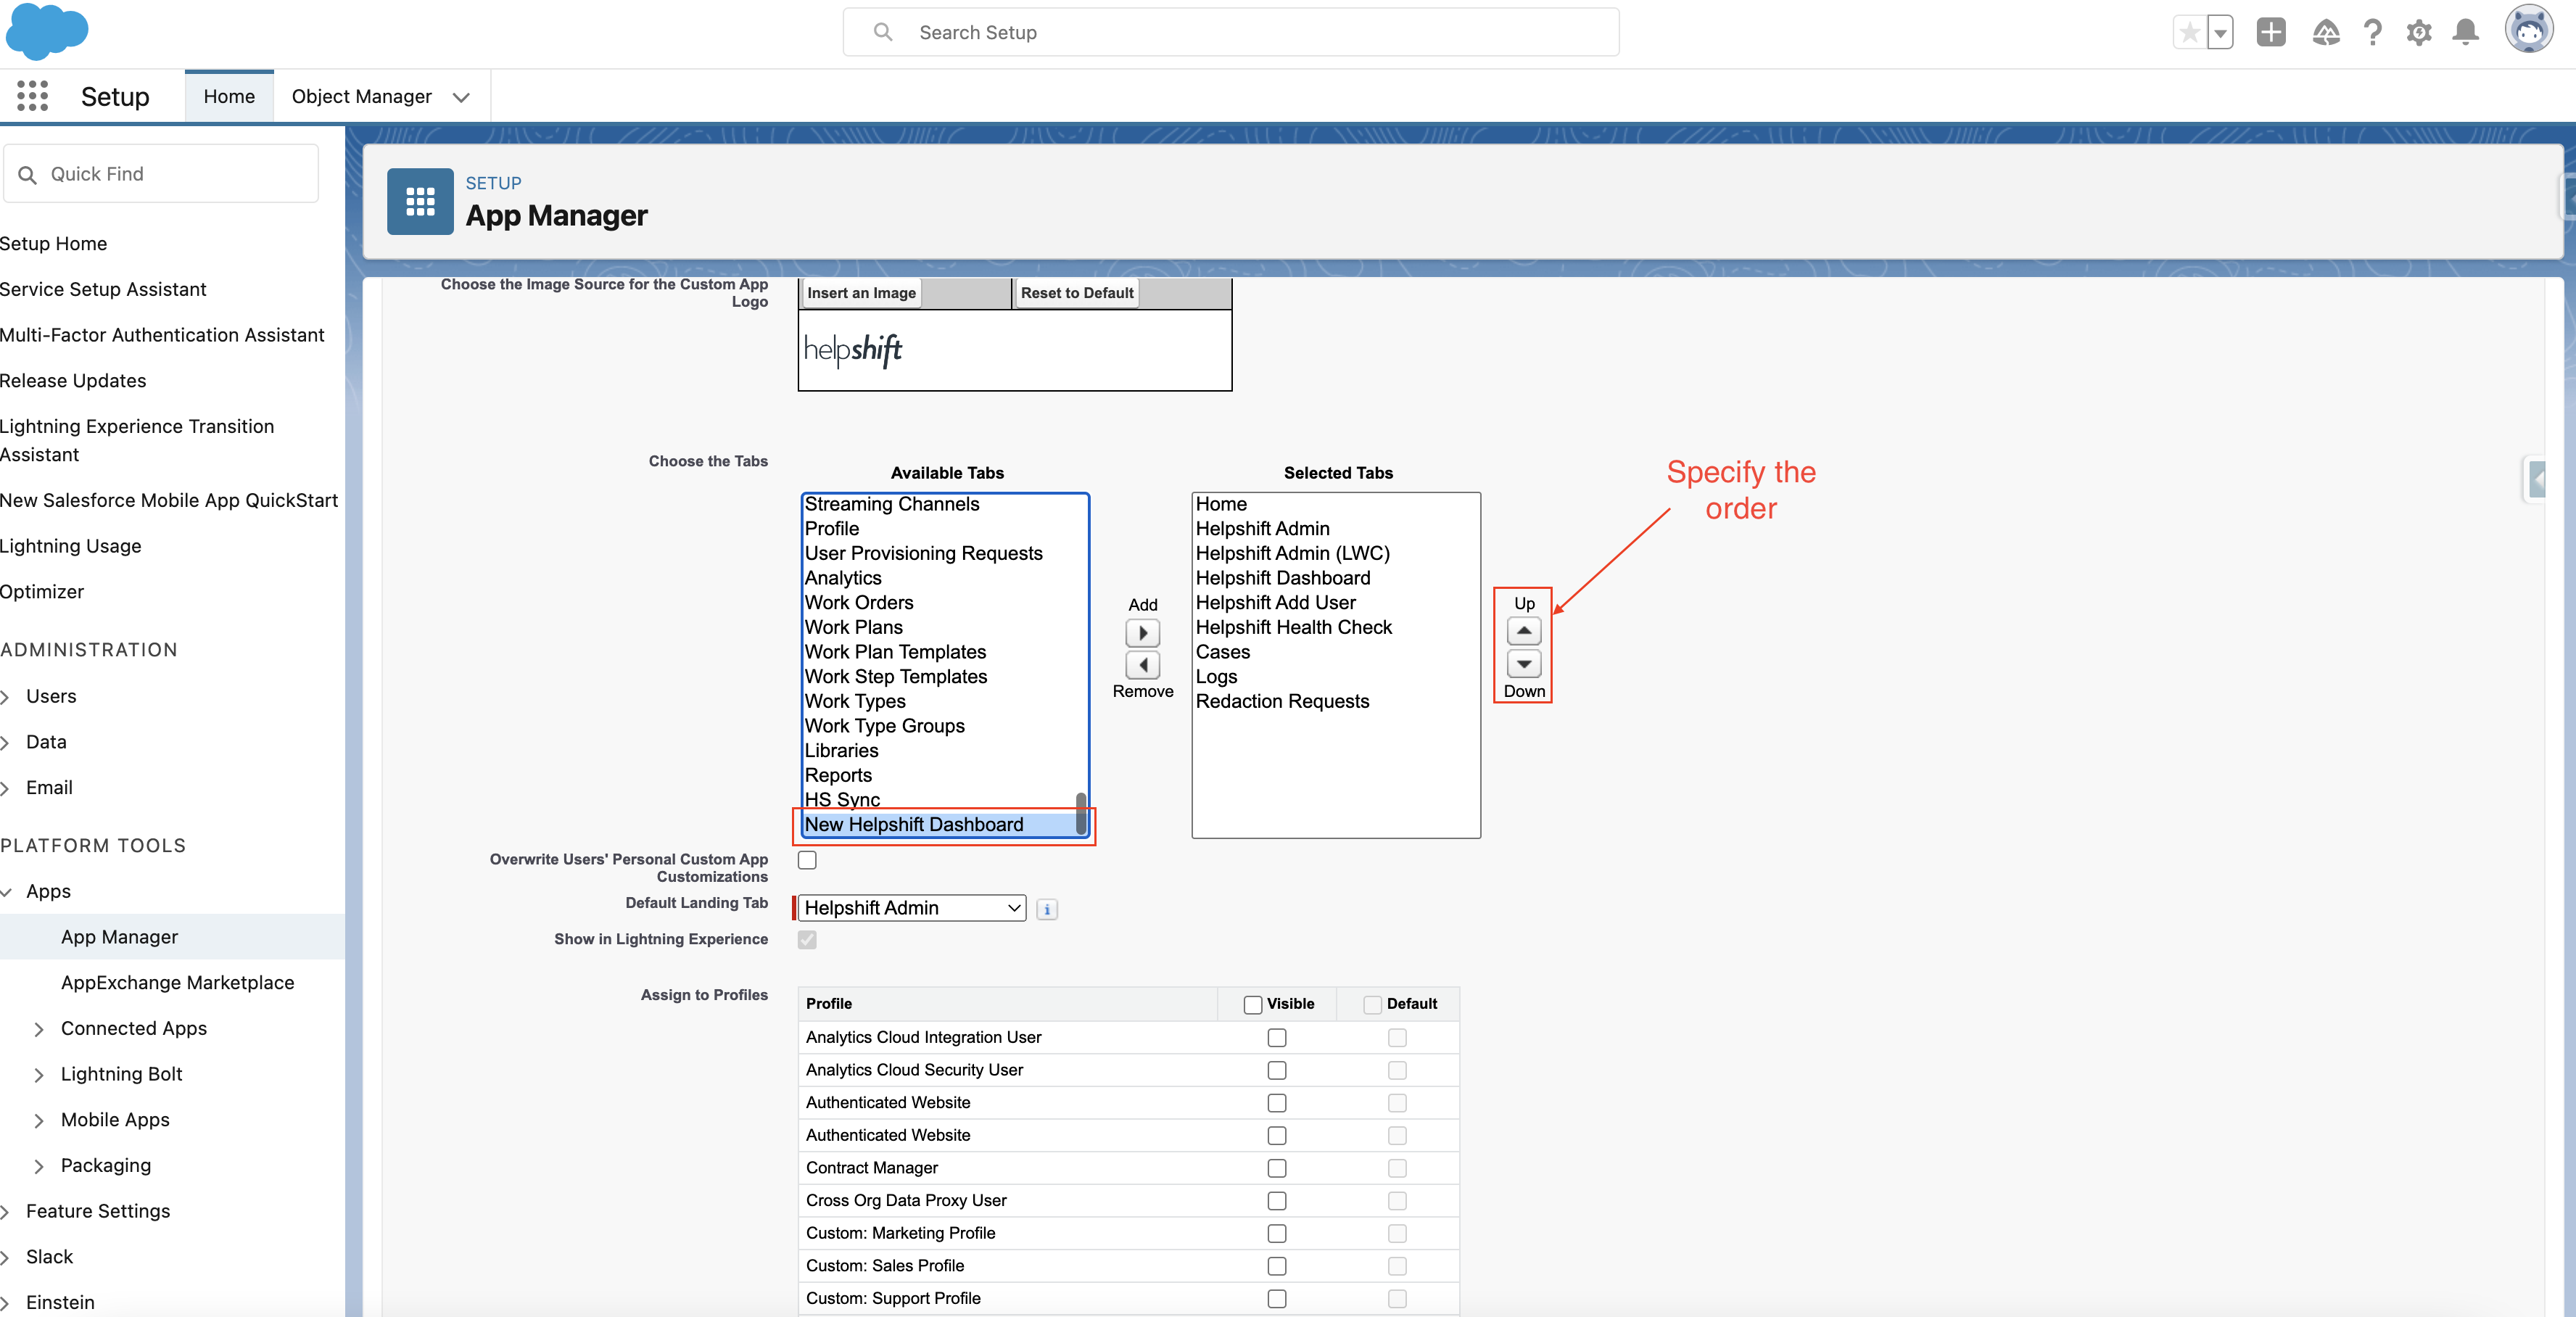
- Click on Save below
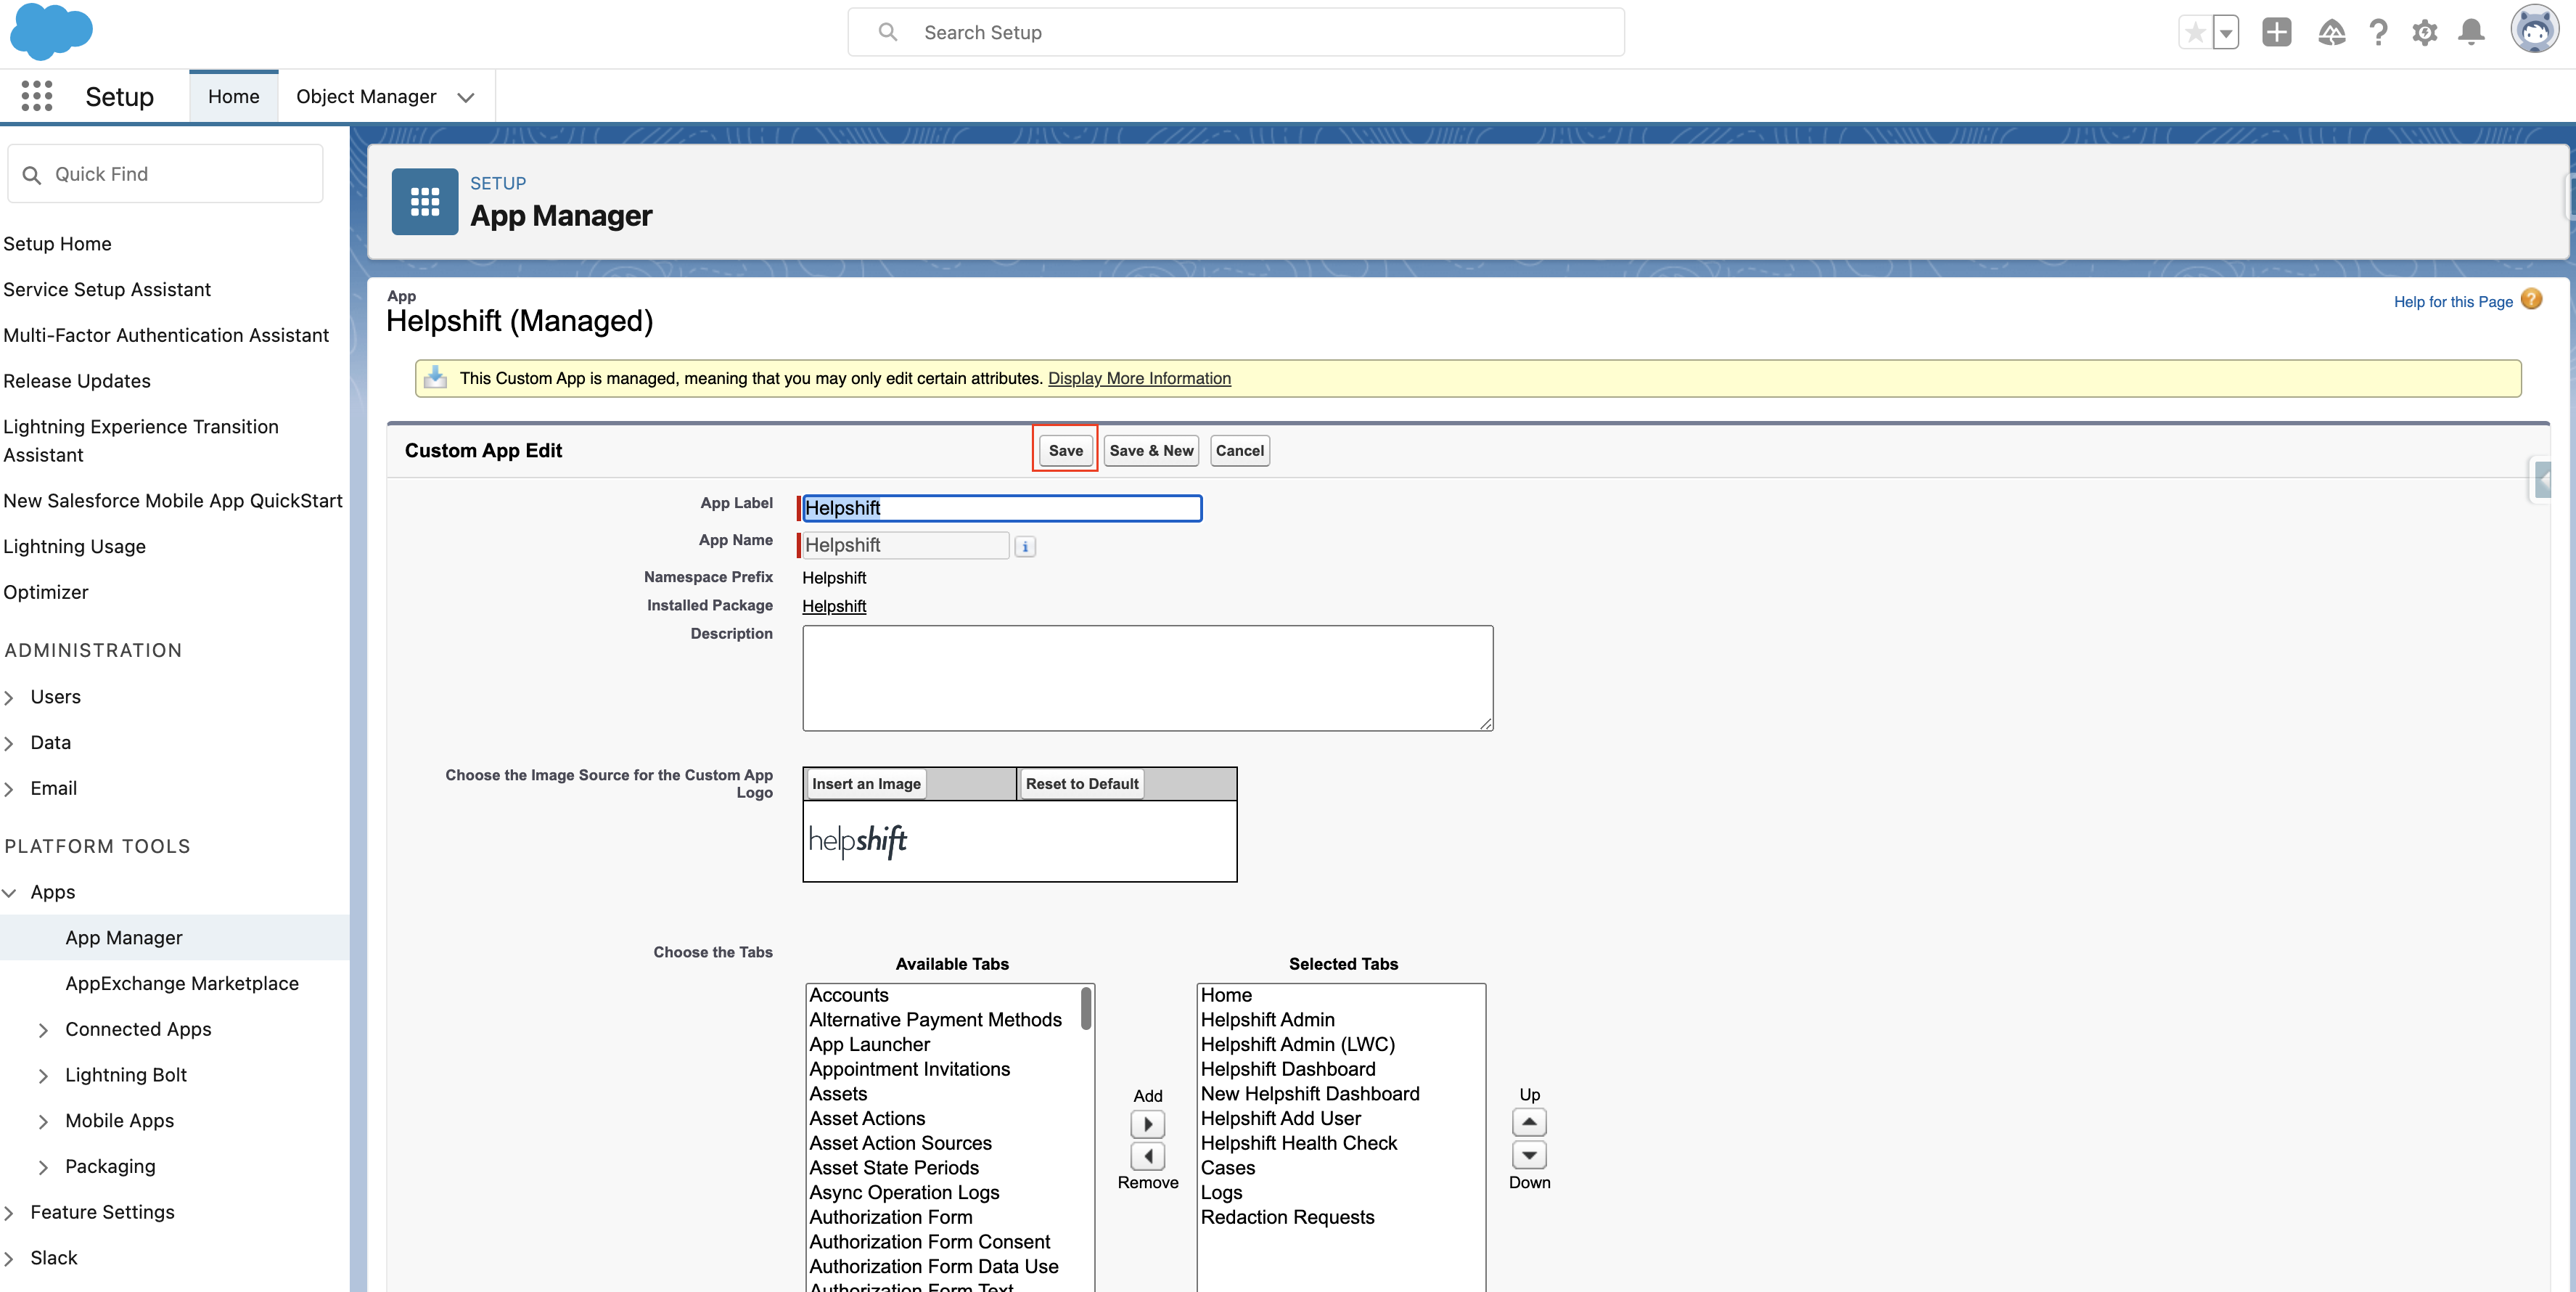
Other functionalities with the new package
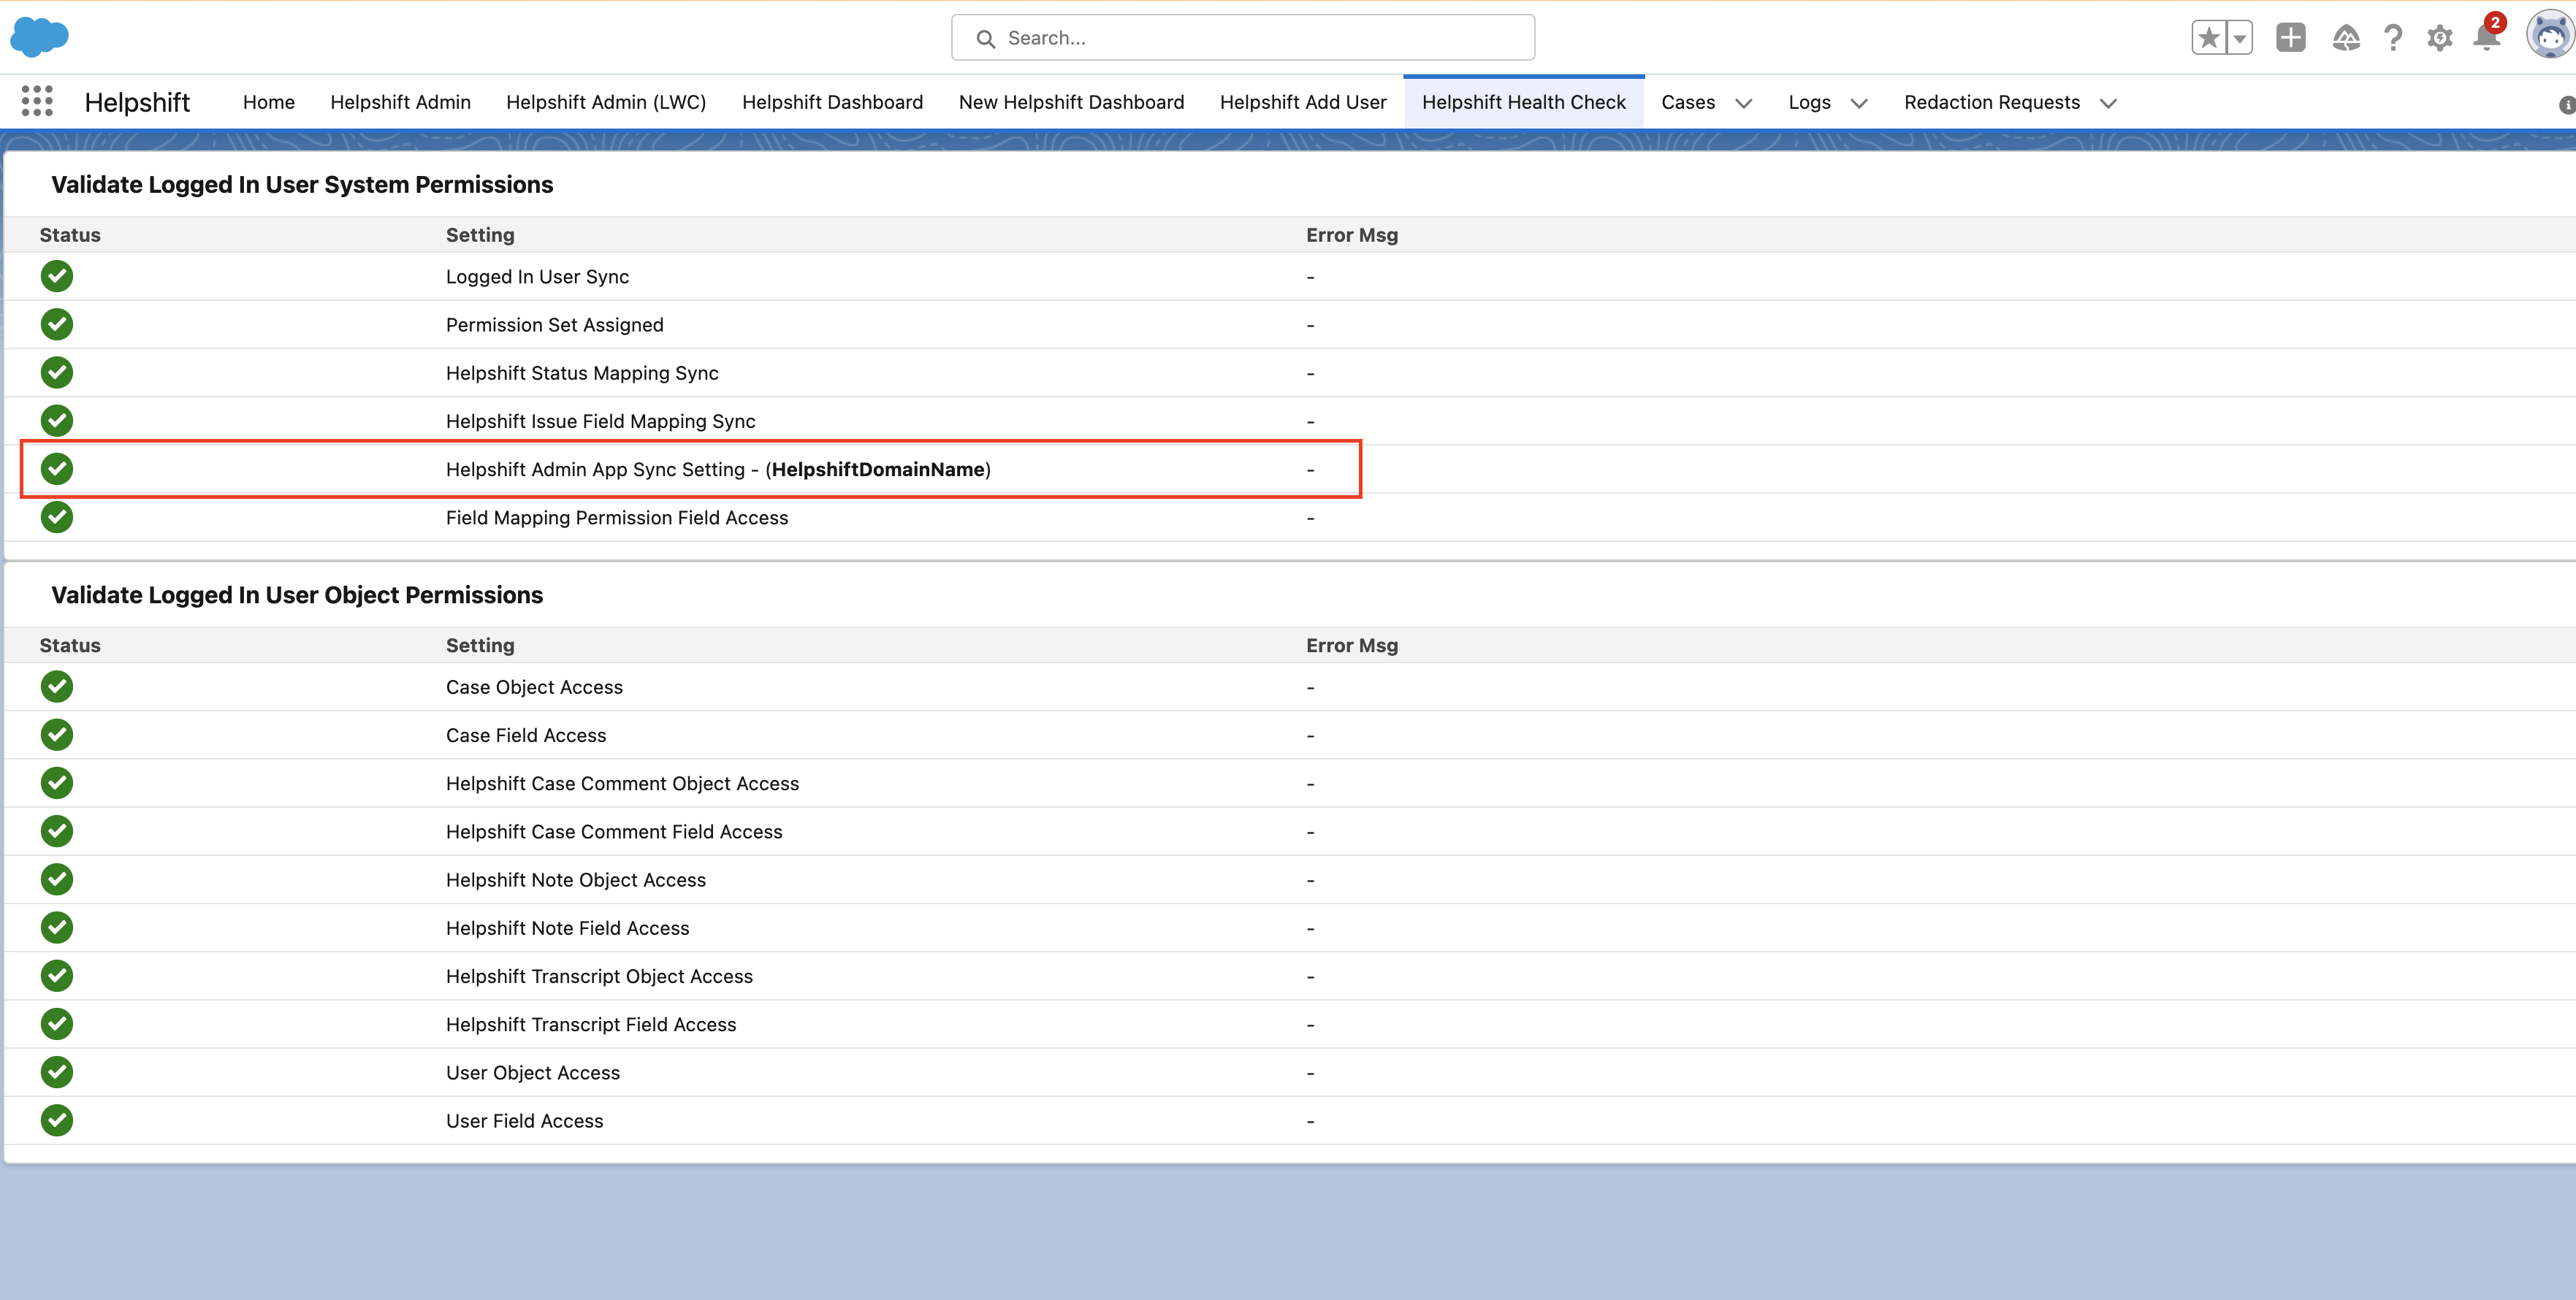
- Added Helpshift domain name on the Health Check Page
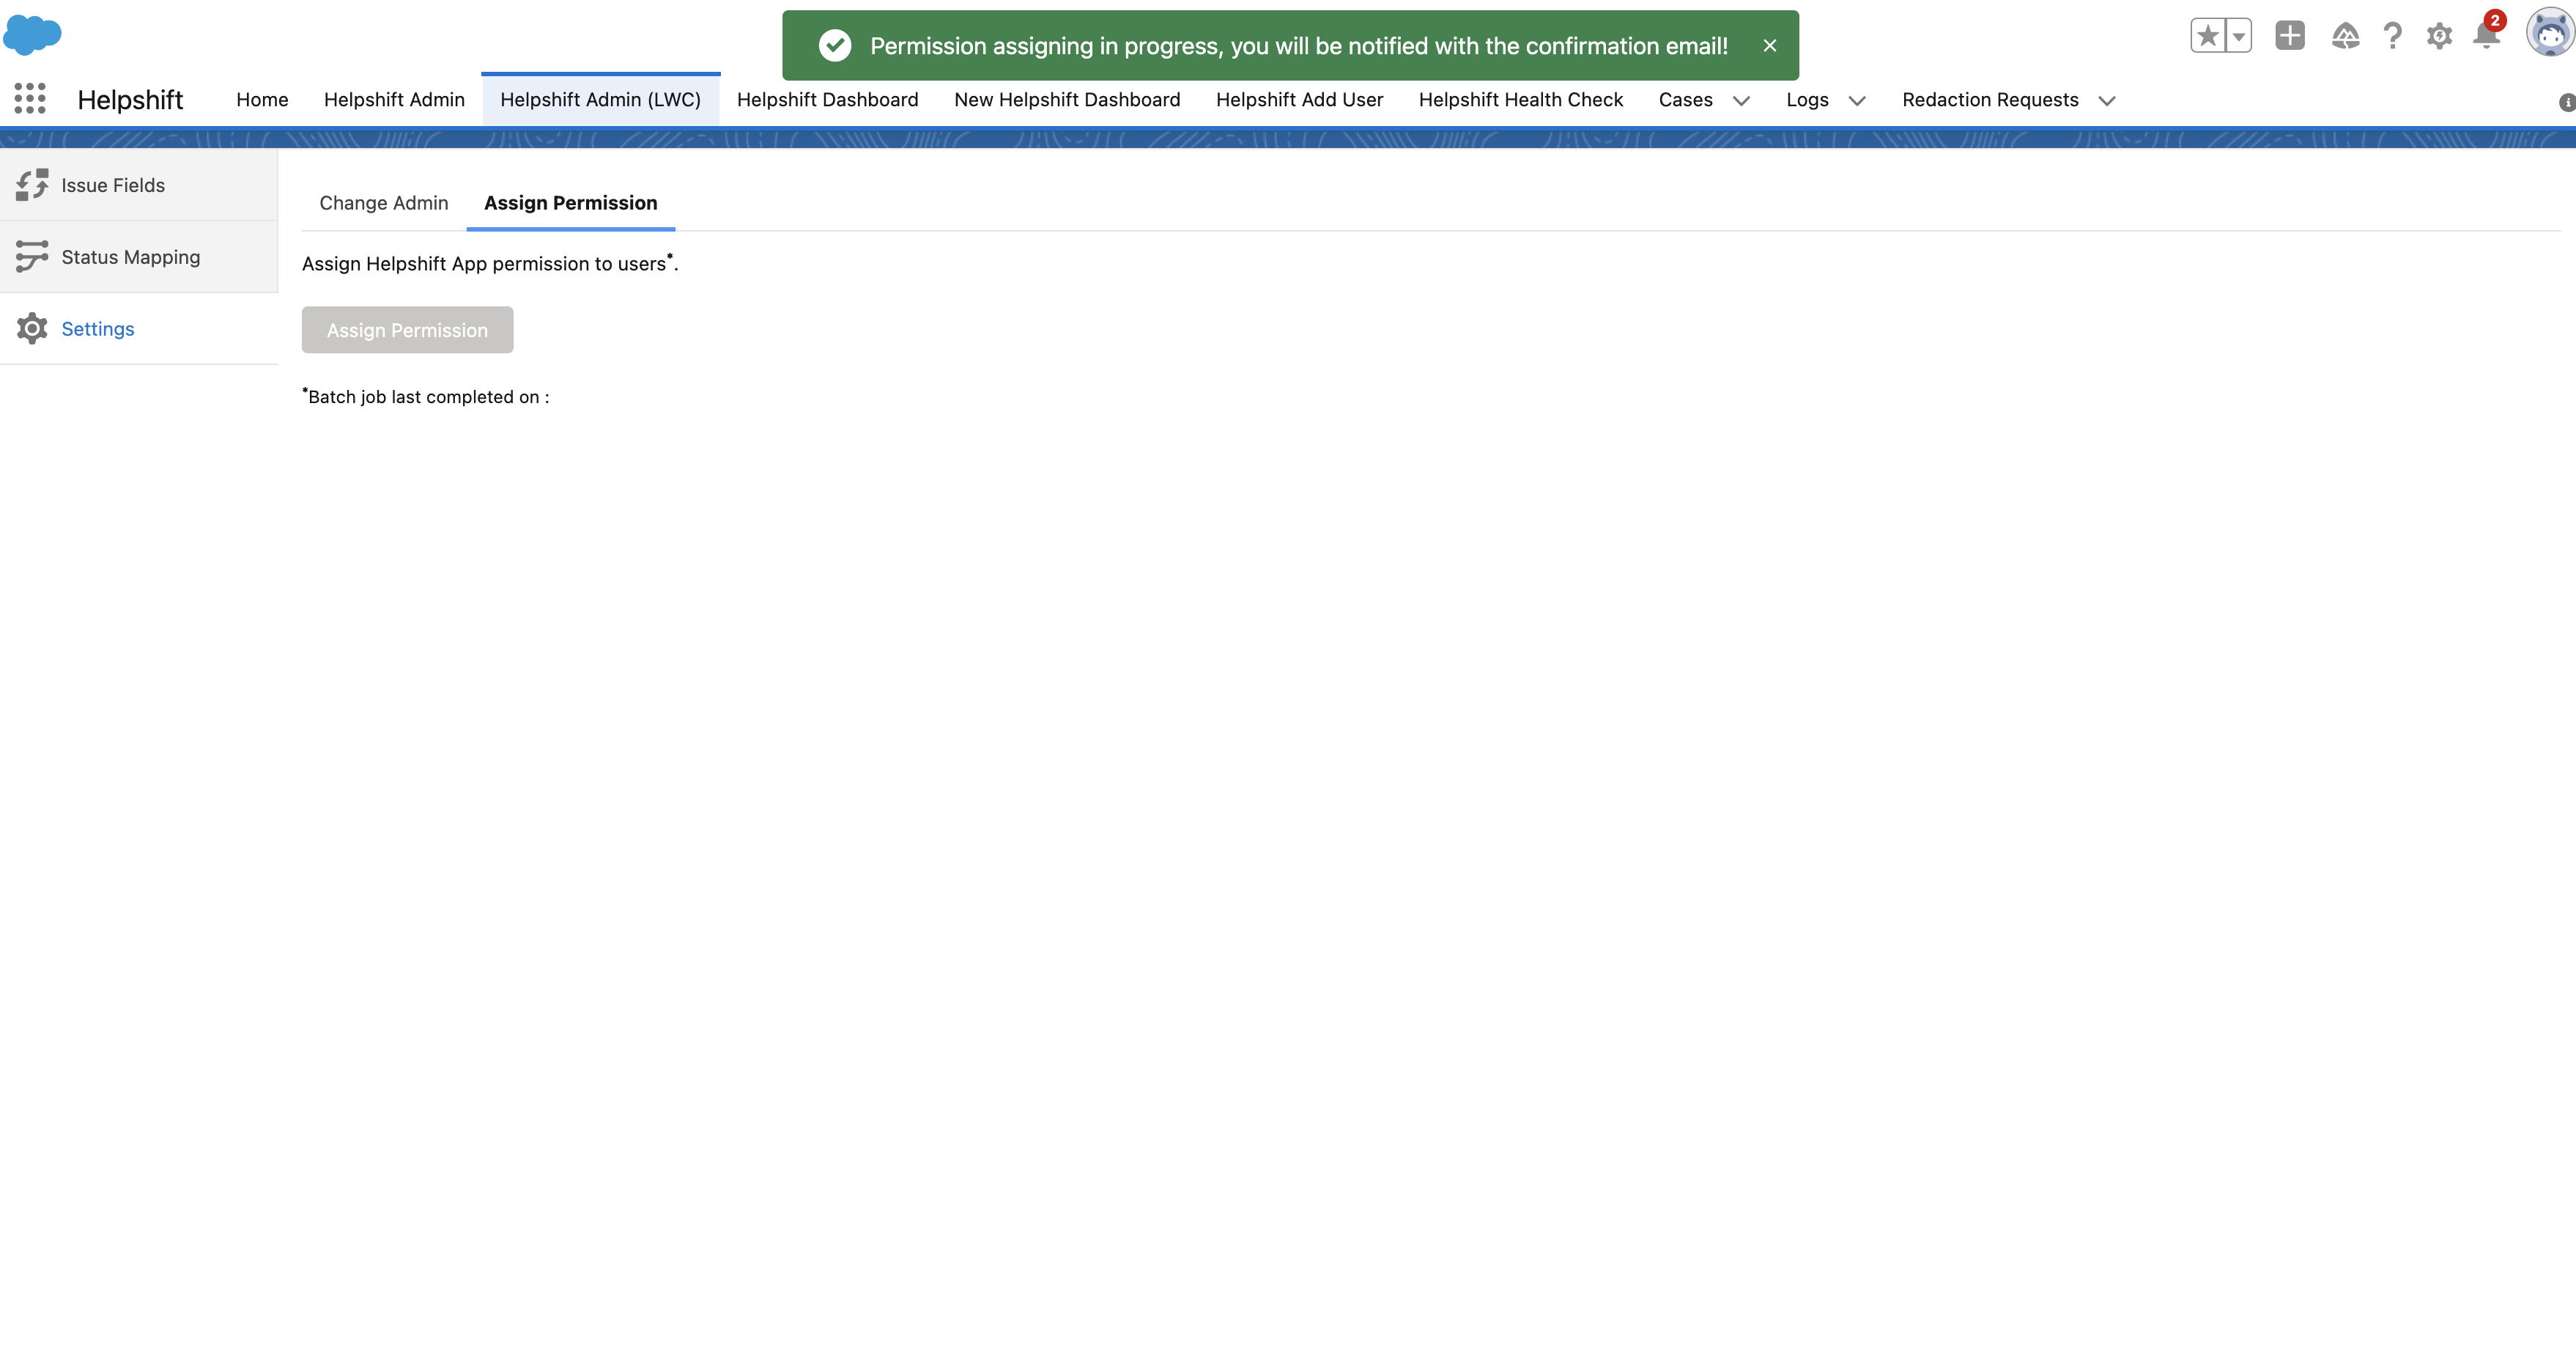
- On click of the Assign Permission button, you will be notified via email after the job completion
