SDK Configuration
Helpshift provides several config options which can be used to customize behaviour of the SDK. Use these options in conjunction with our Helpshift APIs.
All the public APIs in the SDK should be called after initializing the SDK via Helpshift.install() API
Enable Logging
Upon setting enableLogging to true, Helpshift SDK logs will be generated in the Android logcat. These logs can be useful for debugging the SDK during integration. Turning on logging can help the developer resolve common integration issues.
| Option: | enableLogging |
| Values: | true / false |
| Default: | false |
| Min SDK | v10.0.0 |
| Supported by: | install() |
- From 10.4.0,
- Error Logs will always get logged regardless of
enableLoggingconfig. - Debug logs are now based solely on the enableLogging flag, irrespective of whether the app is in debug or release variant.
- Error Logs will always get logged regardless of
Example:
    public class MainApplication extends Application {

      @Override
      public void onCreate() {
        super.onCreate();

        Map<String, Object> configurations = new HashMap<>();
        configurations.put("enableLogging",  true);

        // Install call
        Helpshift.install(this,
                          "<PLATFORM_ID>",
                          "<DOMAIN>",
                          configurations);
      }
    }
FAQ Filtering by tags
We have FAQ filtering capability by tags. With the goal of helping the end user see focused & related content e.g. basis the user demographic or device profiles, developers can now choose this capability for FAQ filtering and showing a focused FAQ list to the right audience.
Typical cases why you would want to use FAQ filtering are:
- You want to show specific FAQs for specific audience. E.g. if you may categorize the users as ‘beginner’, ‘intermediate’ or ‘expert’ based on your business logic.
- You may want to show specific FAQs based on the device. E.g. a set of FAQs for iPad vs. iPhone.
FAQ filtering is a 2 step approach :
- FAQs need to be classified using the
<issue tags>field on the dashboard e.g. tagsiphone&ipad.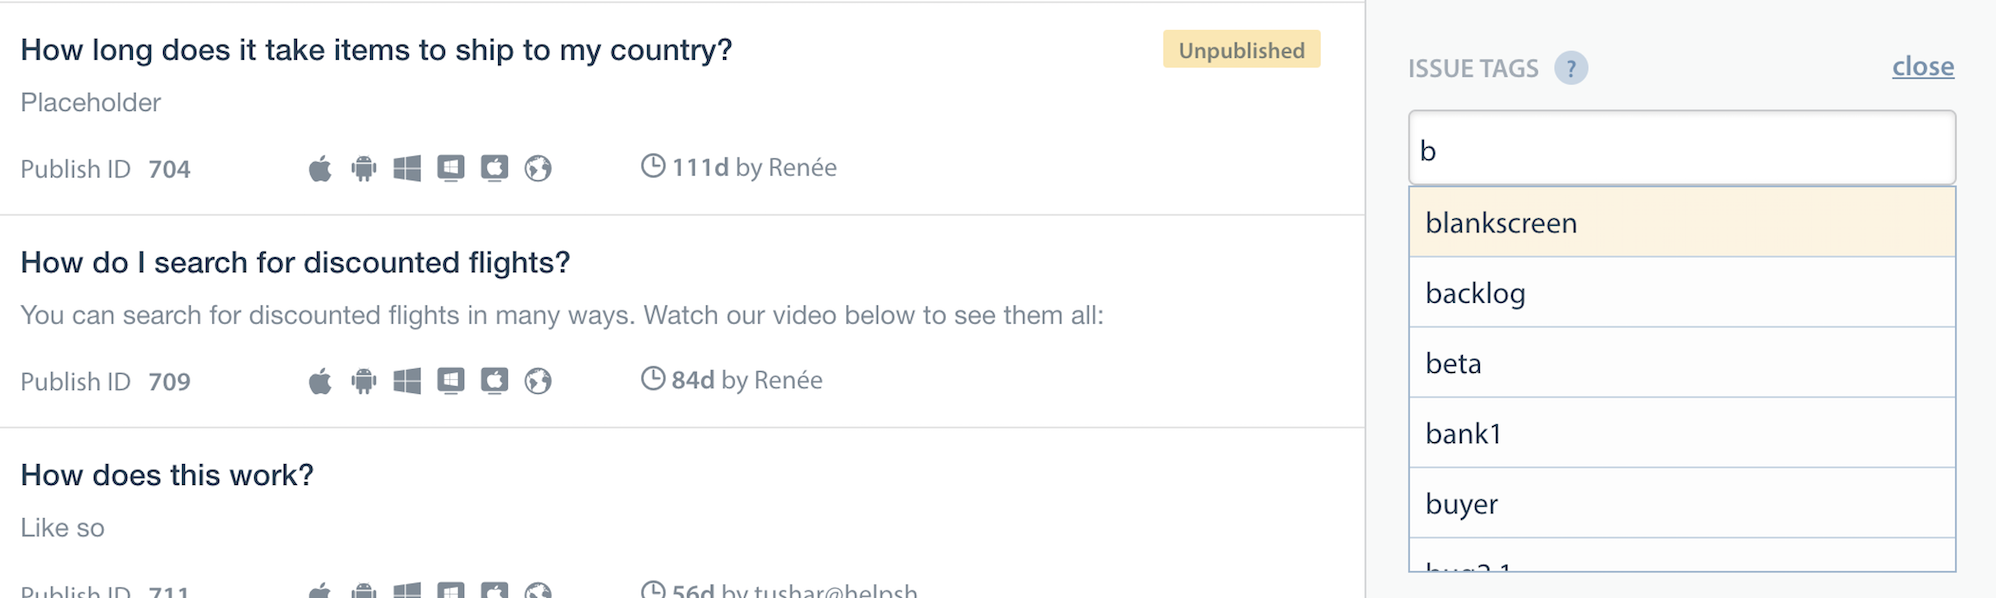
- Once the FAQs are tagged, they can be filtered at the SDK using the filter options described here.
Helpshift has 2 types of tags mainly ‘Issue Tags’ & ‘Search Tags’.
- Issue tags are used to filter the FAQ list on the SDK with the filter rules.
- Search tags (a.k.a Search Keywords) When performing in-app search, Helpshift SDK gives preference to these keywords. You can also use this to add alternative keywords that users might search for, but which may not exist in the FAQ title or the content.
How to use FAQ filtering
This will be a config option which will be supported by the showFAQs and showFAQSection APIs.
The filter option will be a map containing 2 keys
- operator : one of
AND,OR,NOTwhich will serve as conditional operators for the given tags. - tags : the actual tags in the query
The filter option should be added as an object against key “filter” in the map config that is taken by showFAQs, showFAQSection and showSingleFAQ APIs.
| Option: | filter |
| Sub-Options: | tags / operator |
| Default | null |
| Min SDK | v10.0.0 |
| Supported by | showFAQs, showFAQSection, showSingleFAQ |
Example:
 Map<String, Object> config = new HashMap<>();

 // .. other configs

 Map<String, Object> filter = new HashMap<>();
 filter.put("tags", new String[]{"tag1", "tag2"});
 filter.put("operator", "AND");

 config.put("filter", filter);

 Helpshift.showFAQs(MainActivity.this, config);
You can have only one tag filter config which will be respected on showFAQs, showFAQSection and showSingleFAQ. Also the tag filtering respects only one operator.
Enable Contact Us
Controls the visibility of the Helpshift Contact Us button when a user is viewing FAQs. You can customize this option to make it easier or more difficult to contact support. If specified, this configuration takes precedence over the value of Enable Contact Us set on admin dashboard.
| Option | enableContactUs |
| Values | "ALWAYS" / "AFTER_VIEWING_FAQS" / "AFTER_MARKING_ANSWER_UNHELPFUL" / "NEVER" |
| Default | null |
| Min SDK | v10.0.0 |
| Supported by | showFAQs, showFAQSection, showSingleFAQ |
Example:
 Map<String, Object> config = new HashMap<>();
 // .. other configs
 config.put("enableContactUs", "AFTER_VIEWING_FAQS");
 Helpshift.showFAQs(MainActivity.this, config);
Best Practices
- Provide tier-based support by setting enableContactUs to
ALWAYSfor paid users andAFTER_VIEWING_FAQSfor unpaid ones. - Provide country based support by setting enableContactUs to
ALWAYSfor local users andAFTER_VIEWING_FAQSfor foreign ones. Example Code:
TelephonyManager tm = (TelephonyManager) context.getSystemServic(Context.TELEPHONY_SERVICE);
String country = tm.getSimCountryIso();
String value = "AFTER_VIEWING_FAQS";
if("<LOCAL_COUNTRY_CODE>".equals(country)) {
  value = "ALWAYs";
}
HashMap config = new HashMap();
config.put("enableContactUs", value);
Helpshift.showFAQs(MyActivity.this, config);
Full privacy
Full privacy option helps ensure COPPA compliance by:
- Disabling user-initiated screenshots (users will not be able to attach files, including images, using SDK).
- Making sure that Personally Identifiable Information (PII) such as name and email are not collected by SDK (using Identity Bot and/or the helpshiftConfig object). This means that if you set
userNameanduserEmail, and withfullPrivacyset totrue, Helpshift will not use theuserNameanduserEmailvalues. - Not collecting any of the following personal information:
- Mobile country code, mobile network code and carrier name.
- Custom meta-data that is labeled "private-data".
Moreover, in scenarios where the user attaches objectionable content, it becomes a huge COPPA compliance concern. This option helps to solve this problem.
| Option | fullPrivacy |
| Values | true / false |
| Default | false |
| Min SDK | v10.0.0 |
| Supported by | showConversation, showFAQs |
Example:
Map<String, Object> config = new HashMap<>();
// .. other configs
config.put("fullPrivacy", true);
Helpshift.showConversation(MainActivity.this, config);
Best Practices
In your registration process, ask your user for their age. If the user's age is 13 or younger, set fullPrivacy to YES. This way, you comply with COPPA for your under-age users, but collect valuable user and device data for your other users.
Enable In-App Notifications
If you do not want the in-app notification for conversation messages support provided by the Helpshift SDK, you can set the flag to false.
On setting this flag to false, the SDK will stop showing notifications, for the messages sent from Dashboard on issues, in the notification tray of the device but it will fetch messages in background.
The default value of this flag is true i.e., the in-app notifications will be enabled.
| Option: | enableInAppNotification |
| Values: | true / false |
| Default: | true |
| Min SDK | v10.0.0 |
| Supported by: | install() |
Example:
public class MainApplication extends Application {
  @Override
  public void onCreate() {
    super.onCreate();
    Map<String, Object> configurations = new HashMap<>();
    configurations.put("enableInAppNotification", false);
    // Install call
    Helpshift.install(this,
                      "<PLATFORM_ID>",
                      "<DOMAIN>",
                      configurations);
  }
}
Initiate new conversation on chat screen load
In config map of Helpshift.showConversation(this, config); API, setting the initiateChatOnLoad option to true will start a new conversation if the previous issue is resolved, without the end user clicking the New Conversation button or going through the post resolution flows like feedback bots of the previous issue.
Example:
Map<String, Object> config = new HashMap<>();
// .. other configs
config.put("initiateChatOnLoad", true);
Helpshift.showConversation(MainActivity.this, config);
Conversation prefill text
Setting conversationPrefillText in the config allows you to set some text in the user's input box. This text will be inserted provided that:
- There is no ongoing (active) issue for the user.
- Text inputs are enabled for new conversations (e.g. the User Reply Input Type is not "Only Intent Menu").
The end-user can edit this text before sending it. There is a limit of 1,000 characters for this configuration value, so only the first 1,000 characters will be kept in the user input.
We recommend keeping your actual text even shorter for a better user experience, since the user has to read and edit it before sending it.
Example:
Map<String, Object> config = new HashMap<>();
// .. other configs
config.put("conversationPrefillText", "INSERT YOUR PREFILL TEXT");
Helpshift.showConversation(MainActivity.this, config);
Conversation Initial User Message
Initial user message configuration, initialUserMessage, helps you send the first message in a conversation on behalf of the user so that certain workflows are automatically triggered based on that message.
You should set this configuration before a conversation starts. In other words, it works only when there is no active conversation for the user i.e. when a new user opens the chat screen for the first time or existing user has already closed an ongoing conversation.
If you set this configuration in the middle of an existing conversation, it will not have any effect.
Example:
Map<String, Object> config = new HashMap<>();
// .. other configs
config.put("initialUserMessage", "INSERT YOUR INITIAL USER MESSAGE");
Helpshift.showConversation(MainActivity.this, config);
Clearing Initial User Message
If the end user starts a new conversation immediately in the same session,
then, by default, the initial user message is applied to all subsequent issues in the same session.
You can change this behaviour by setting the initialUserMessage key in subsequentIssuesInSameSessionConfig
to an appropriate value.
You can set the initial user message to an empty string, which will clear it and allow the end-user to type a message for their subsequent issues. Alternatively, you can also supply a non-empty string which will be used for all subsequent issues in the same session.
We recommend setting this value to an empty string unless you want to run specific automation flows for subsequent issues in the same session.
Currently, only the initial user message can be reset. Tags, Custom Issue Fields, and Conversation Prefill Text values stay the same for subsequent issues in the same session.
Example:
Map<String, Object> subsequentIssuesInSameSessionConfig = new HashMap<>();
subsequentIssuesInSameSessionConfig.put("initialUserMessage", "");

Map<String, Object> config = new HashMap<>();

// This is used for the first issue in the session
config.put("initialUserMessage", "INSERT YOUR INITIAL USER MESSAGE");

// This will be used for all subsequent issues in that session
config.put("subsequentIssuesInSameSessionConfig", subsequentIssuesInSameSessionConfig);

Helpshift.showConversation(MainActivity.this, config);
For outbound support scenarios make sure to add this config in the user specific config callback
getAPIConfig you get when you register Helpshift.setHelpshiftProactiveConfigCollector().
public class MainActivity extends AppCompatActivity implements HelpshiftProactiveAPIConfigCollector{
  @Override
  public void onCreate() {
    super.onCreate();
    //...

    // initialise proactiveConfig collector
    Helpshift.setHelpshiftProactiveConfigCollector(this);

    //...
  }

  //...

  @Override
  public Map<String, Object> getAPIConfig() {

    // config map
    Map<String, Object> localConfig = new HashMap<>();
    Map<String, Object> subsequentIssuesInSameSessionConfig = new HashMap<>();

    // ....
    // user specific config

    // This is used for the first issue in the session
    localConfig.put("initialUserMessage", "INSERT YOUR INITIAL USER MESSAGE");
    // This will be used for all subsequent issues in that session
    subsequentIssuesInSameSessionConfig.put("initialUserMessage", "");
    localConfig.put("subsequentIssuesInSameSessionConfig", subsequentIssuesInSameSessionConfig);

    return localConfig;
  }
}
Screen Orientation
The screen orientation of Helpshift SDK screens can be fixed by setting the screenOrientation to constants available in the ActivityInfo class.
For example, you may want to fix the orientation to ActivityInfo.SCREEN_ORIENTATION_PORTRAIT for mobile users and ActivityInfo.SCREEN_ORIENTATION_LANDSCAPE for tablet users.
| Flag | screenOrientation |
| values | integer values for orientation from ActivityInfo class |
| default | ActivityInfo.SCREEN_ORIENTATION_UNSPECIFIED |
Example:
public class MainApplication extends Application {
  @Override
  public void onCreate() {
    super.onCreate();
    Map<String, Object> configurations = new HashMap<>();
    configurations.put("screenOrientation", ActivityInfo.SCREEN_ORIENTATION_PORTRAIT);
    // Install call
    Helpshift.install(this,
                      "<PLATFORM_ID>",
                      "<DOMAIN>",
                      configurations);
  }
}
Notification Icon
By default the application icon is used as the notification icon. You can customize the notification icon using the config in the install call.
Example:
public class MainApplication extends Application {
  @Override
  public void onCreate() {
    super.onCreate();
    Map<String, Object> configurations = new HashMap<>();
    configurations.put("notificationIcon", R.drawable.notification_icon);
    // Install call
    Helpshift.install(this,
                      "<PLATFORM_ID>",
                      "<DOMAIN>",
                      configurations);
  }
}
Large Notification Icon
By default the application icon is used as the notification icon.
If you want to specify the large notification icon also to show up in the notification tray, you can specify that using the config in the install call.
Example:
public class MainApplication extends Application {  @Override
  public void onCreate() {
    super.onCreate();
    Map<String, Object> configurations = new HashMap<>();
    configurations.put("notificationLargeIcon", R.drawable.notification_large_icon);
    // Install call
    Helpshift.install(this,
                      "<PLATFORM_ID>",
                      "<DOMAIN>",
                      configurations);
  }
}
Notification Sound
By default the default device notification sound is used for helpshift notifications. You can customize the notification sound using the config in the install call.
Example:
public class MainApplication extends Application {
  @Override
  public void onCreate() {
    super.onCreate();
    Map<String, Object> configurations = new HashMap<>();
    configurations.put("notificationSoundId",  R.raw.notification_sound);
    // Install call
    Helpshift.install(this,
                      "<PLATFORM_ID>",
                      "<DOMAIN>",
                      configurations);
  }
}
Notification channels
Starting from Android Oreo, Helpshift notifications will create a default channel named In-app Support. If you want to customize the name and description for the default channel, you can do so by using the config in the install call.
Example:
public class MainApplication extends Application {
  @Override
  public void onCreate() {
    super.onCreate();
    Map<String, Object> configurations = new HashMap<>();
    configurations.put("notificationChannelId",  "your channel name here");
    // Install call
    Helpshift.install(this,
                      "<PLATFORM_ID>",
                      "<DOMAIN>",
                      configurations);
  }
}
Theming the SDK
Please check the design page to apply your styles and theming to SDK.
Tracking
This config represents tracking the user actions. For more information check tracking.